Spring bulbs and flowering plants - adding blooms to your home in January
After the Christmas festivities and all the decorations are taken down, my home feels a little bare and dull after all the sparkle of Christmas! A lack of seasonal flowers means that I often buy spring bulbs and flowering plants from my local garden centre to add colour, beauty and scent to my home during the cold and dark month of January.

After the Christmas festivities and all the decorations are taken down, my home feels a little bare and dull after all the sparkle of Christmas! A lack of seasonal flowers means that I often buy spring bulbs and flowering plants from my local garden centre to add colour, beauty and scent to my home during the cold and dark month of January.
Some ideas to brighten up your home this January……
Repurposing your Christmas Wreath:
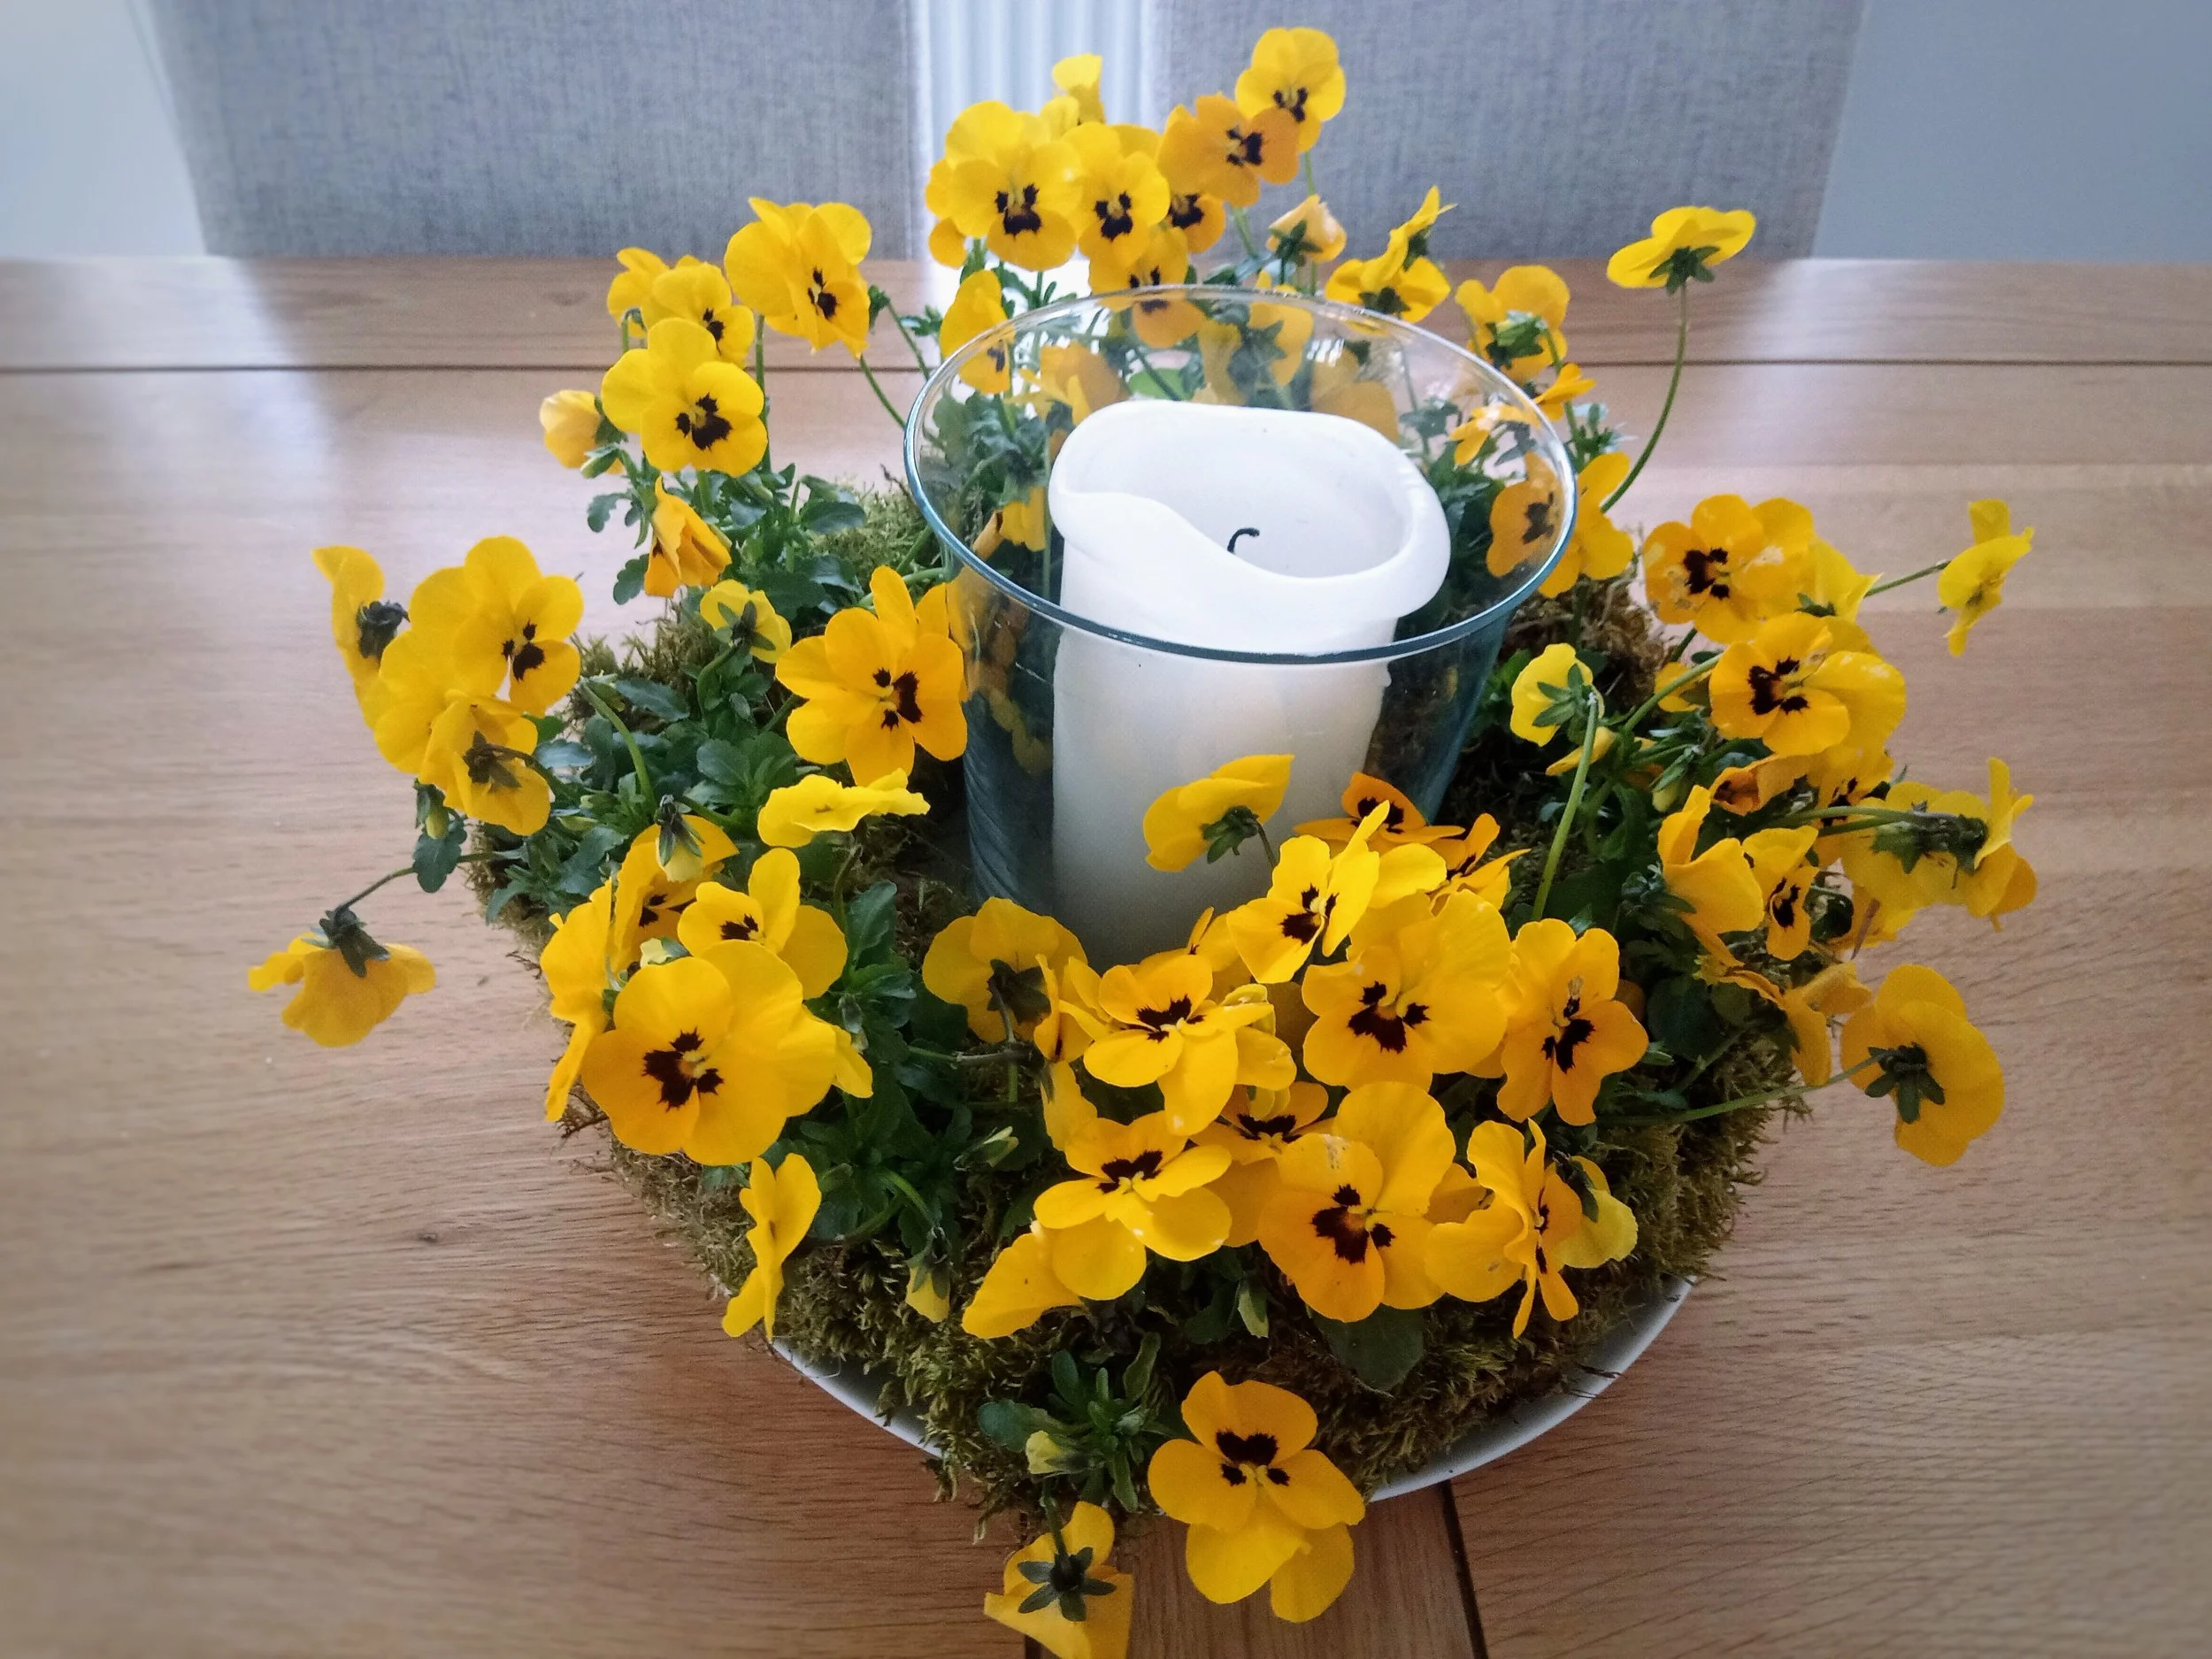
I made the table wreath in the image above by using the moss base of a wreath that I had made for Christmas.
Take off all the foliage and decorative pieces until all that is left is the moss base. Soak the moss base in the sink for about an hour. Purchase violas in pots from a local garden centre. After removing the violas from their pots, remove some of the soil. Add the violas to the moss wreath base with twine. Finally, attach additional moss with mossing pins to cover the twine and fills in any gaps.
As this is sitting on a wooden table, I added a large plate so that the moss doesn’t damage the table. Misting with water every few days is all that is required. If you feel the moss base is becoming too dry, you can place the wreath in a sink of water.
Spring bulbs:
This idea could not be simpler. Purchase some spring bulbs such as Grape Hyacinth bulbs (see image below). You can normally get these for a few pounds from your local garden centre. Remove them from their pots and add them straight to Luminarc jars (no additional soil is required). You can dot them down a kitchen table, put them on your bedside table, or add them to your coffee table. Luminarc jars are ideal for planting spring bulbs as they tend to be the same size as the pots that the bulbs are sold in. I love seeing the roots through the jars! You can also tie a ribbon around the neck of the jar to create a thoughtful and inexpensive gift for a relative, friend or loved one.

Grape Hyacinth bulbs in Luminarc Jars

Flowering Plants:
Adding a flowering winter plant to a contemporary pot is another way of adding beautiful blooms to your home during the winter months. What could be simpler!

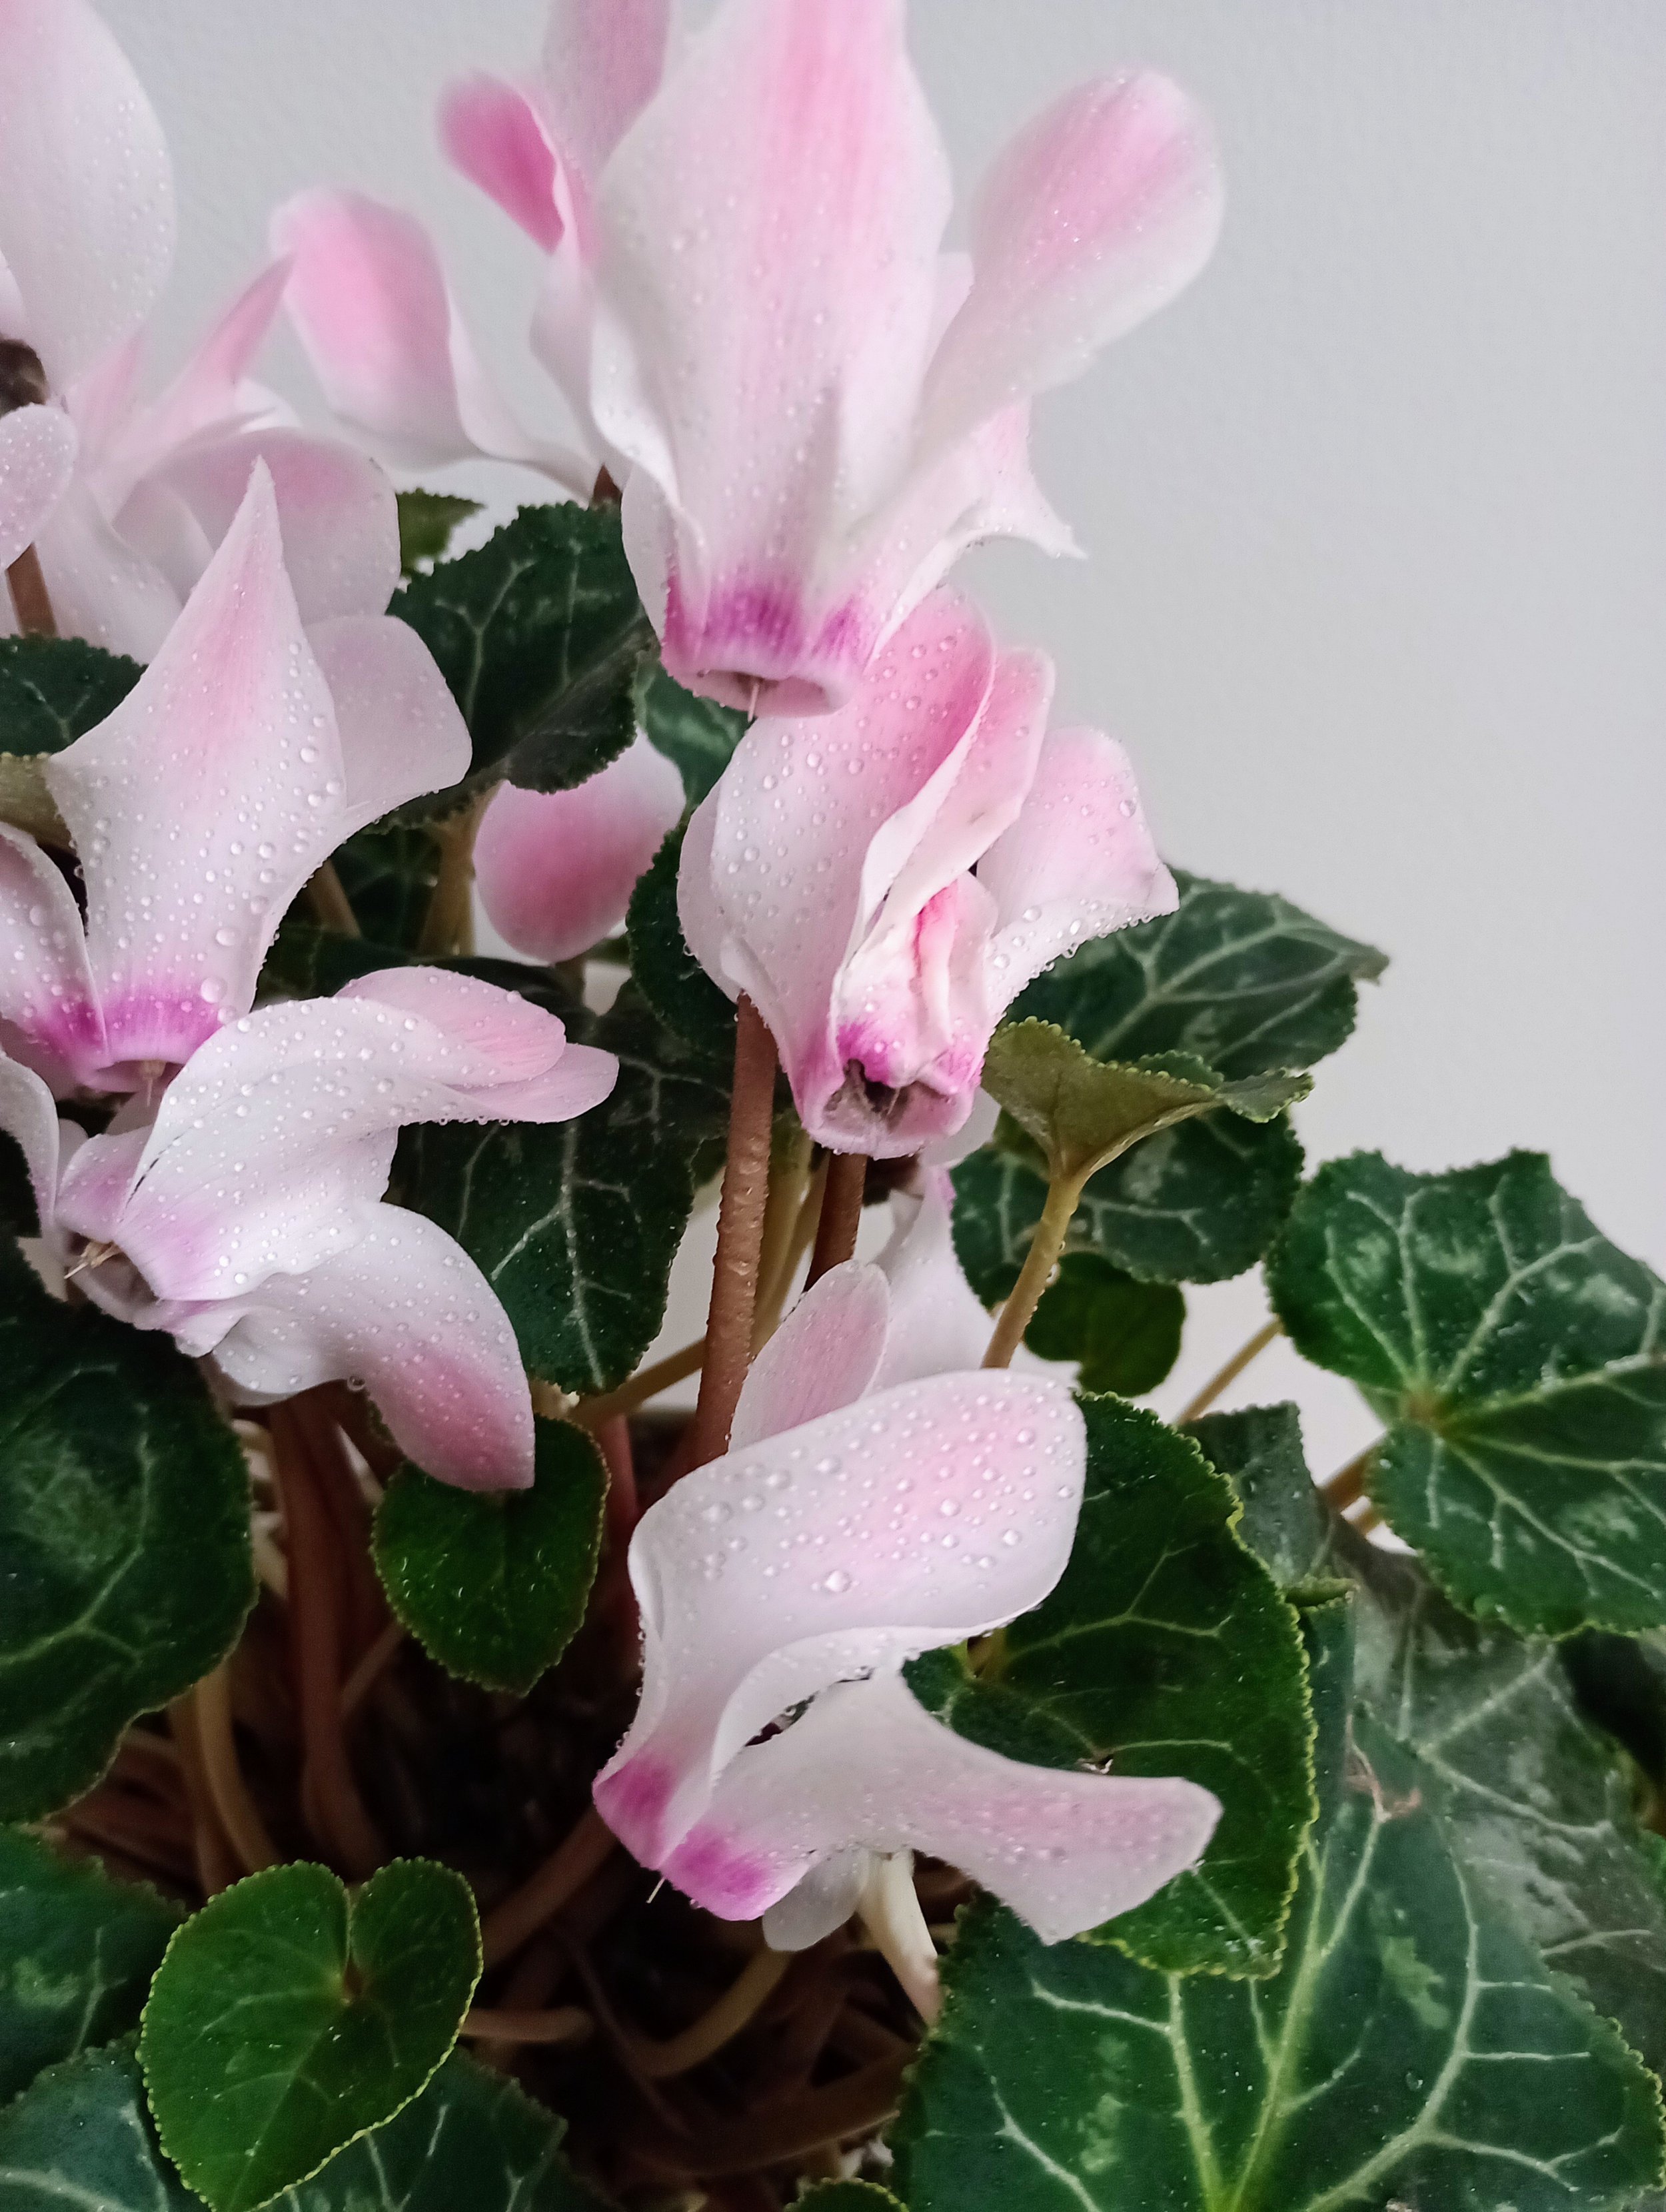
Cyclamen - pretty in pink - providing some beauty when nothing much else is flowering

A tablescape on a budget!
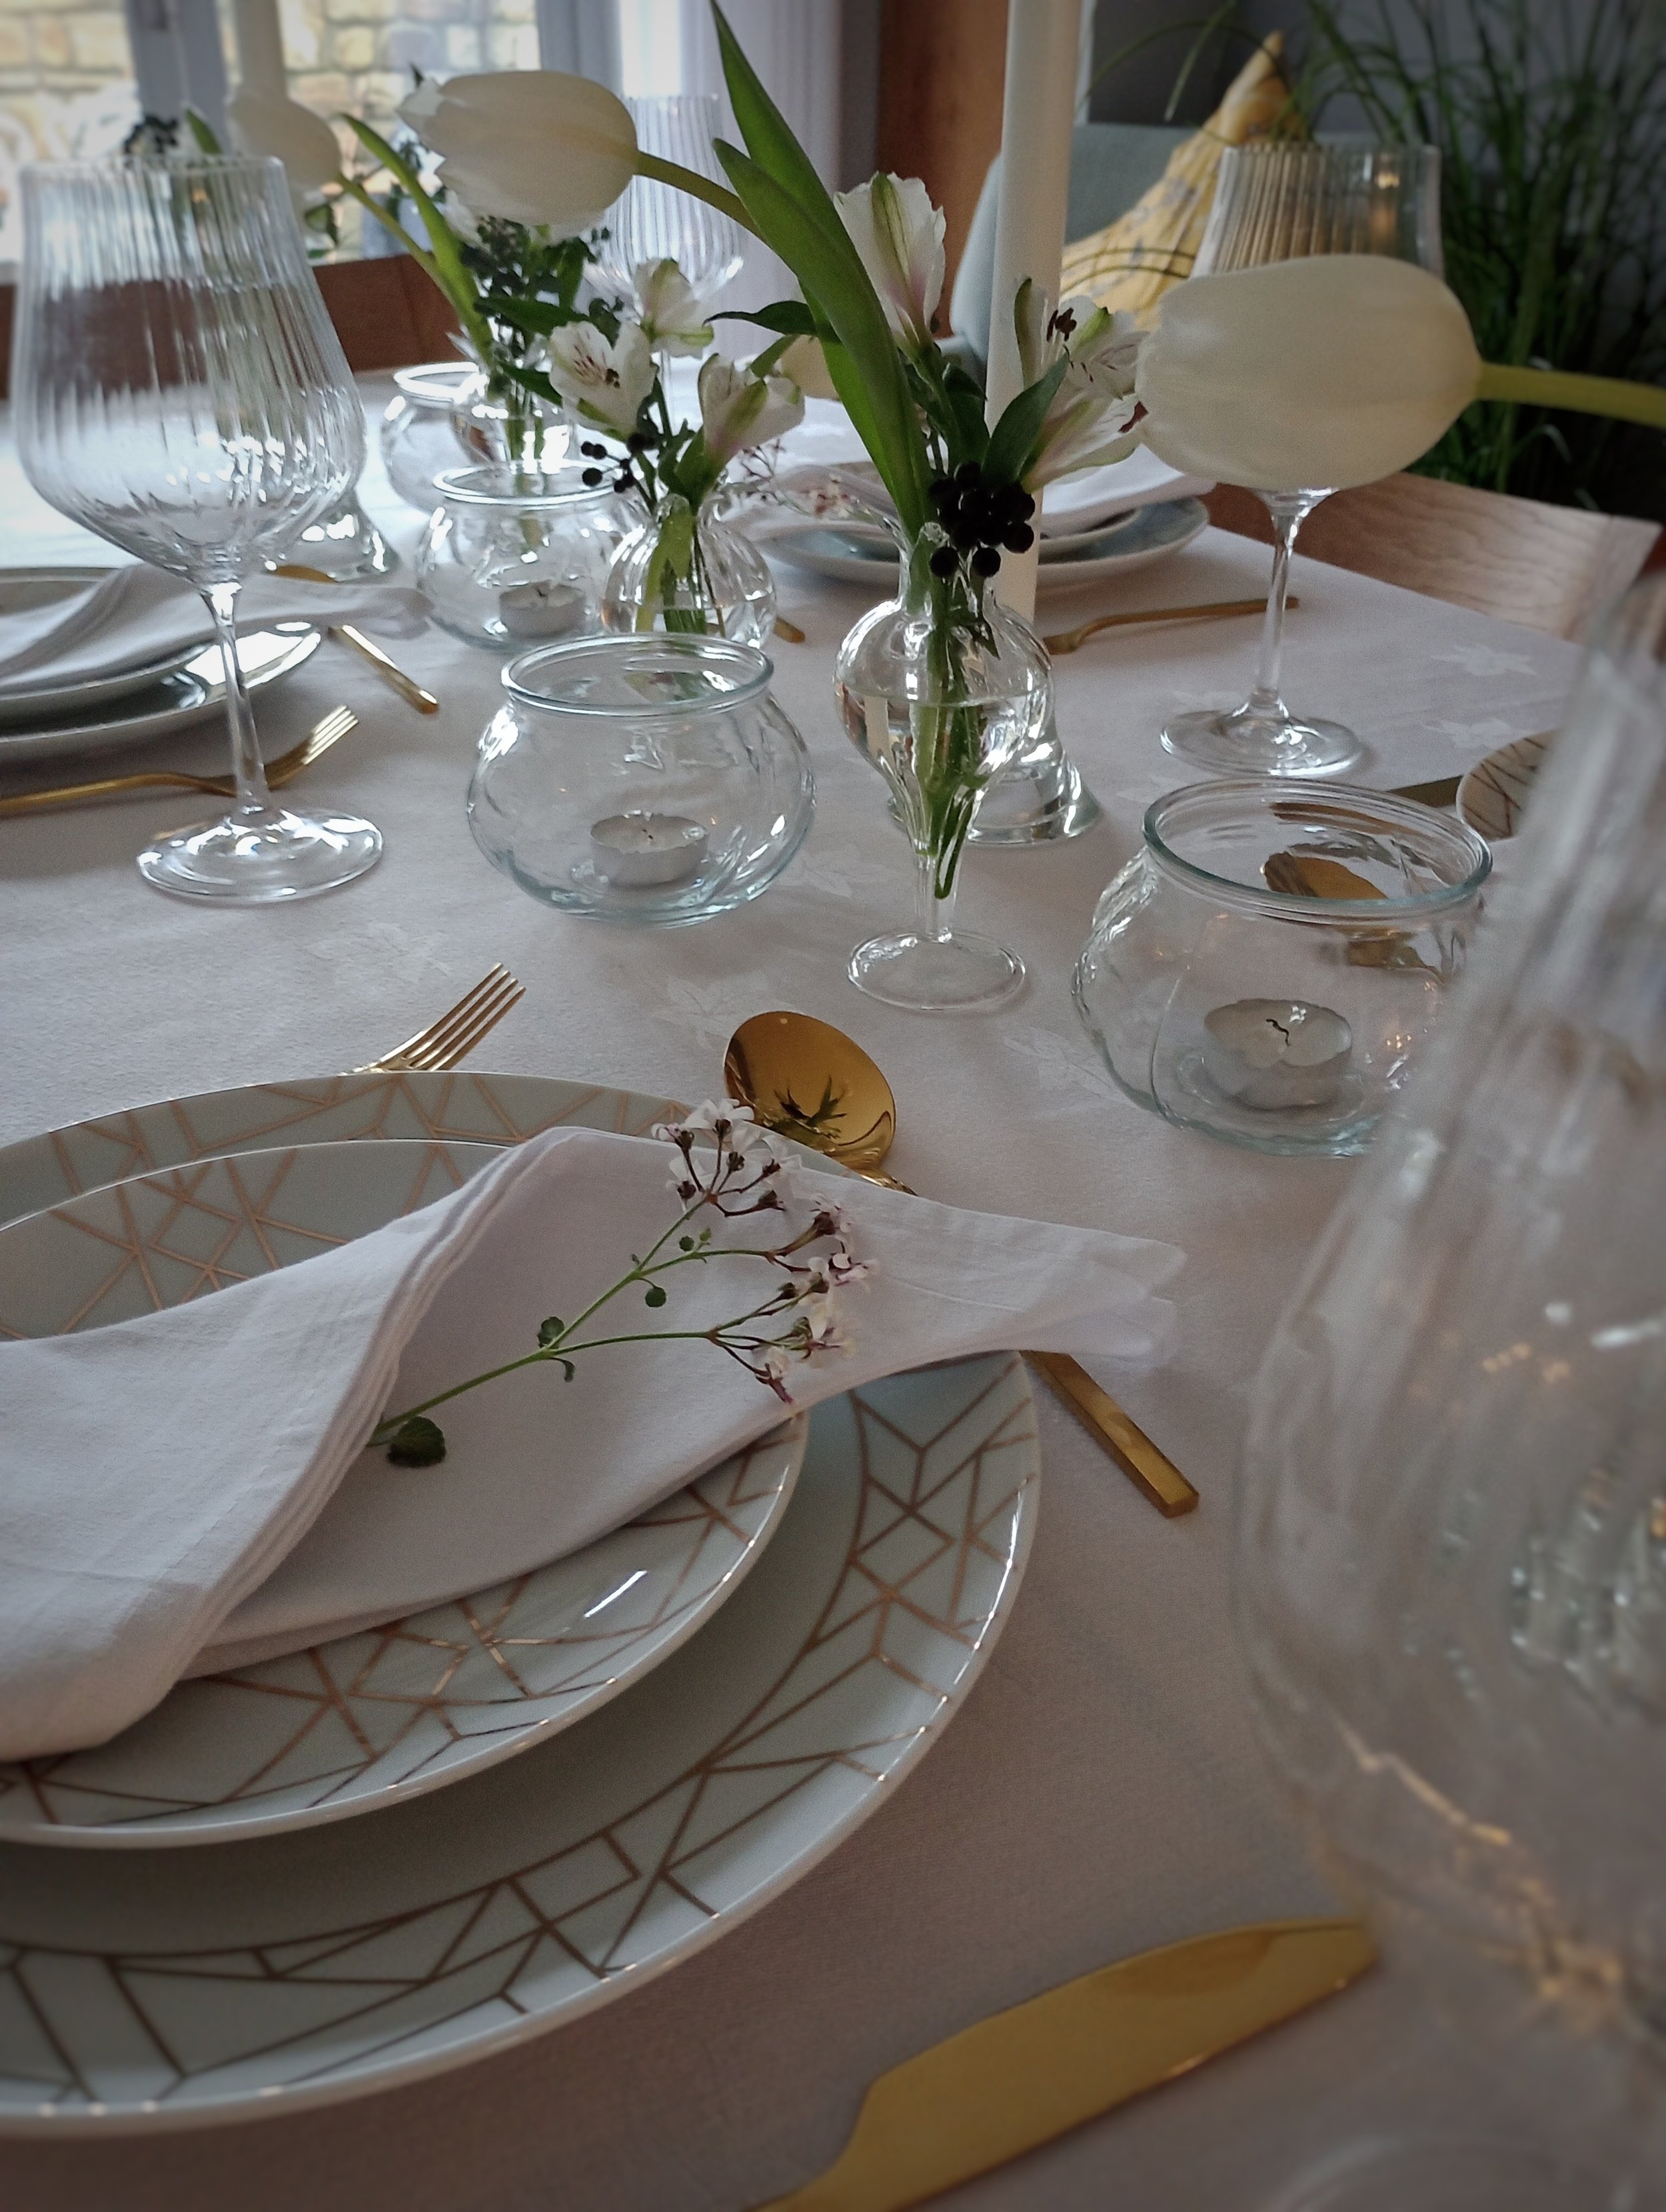
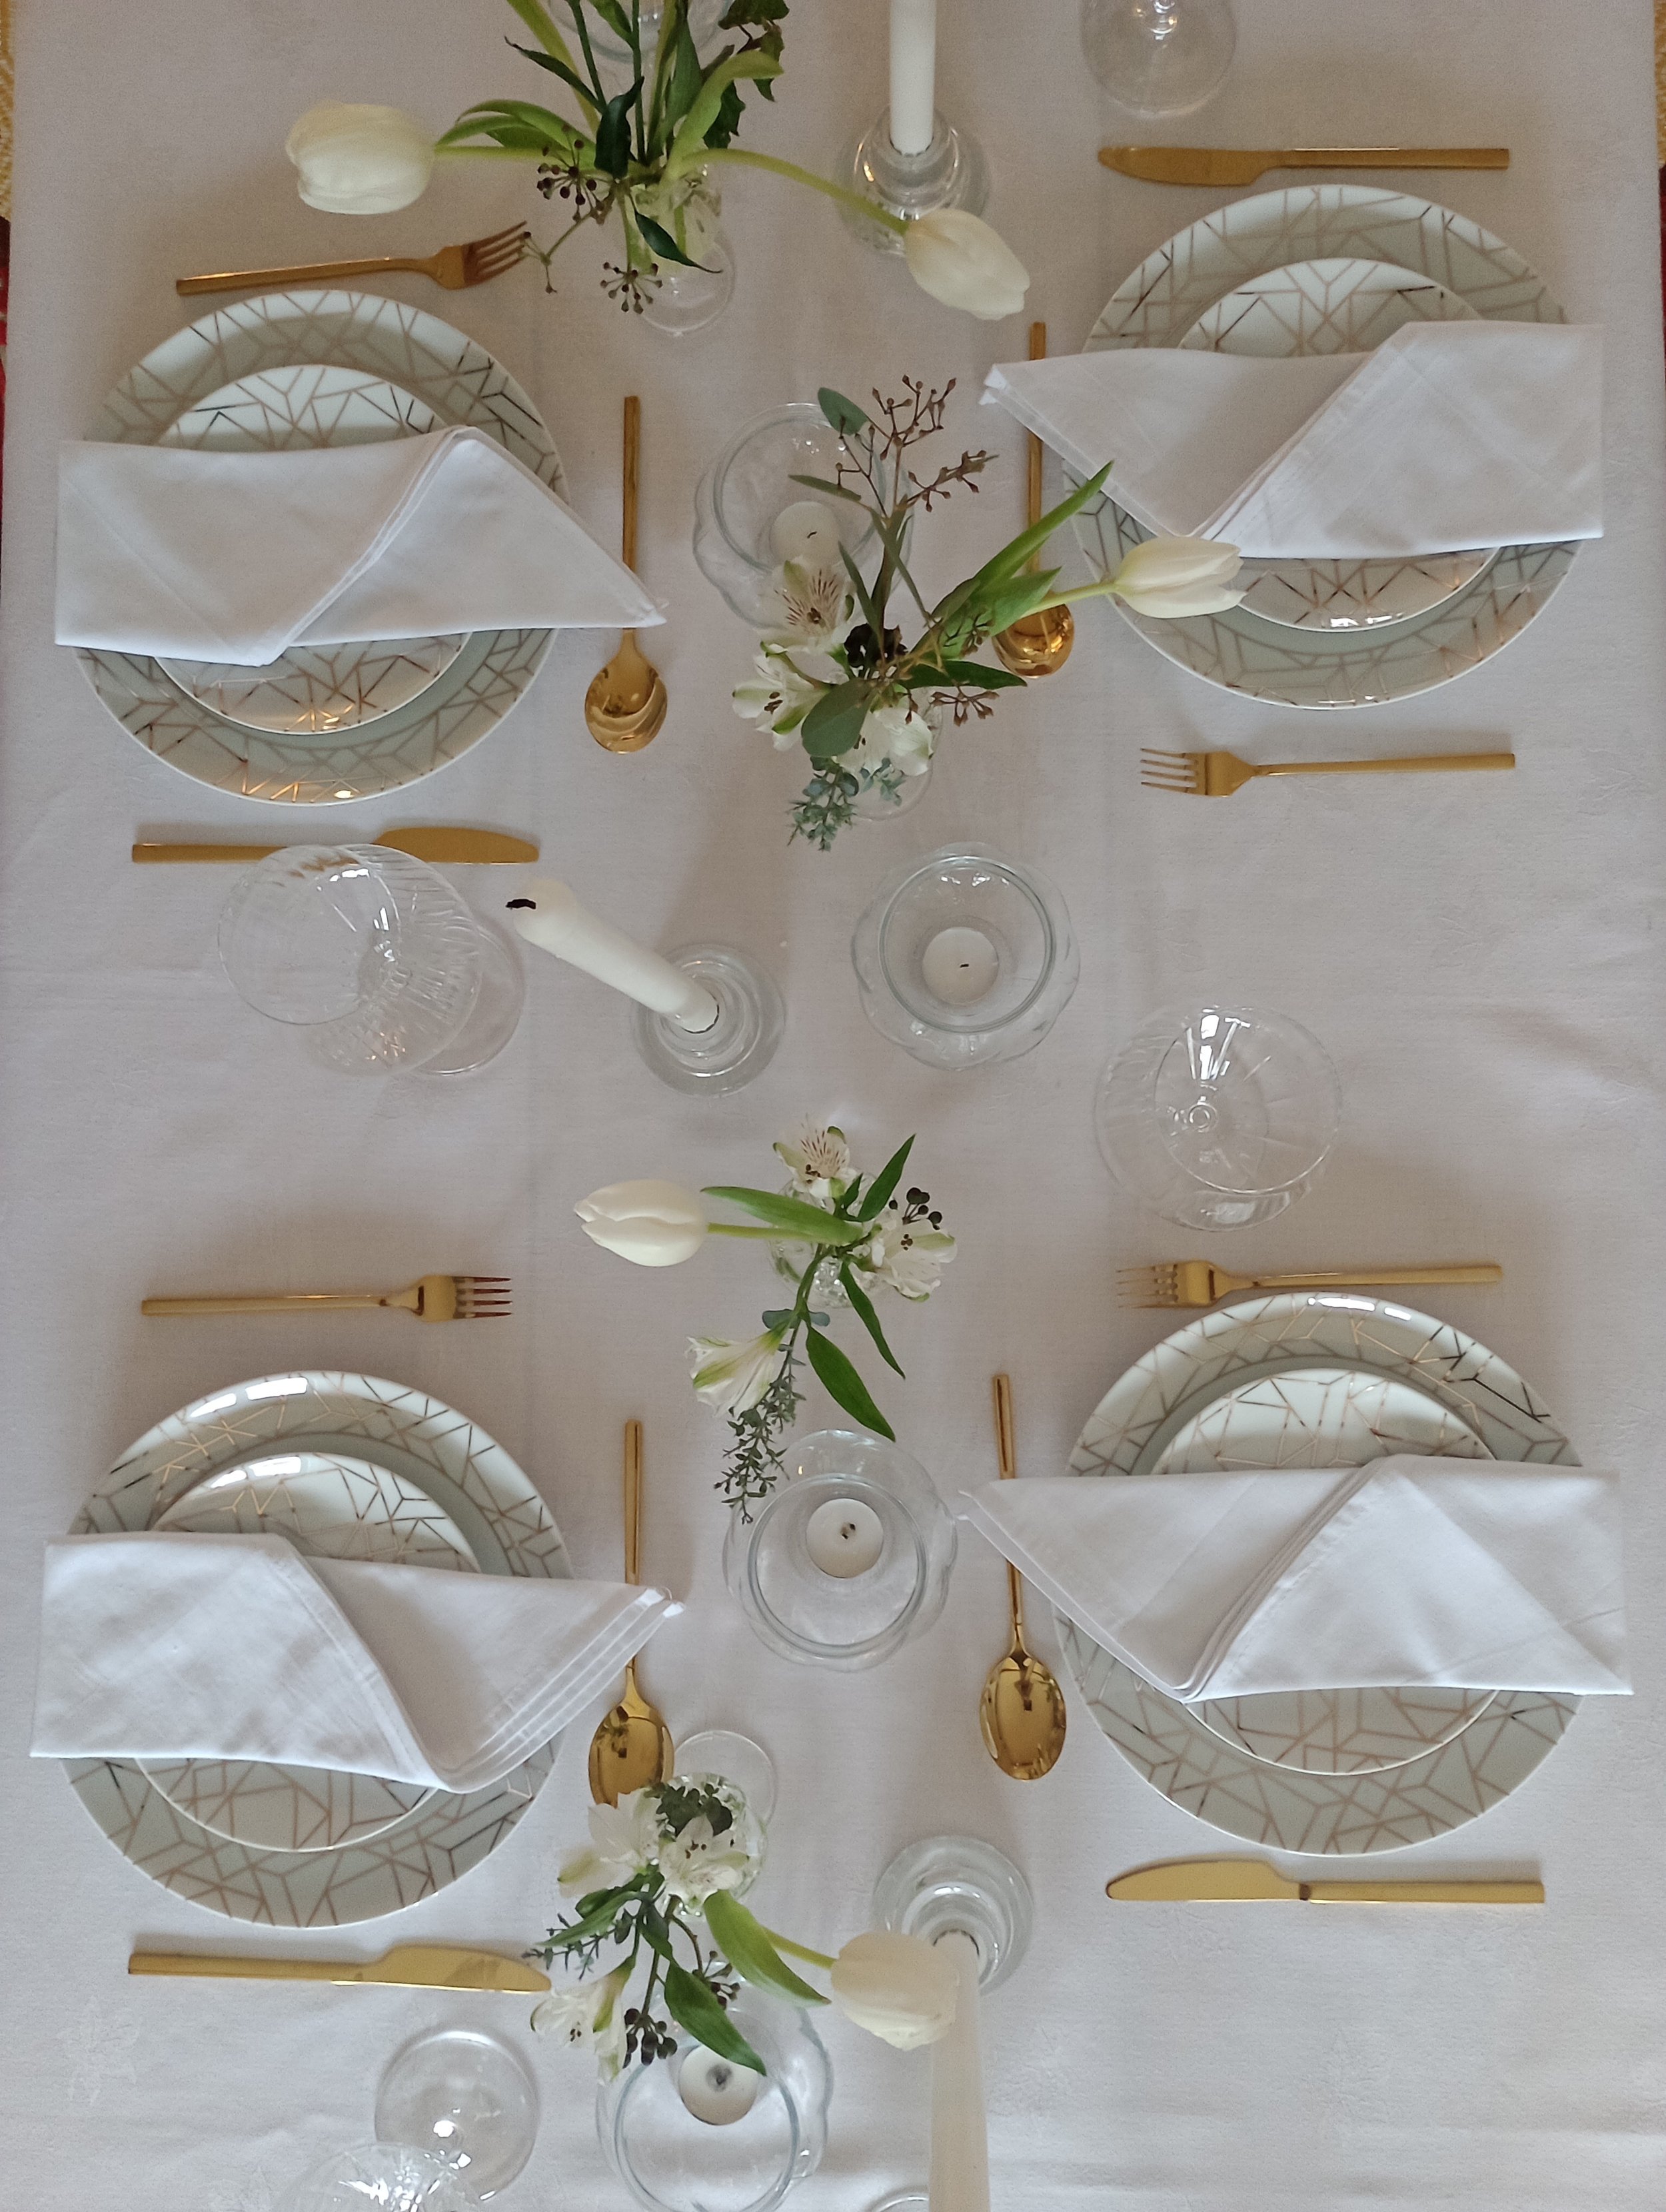
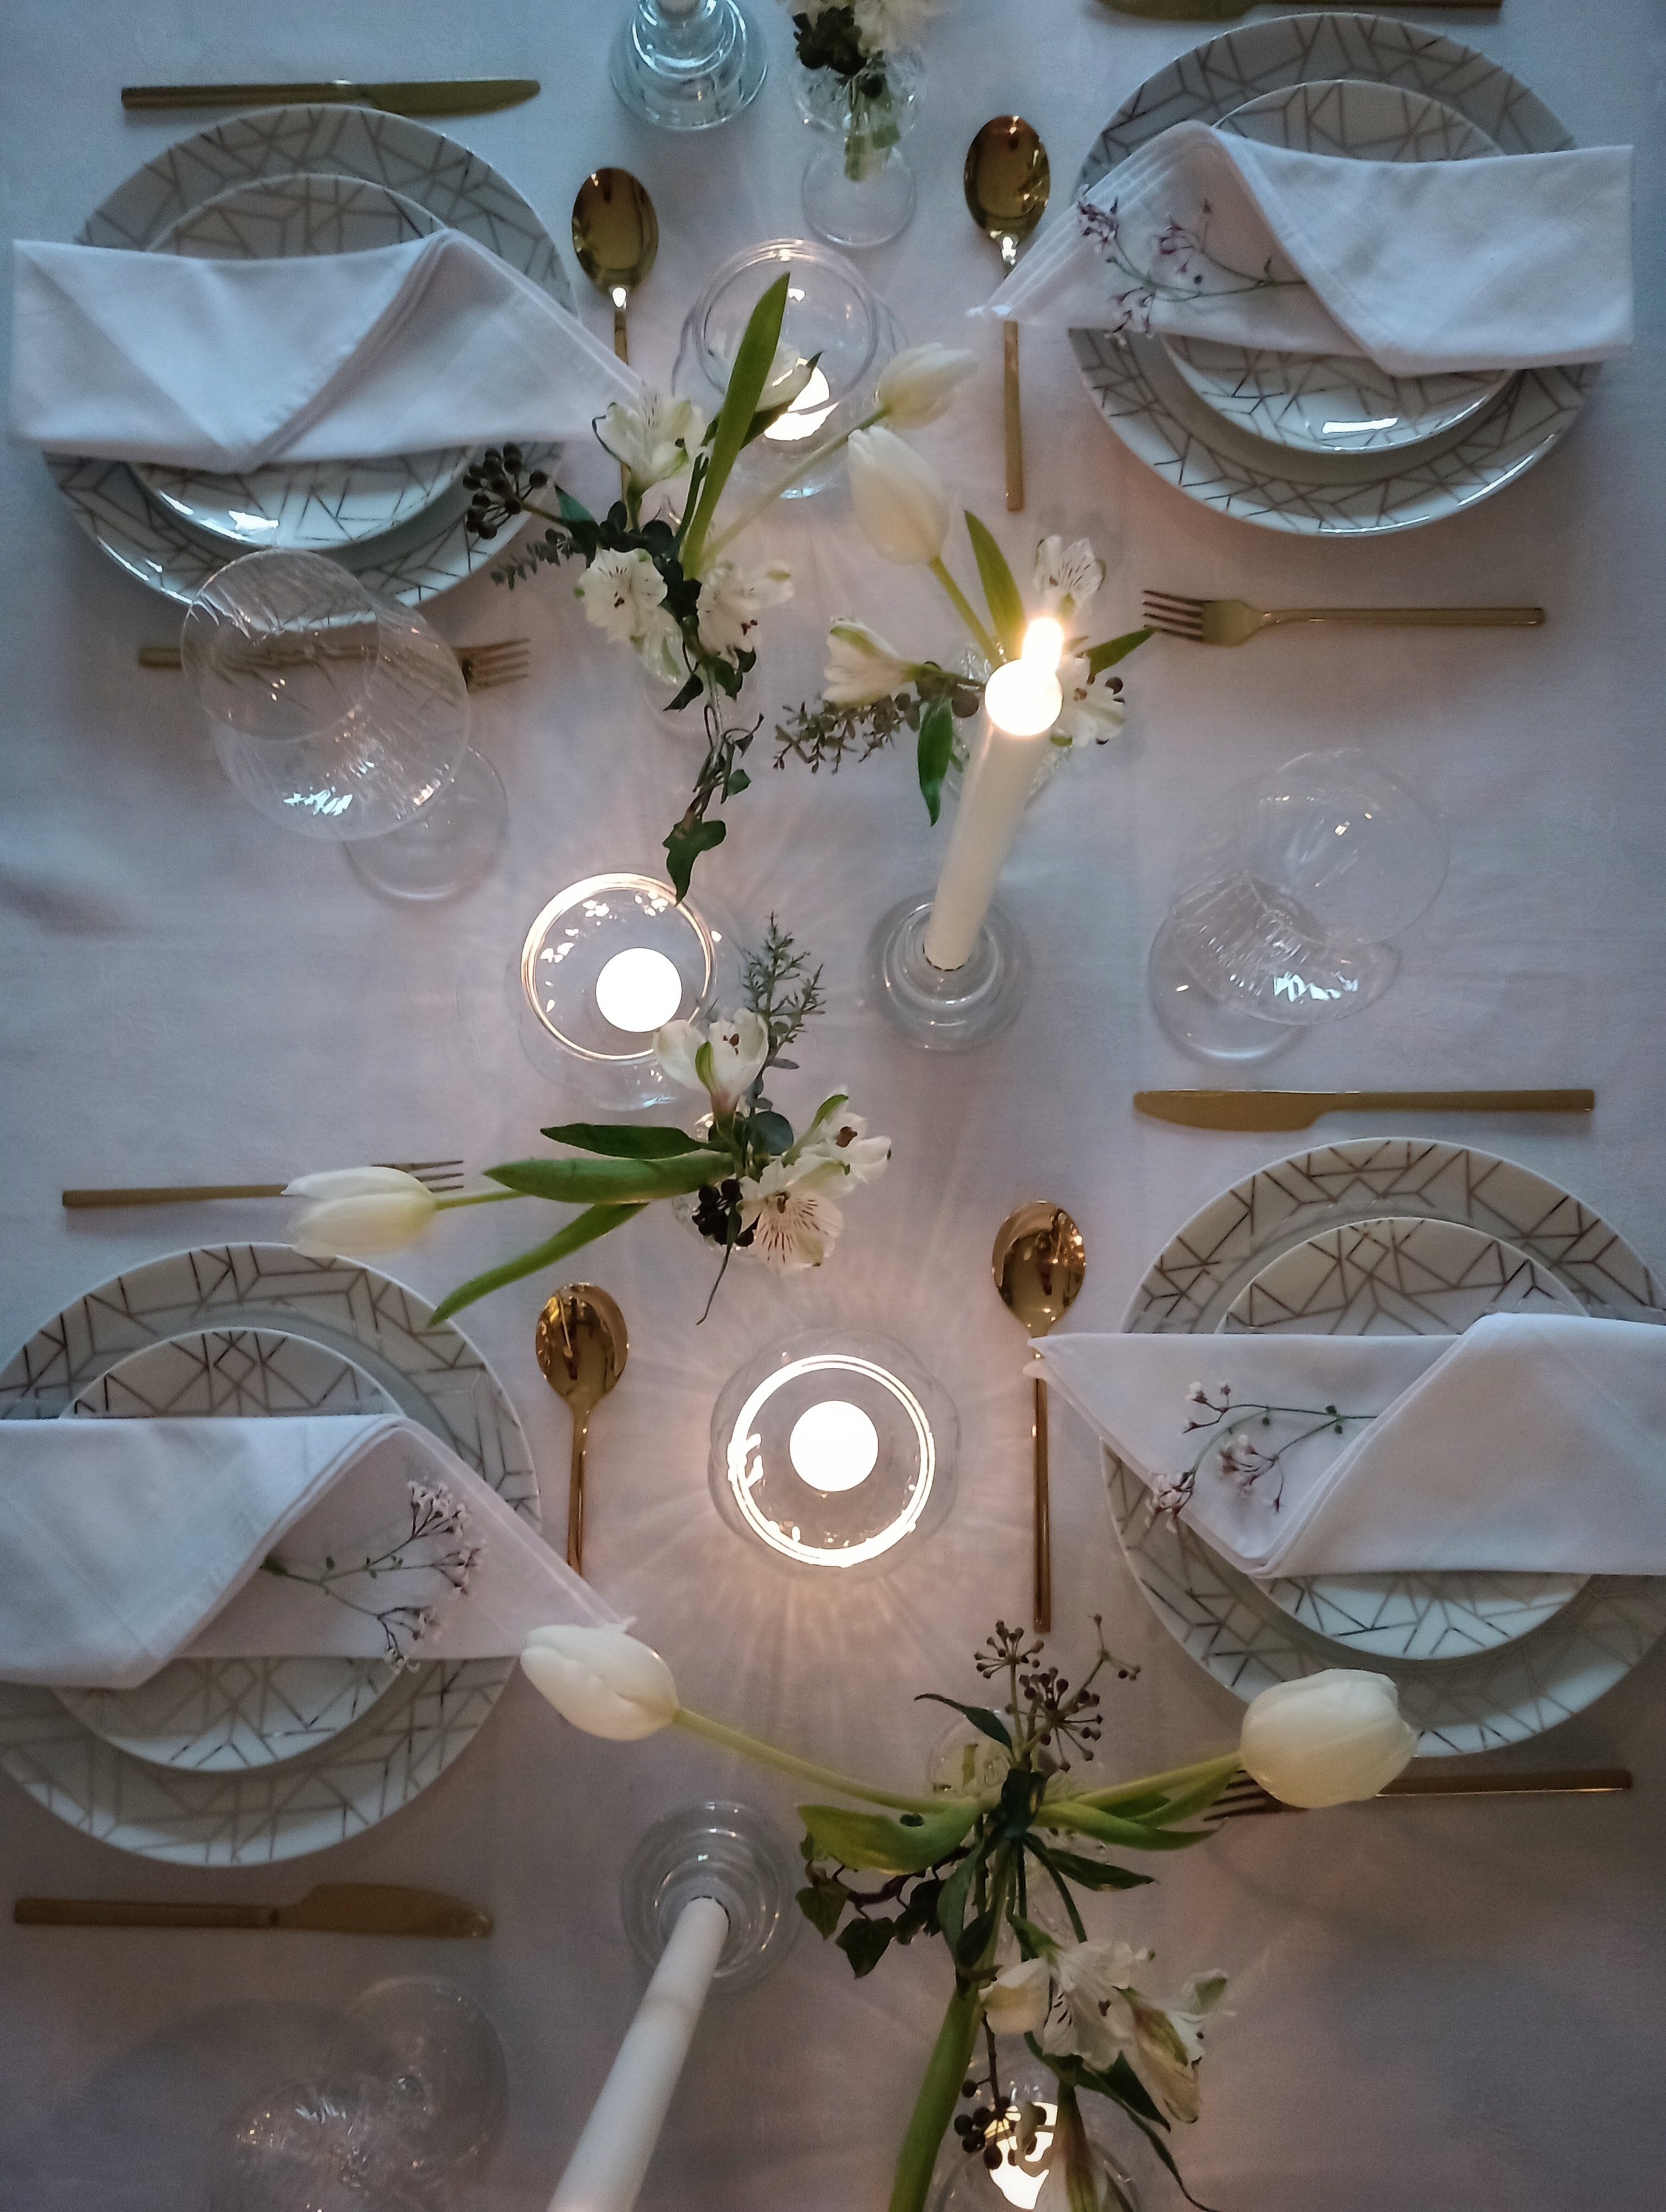
I am not a fan of supermarket flowers, mostly because of the environmental impact of importing the flowers when there are beautiful seasonal British flowers in abundance in the spring and summer months. During the winter months, I tend to forage for foliage and use what is available in my garden. However, I wanted to create a simple tablescape for New Year’s Eve, on a budget, so I decided to use a small amount of supermarket flowers with some foraged finds.

You will need:
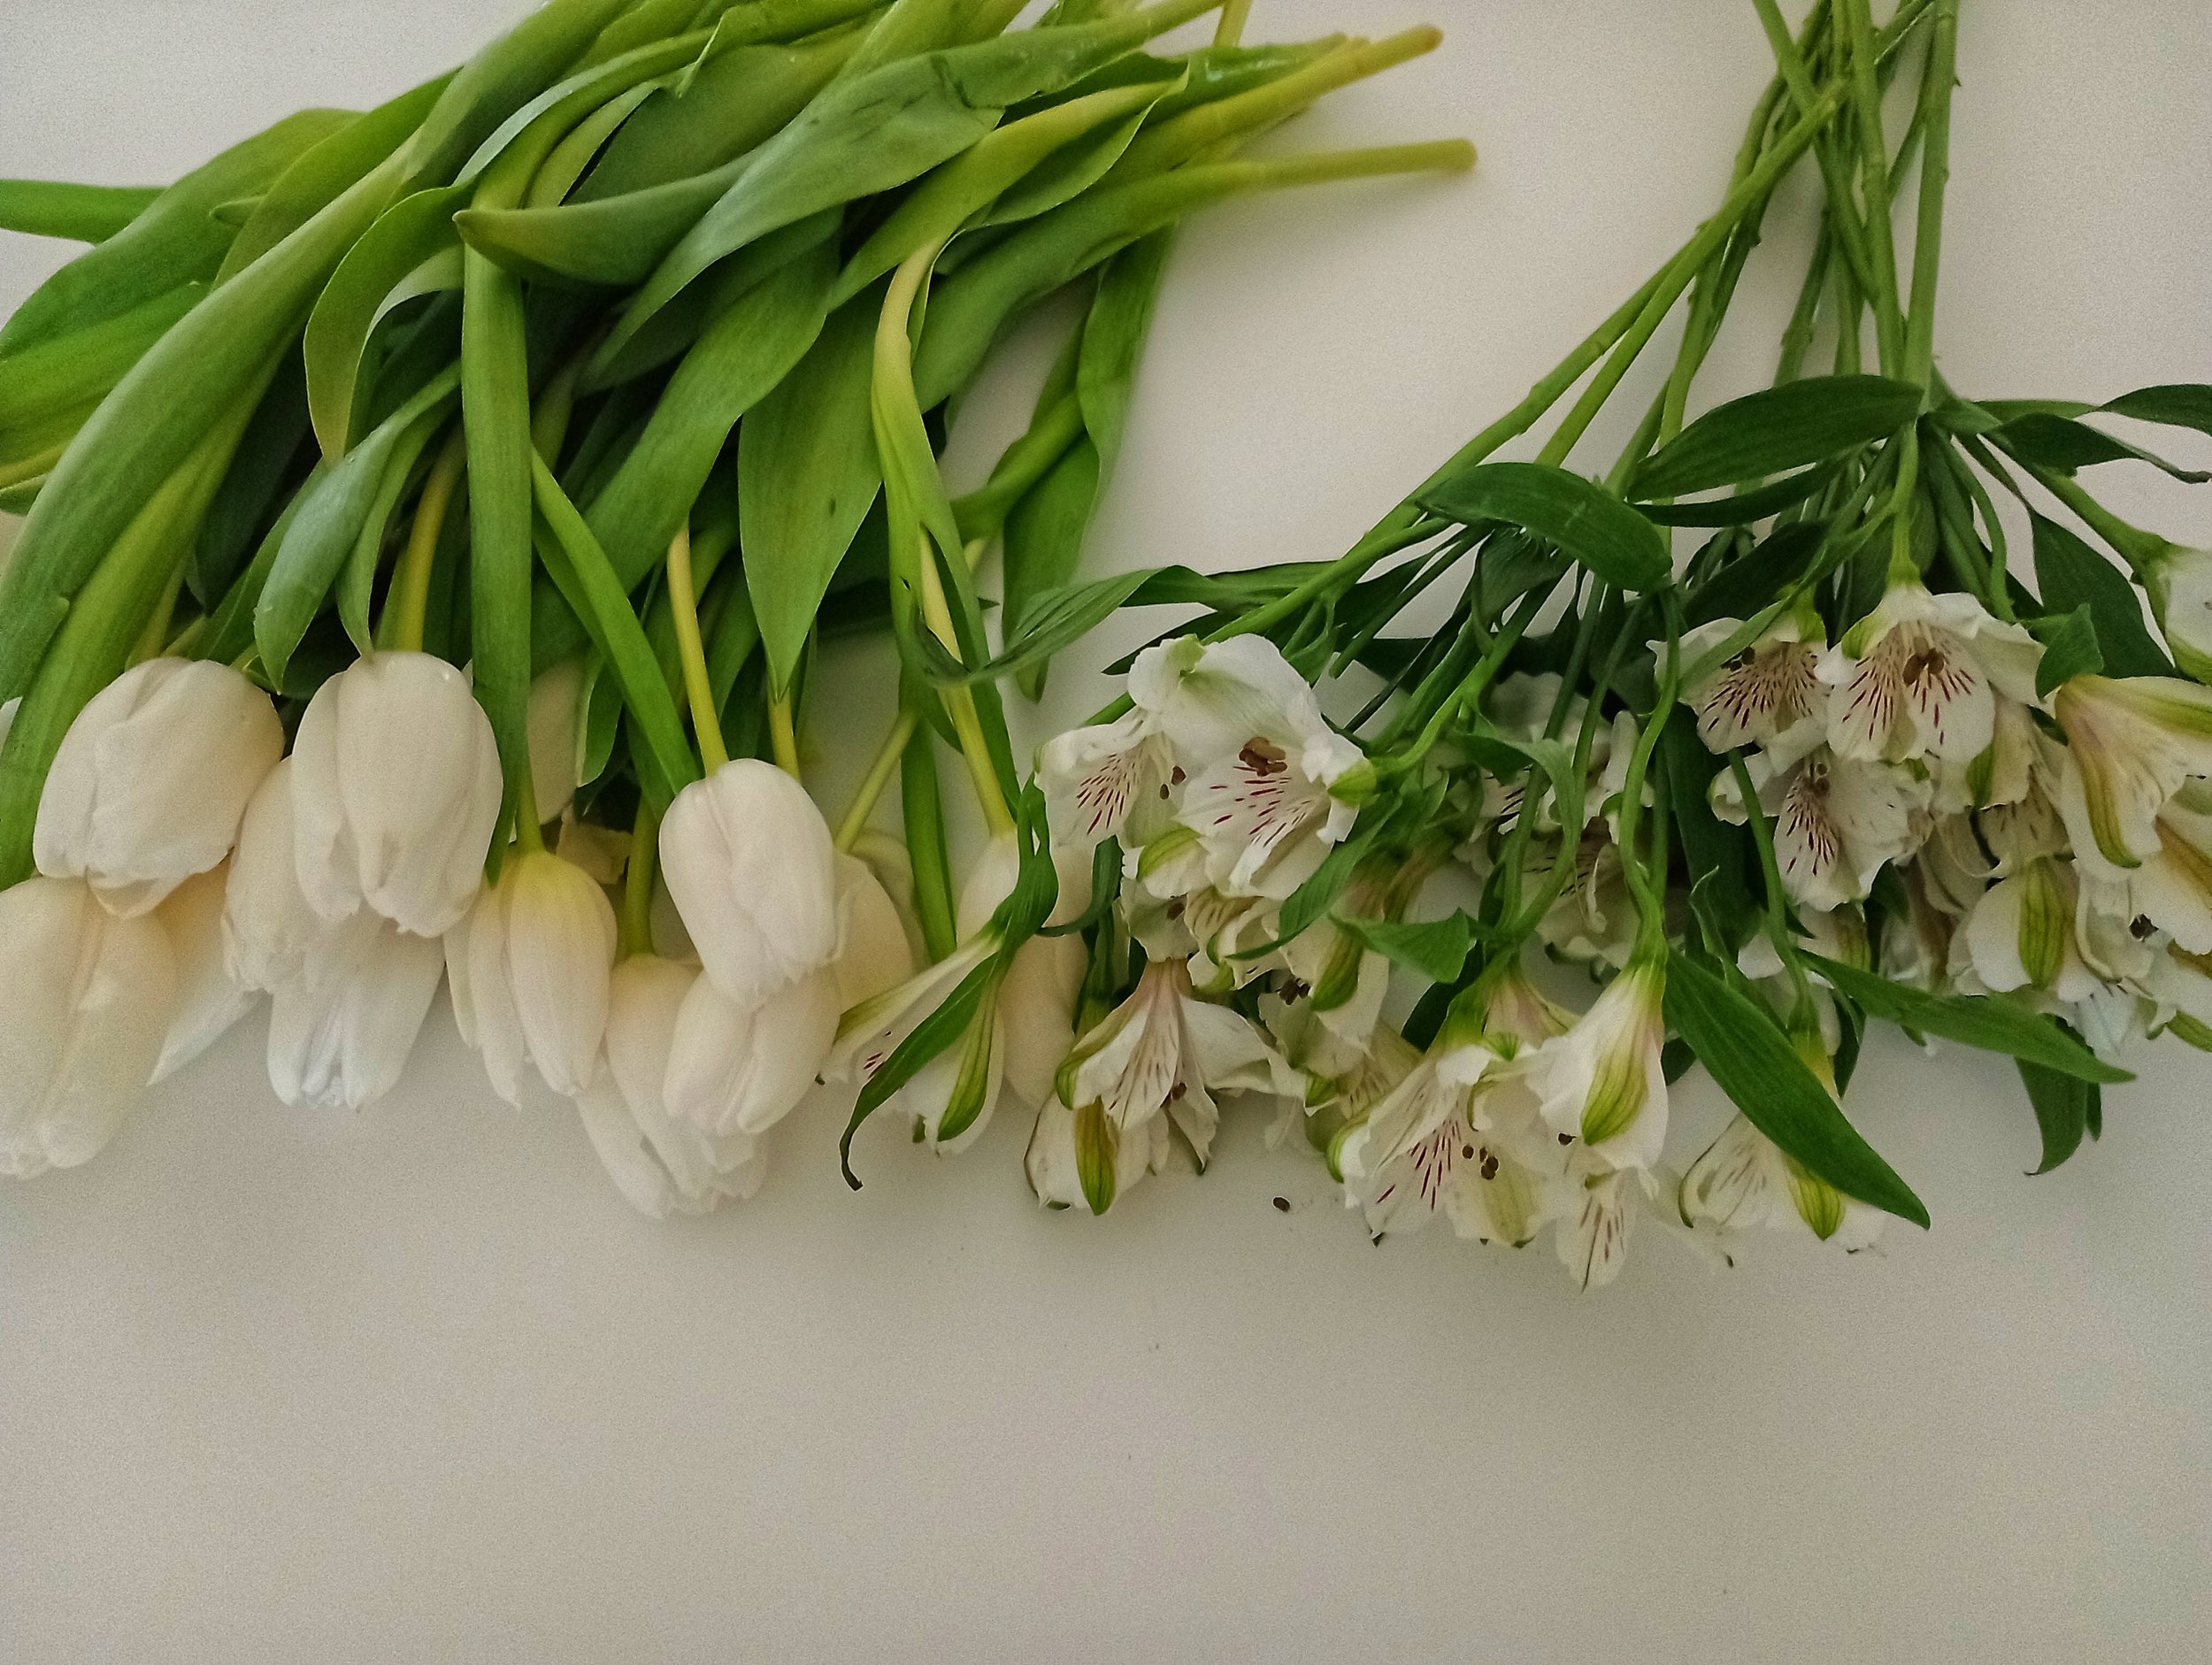
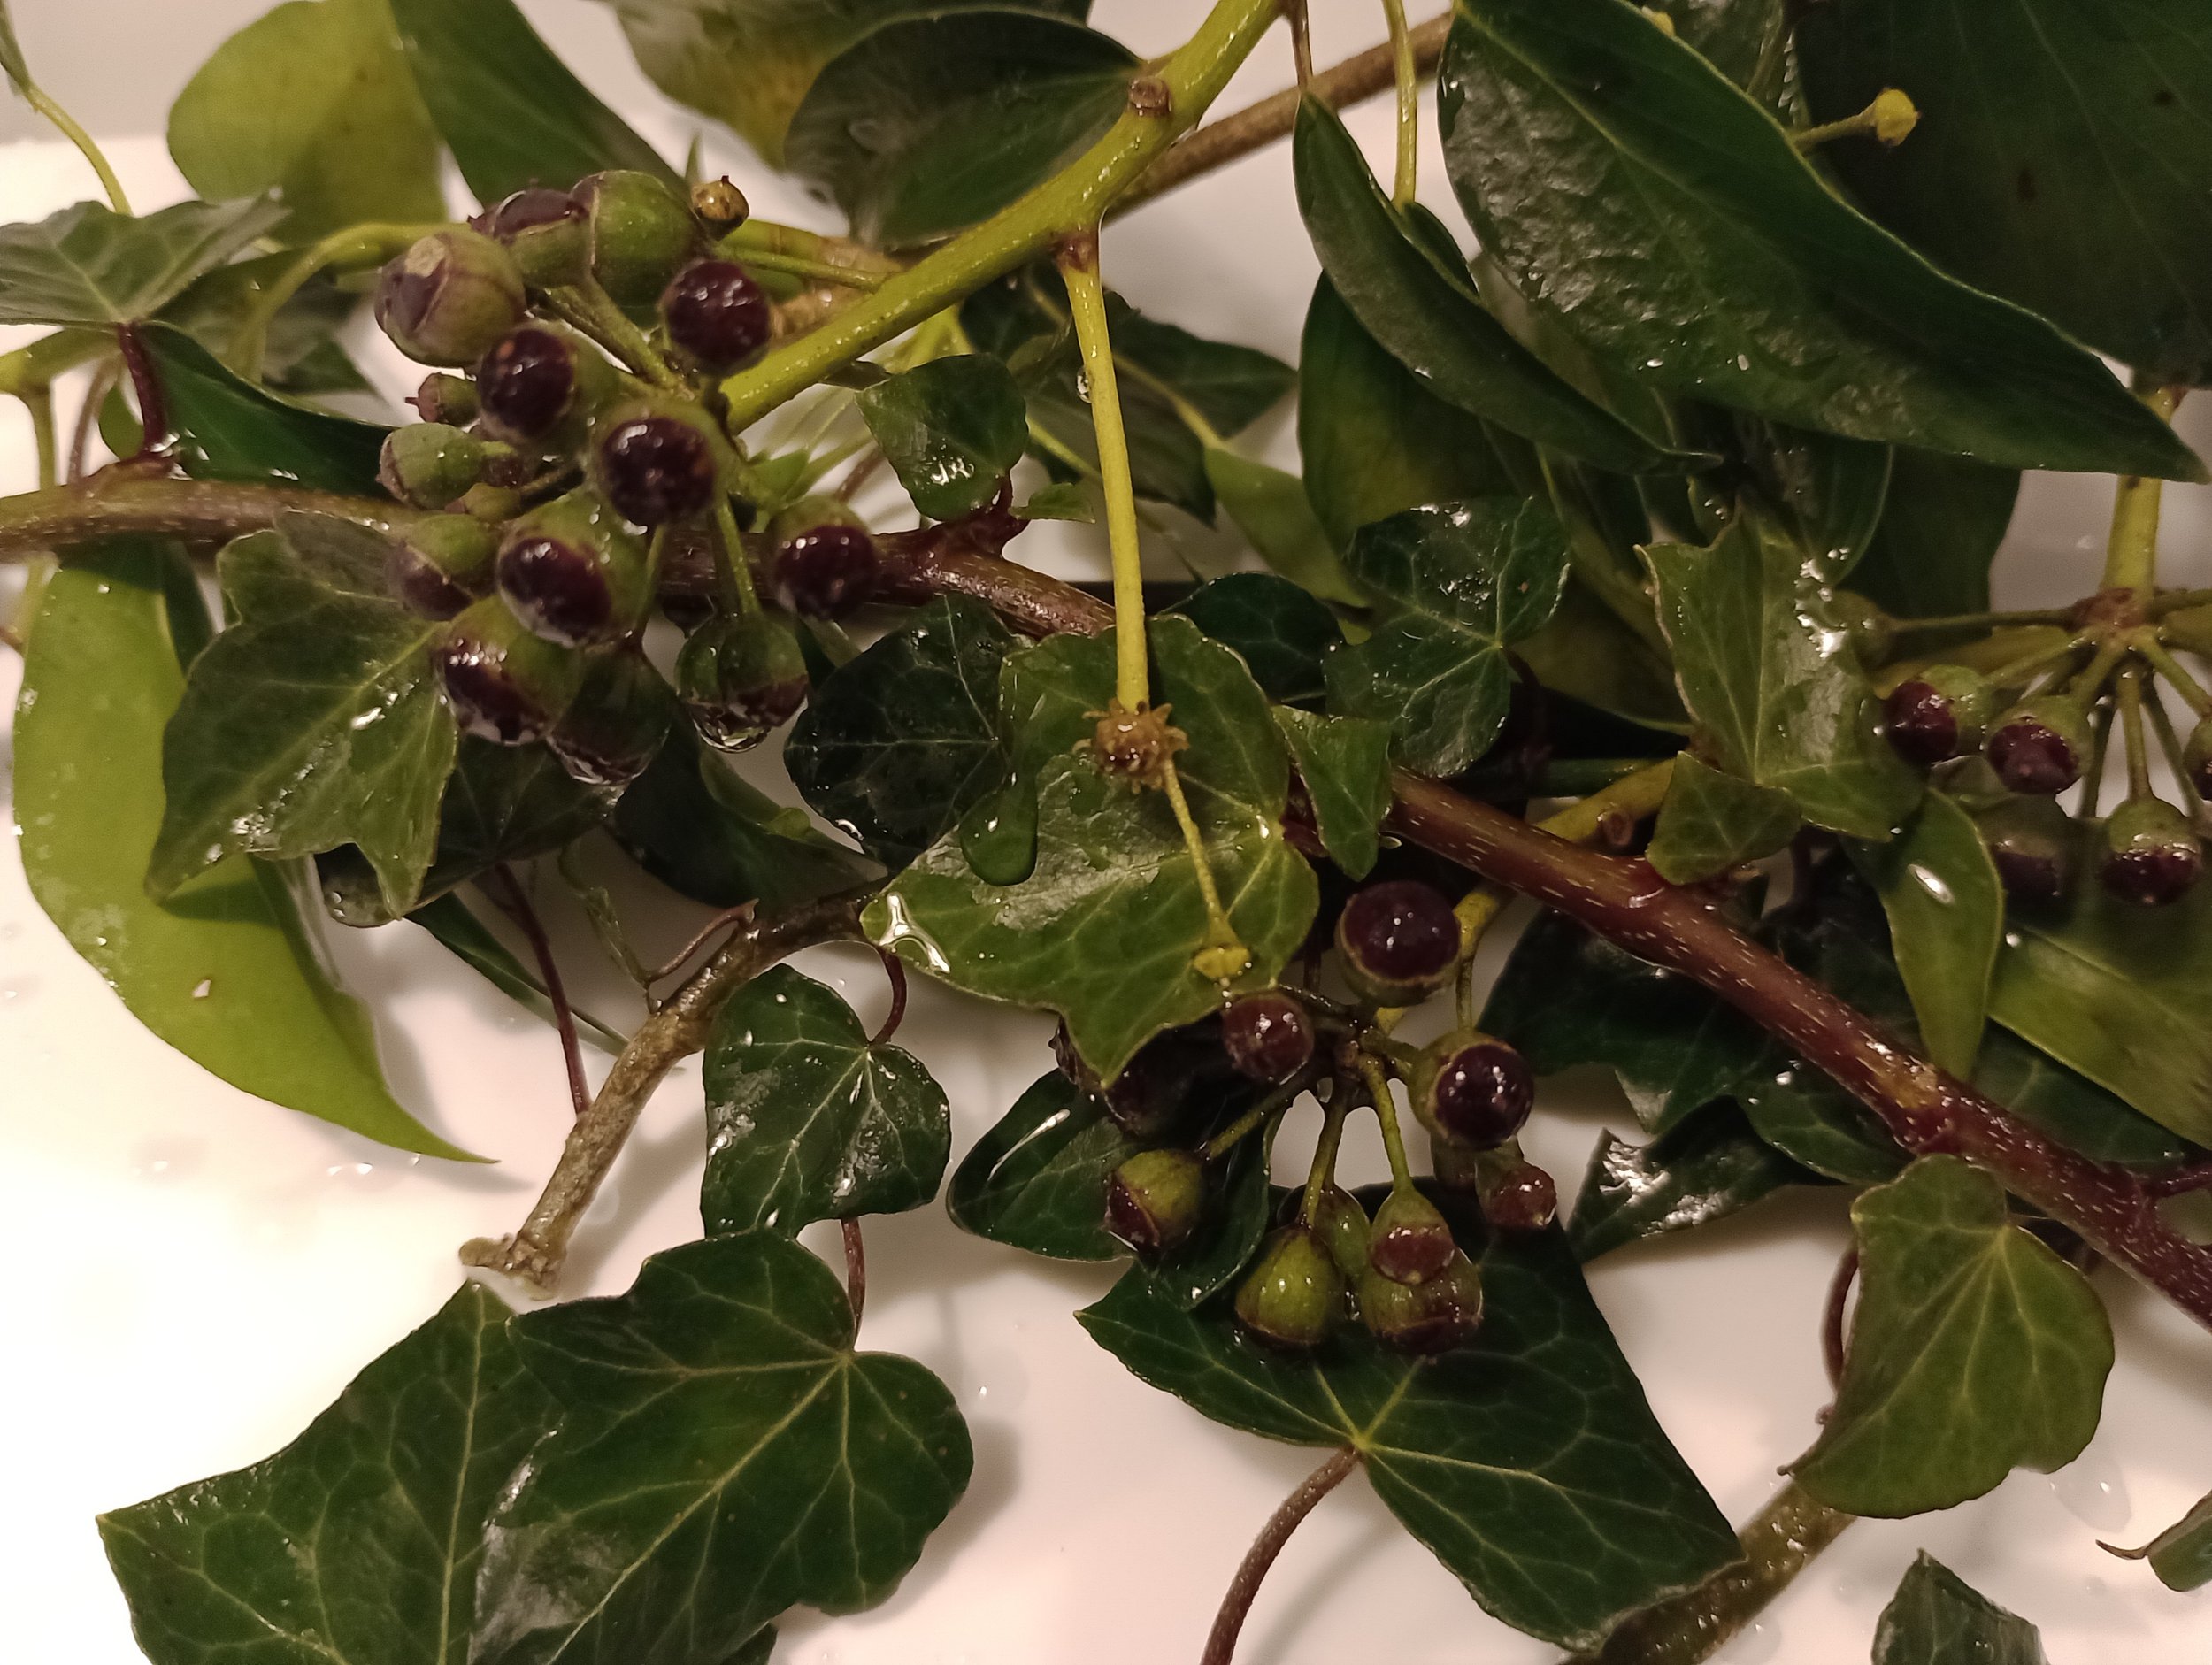
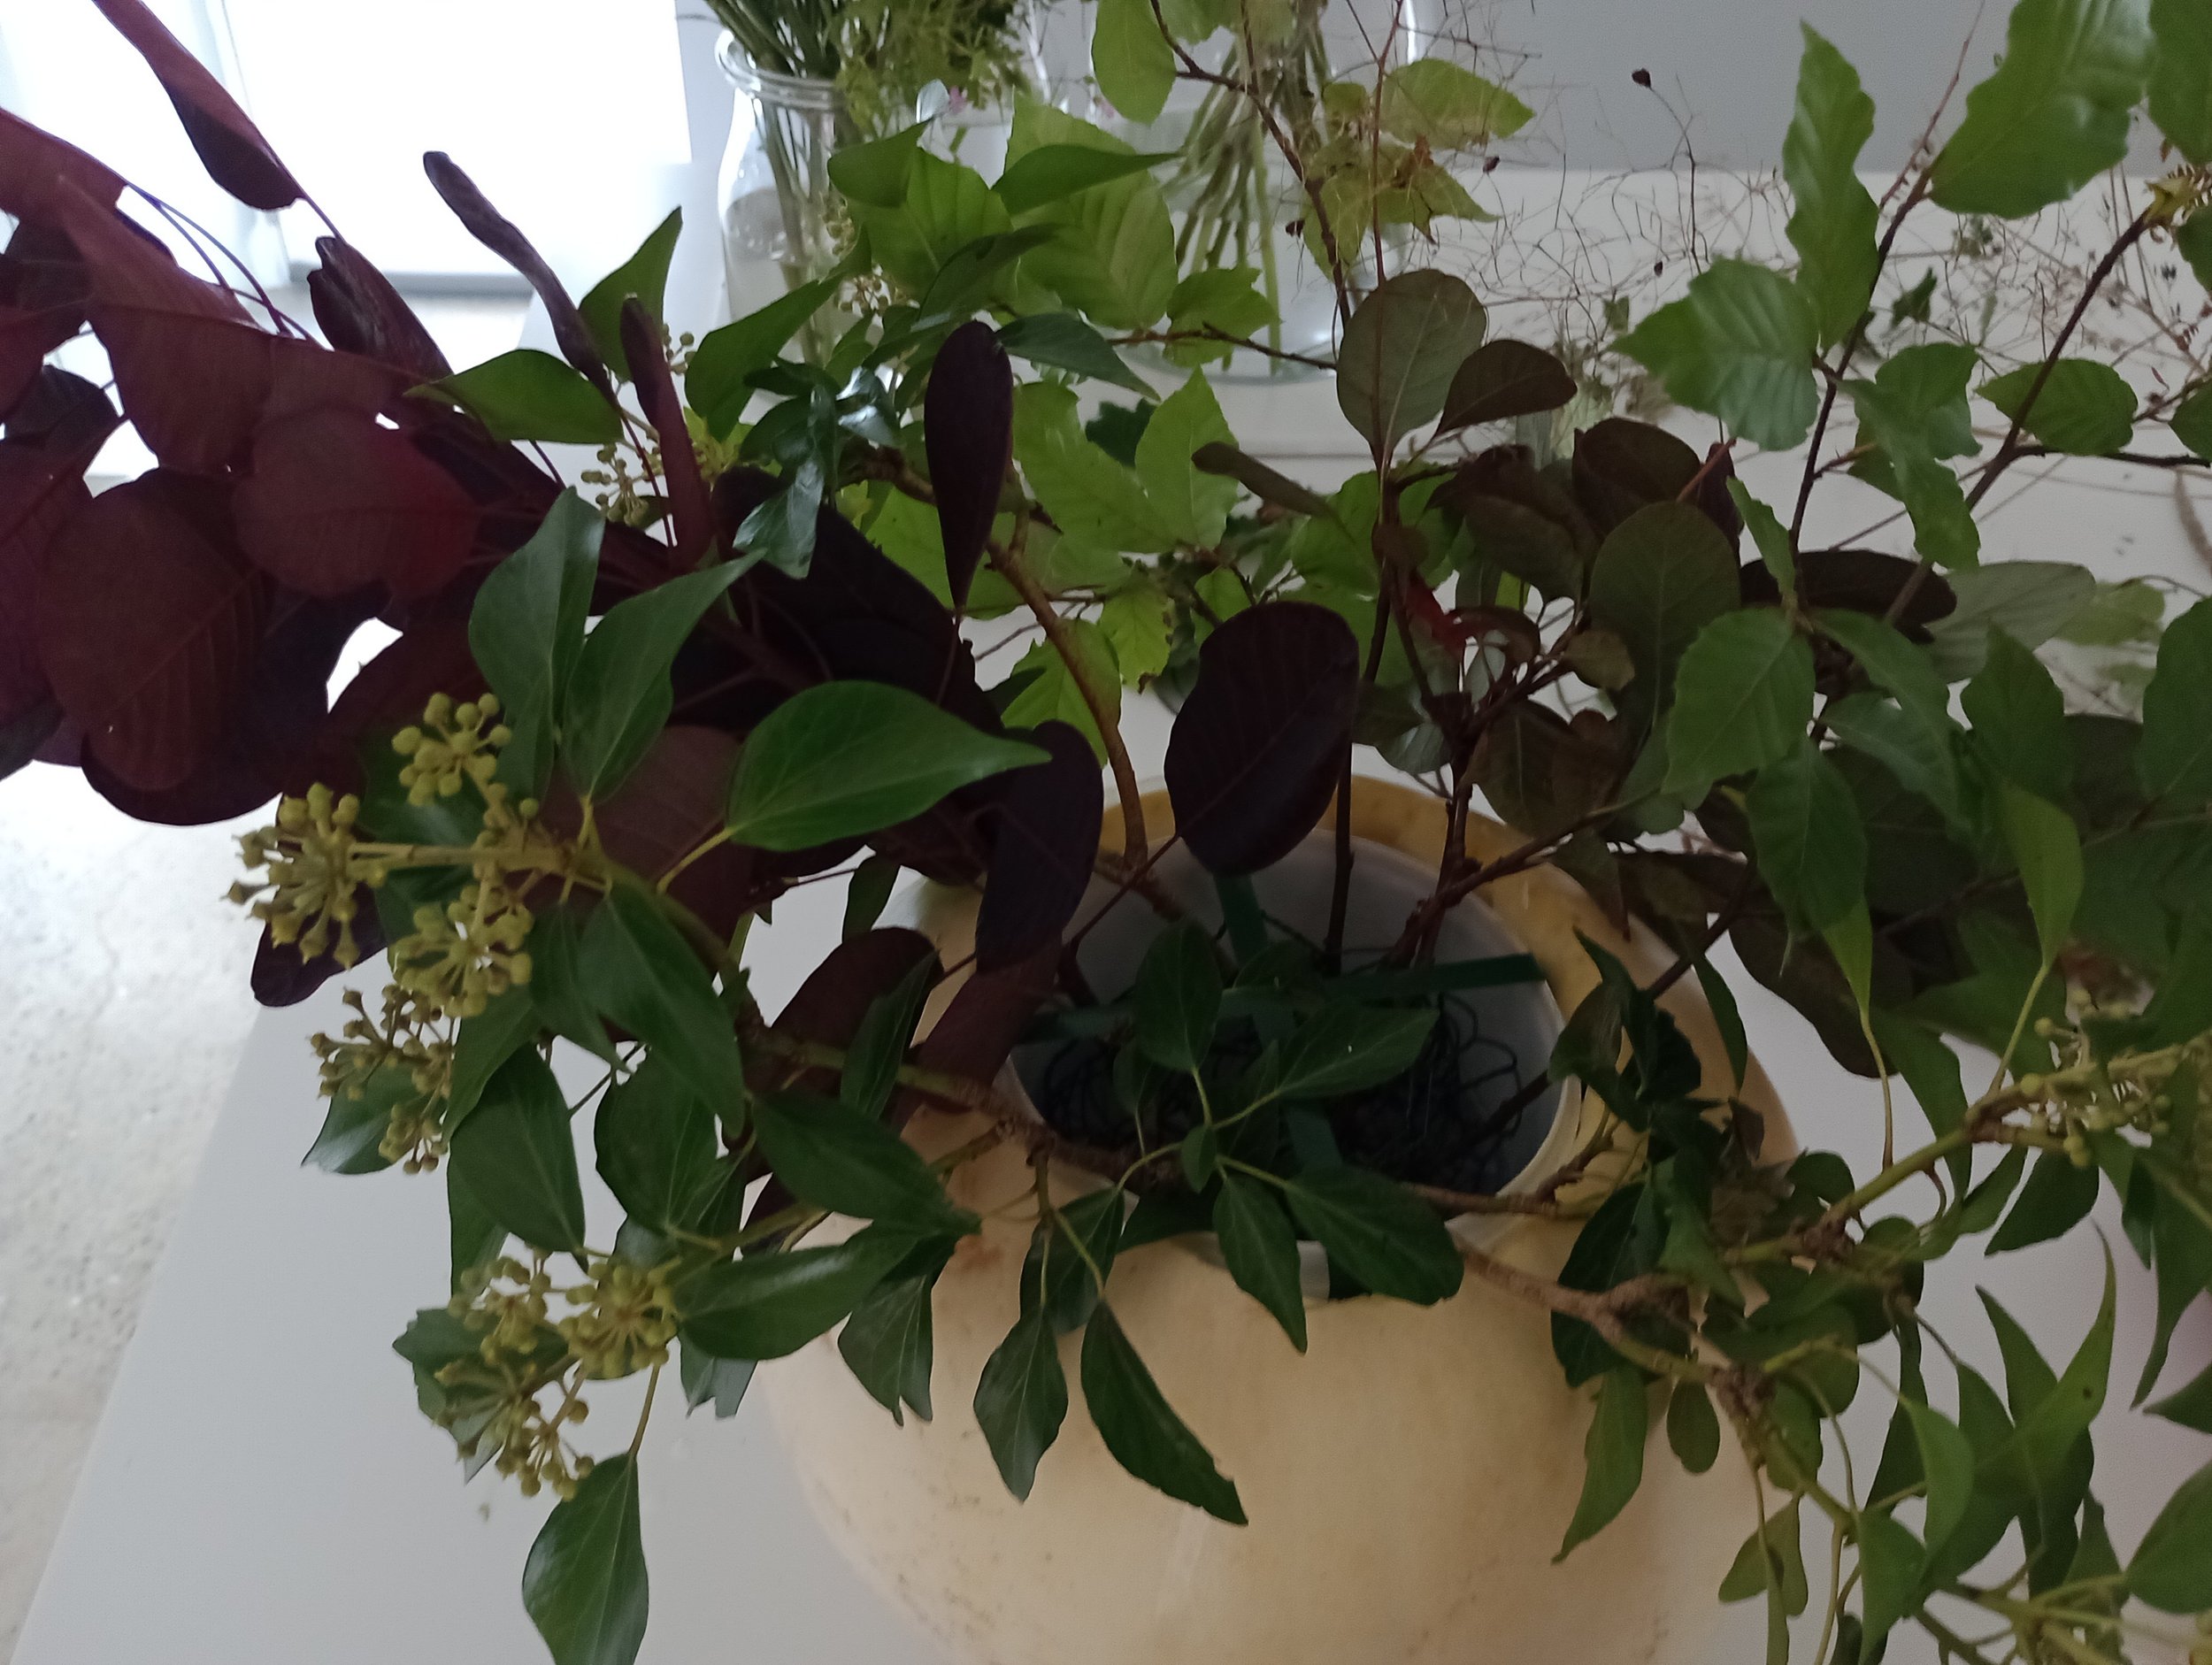
Flowers and foliage (I used white Tulips and Alstroemerias, Eucalyptus and Ivy)
Bud vases or condiment bottles
Candle holders (I used very inexpensive candle holders from Ikea - the tealight candle holders were 50p each!)
Taper candles and tealight candles
I am not a fan of supermarket flowers, mostly because of the environmental impact of importing the flowers when there are beautiful seasonal British flowers in abundance during the spring and summer months. During the winter months, I tend to forage for foliage and use what is available in my garden. However, I wanted to create a simple tablescape for New Year’s Eve, on a budget, so I decided to use a small amount of supermarket flowers with some foraged finds. I spent £14 on white Tulips and Alstroemerias. I used some Eucalyptus from the garden and foraged some Ivy.
Alstromerias come in a range of colours and are very long-lasting. They look like a miniature Lilly. Tulips are very receptive to sunlight. They continue to grow towards the sunlight bending and drooping as they grow.
Supermarket flowers
Foraged finds

Eucalyptus from my garden
Step 1:
Prepare the bud vases. I used these beautiful and delicate bud vases from Petersham Nurseries. These are quite expensive (a Christmas present), but you can use condiment bottles, diffuser bottles and perfume bottles. Make sure you vary the sizes of your containers. It is best to use containers with narrow necks so that you don’t need too many flowers.
A mixture of condiment bottles and perfume bottles
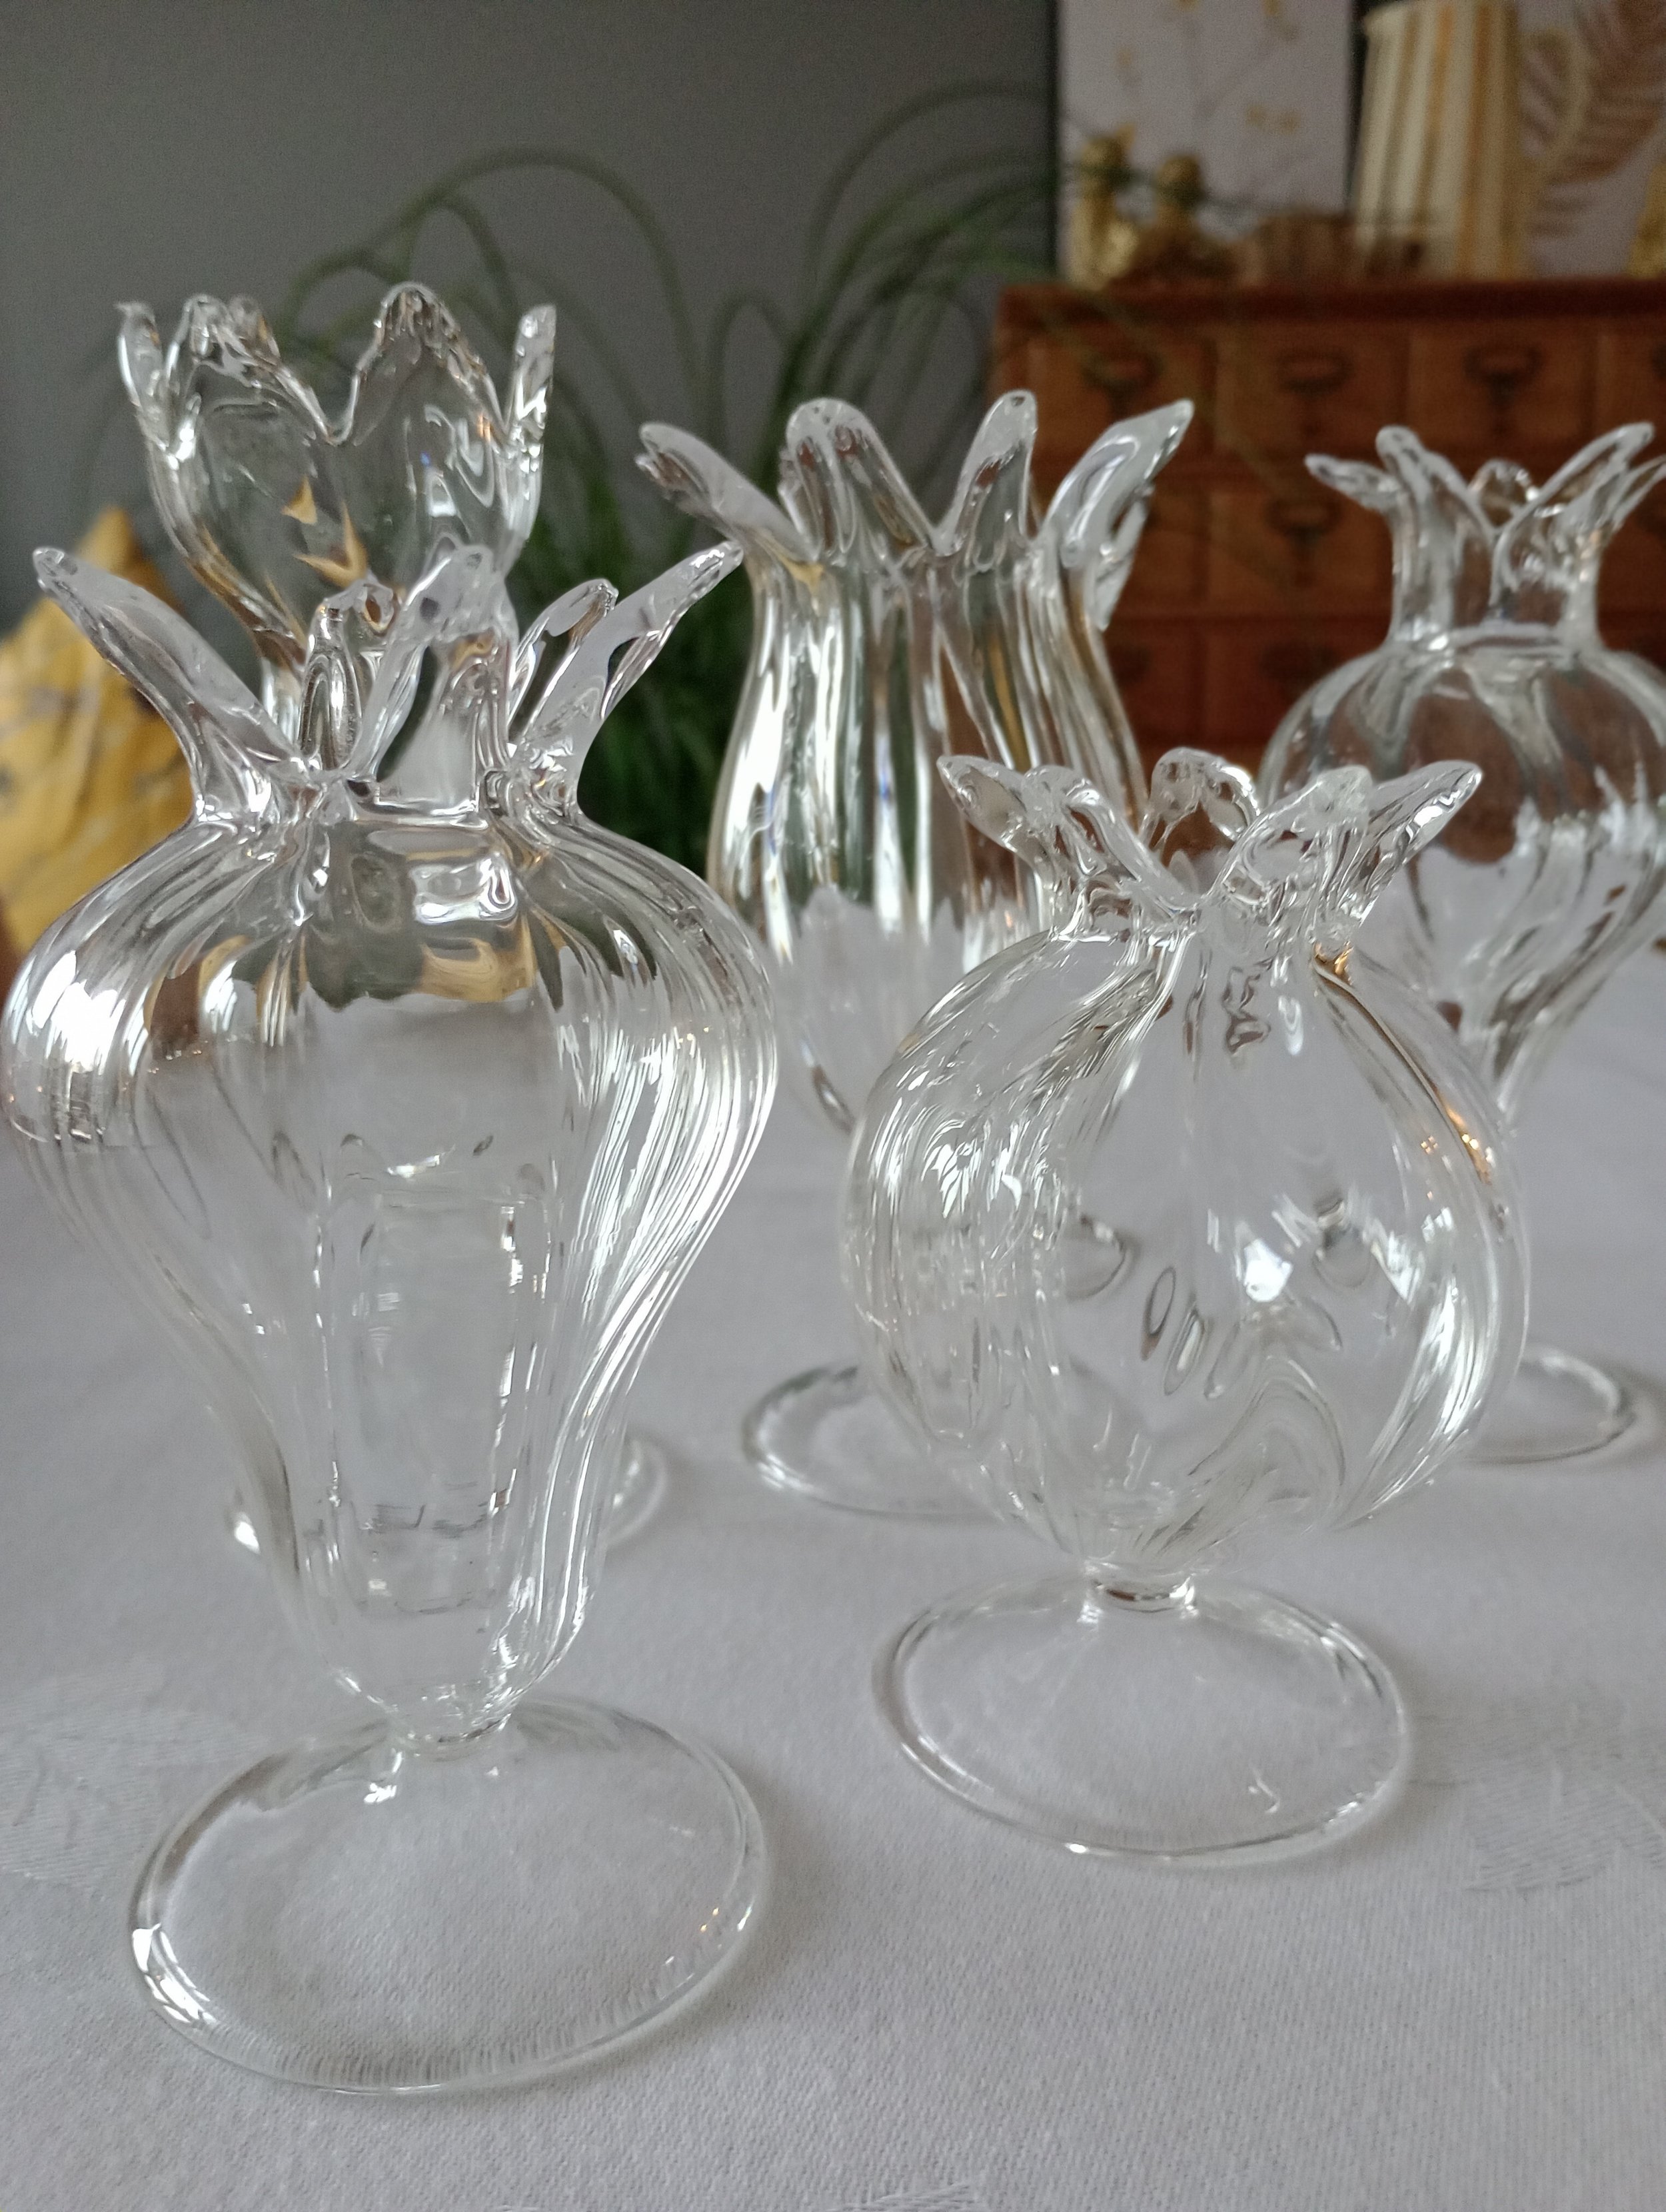
Bud vases from Petersham Nurseries
Step 2:
Prepare your flowers and foliage. I always condition my flowers first (see previous post on conditioning flowers). Fill the bud vases with water and start by inserting the foliage to create a structure.
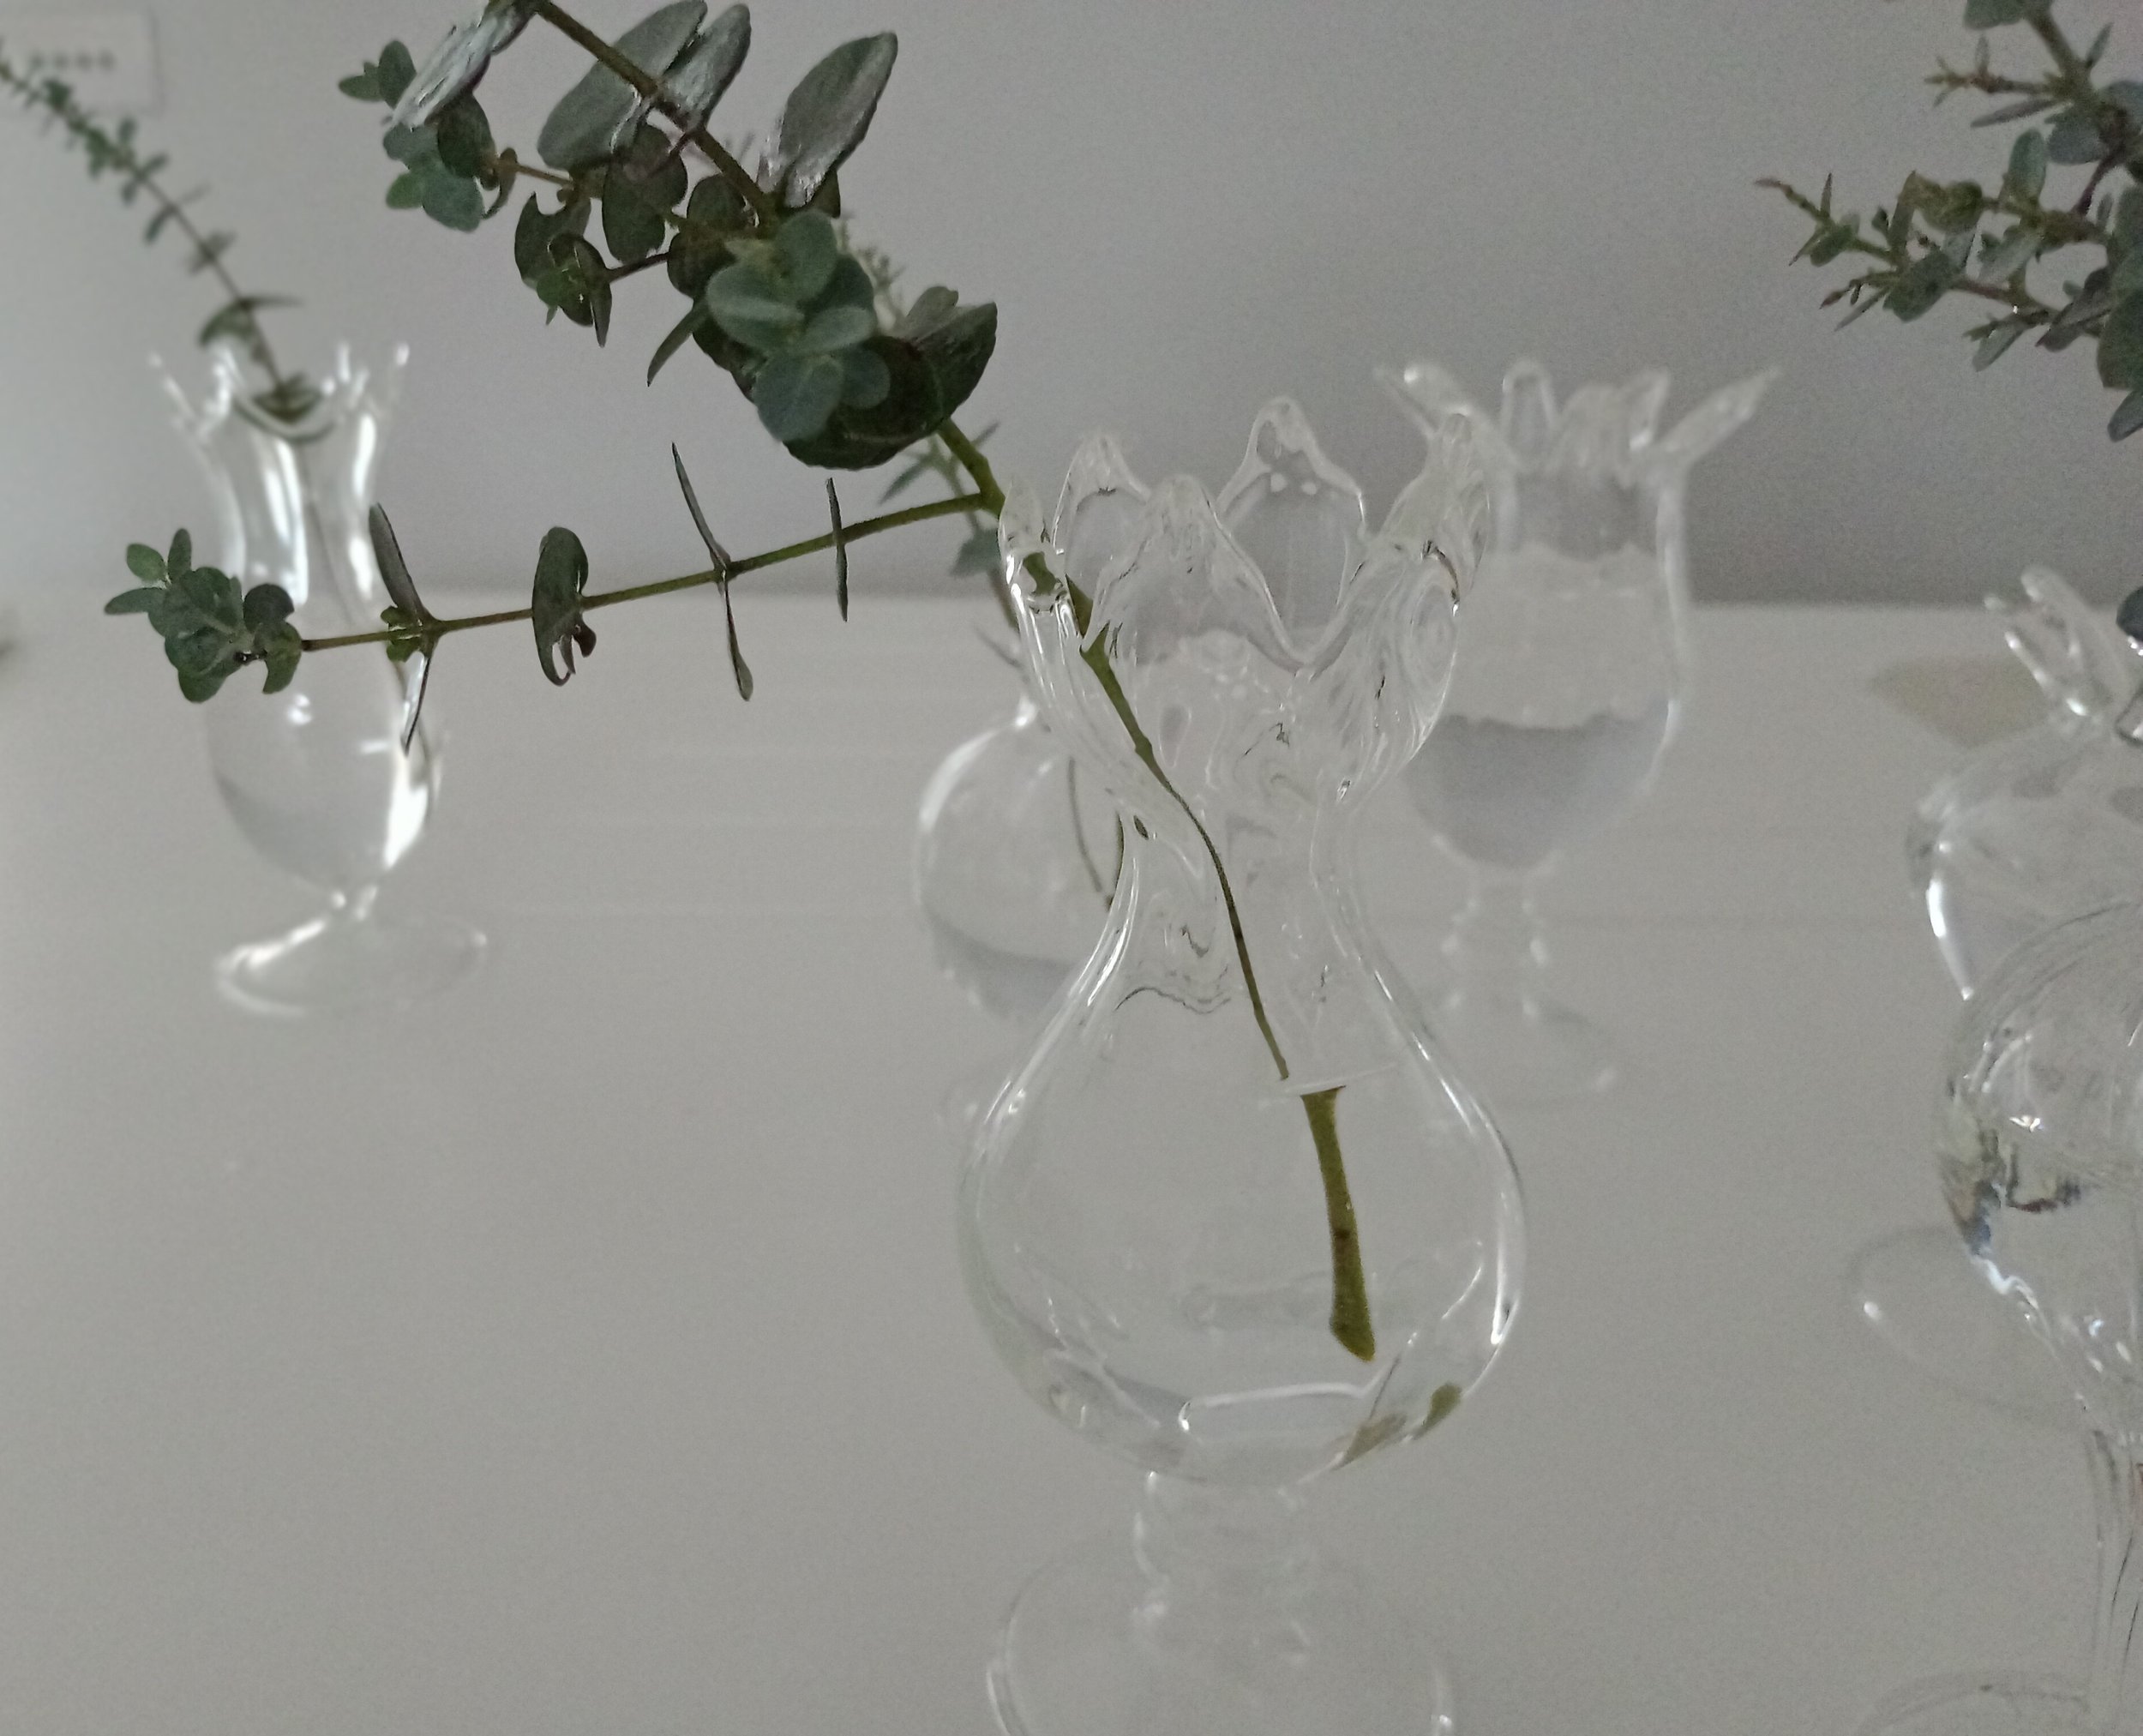
Start by inserting the foliage
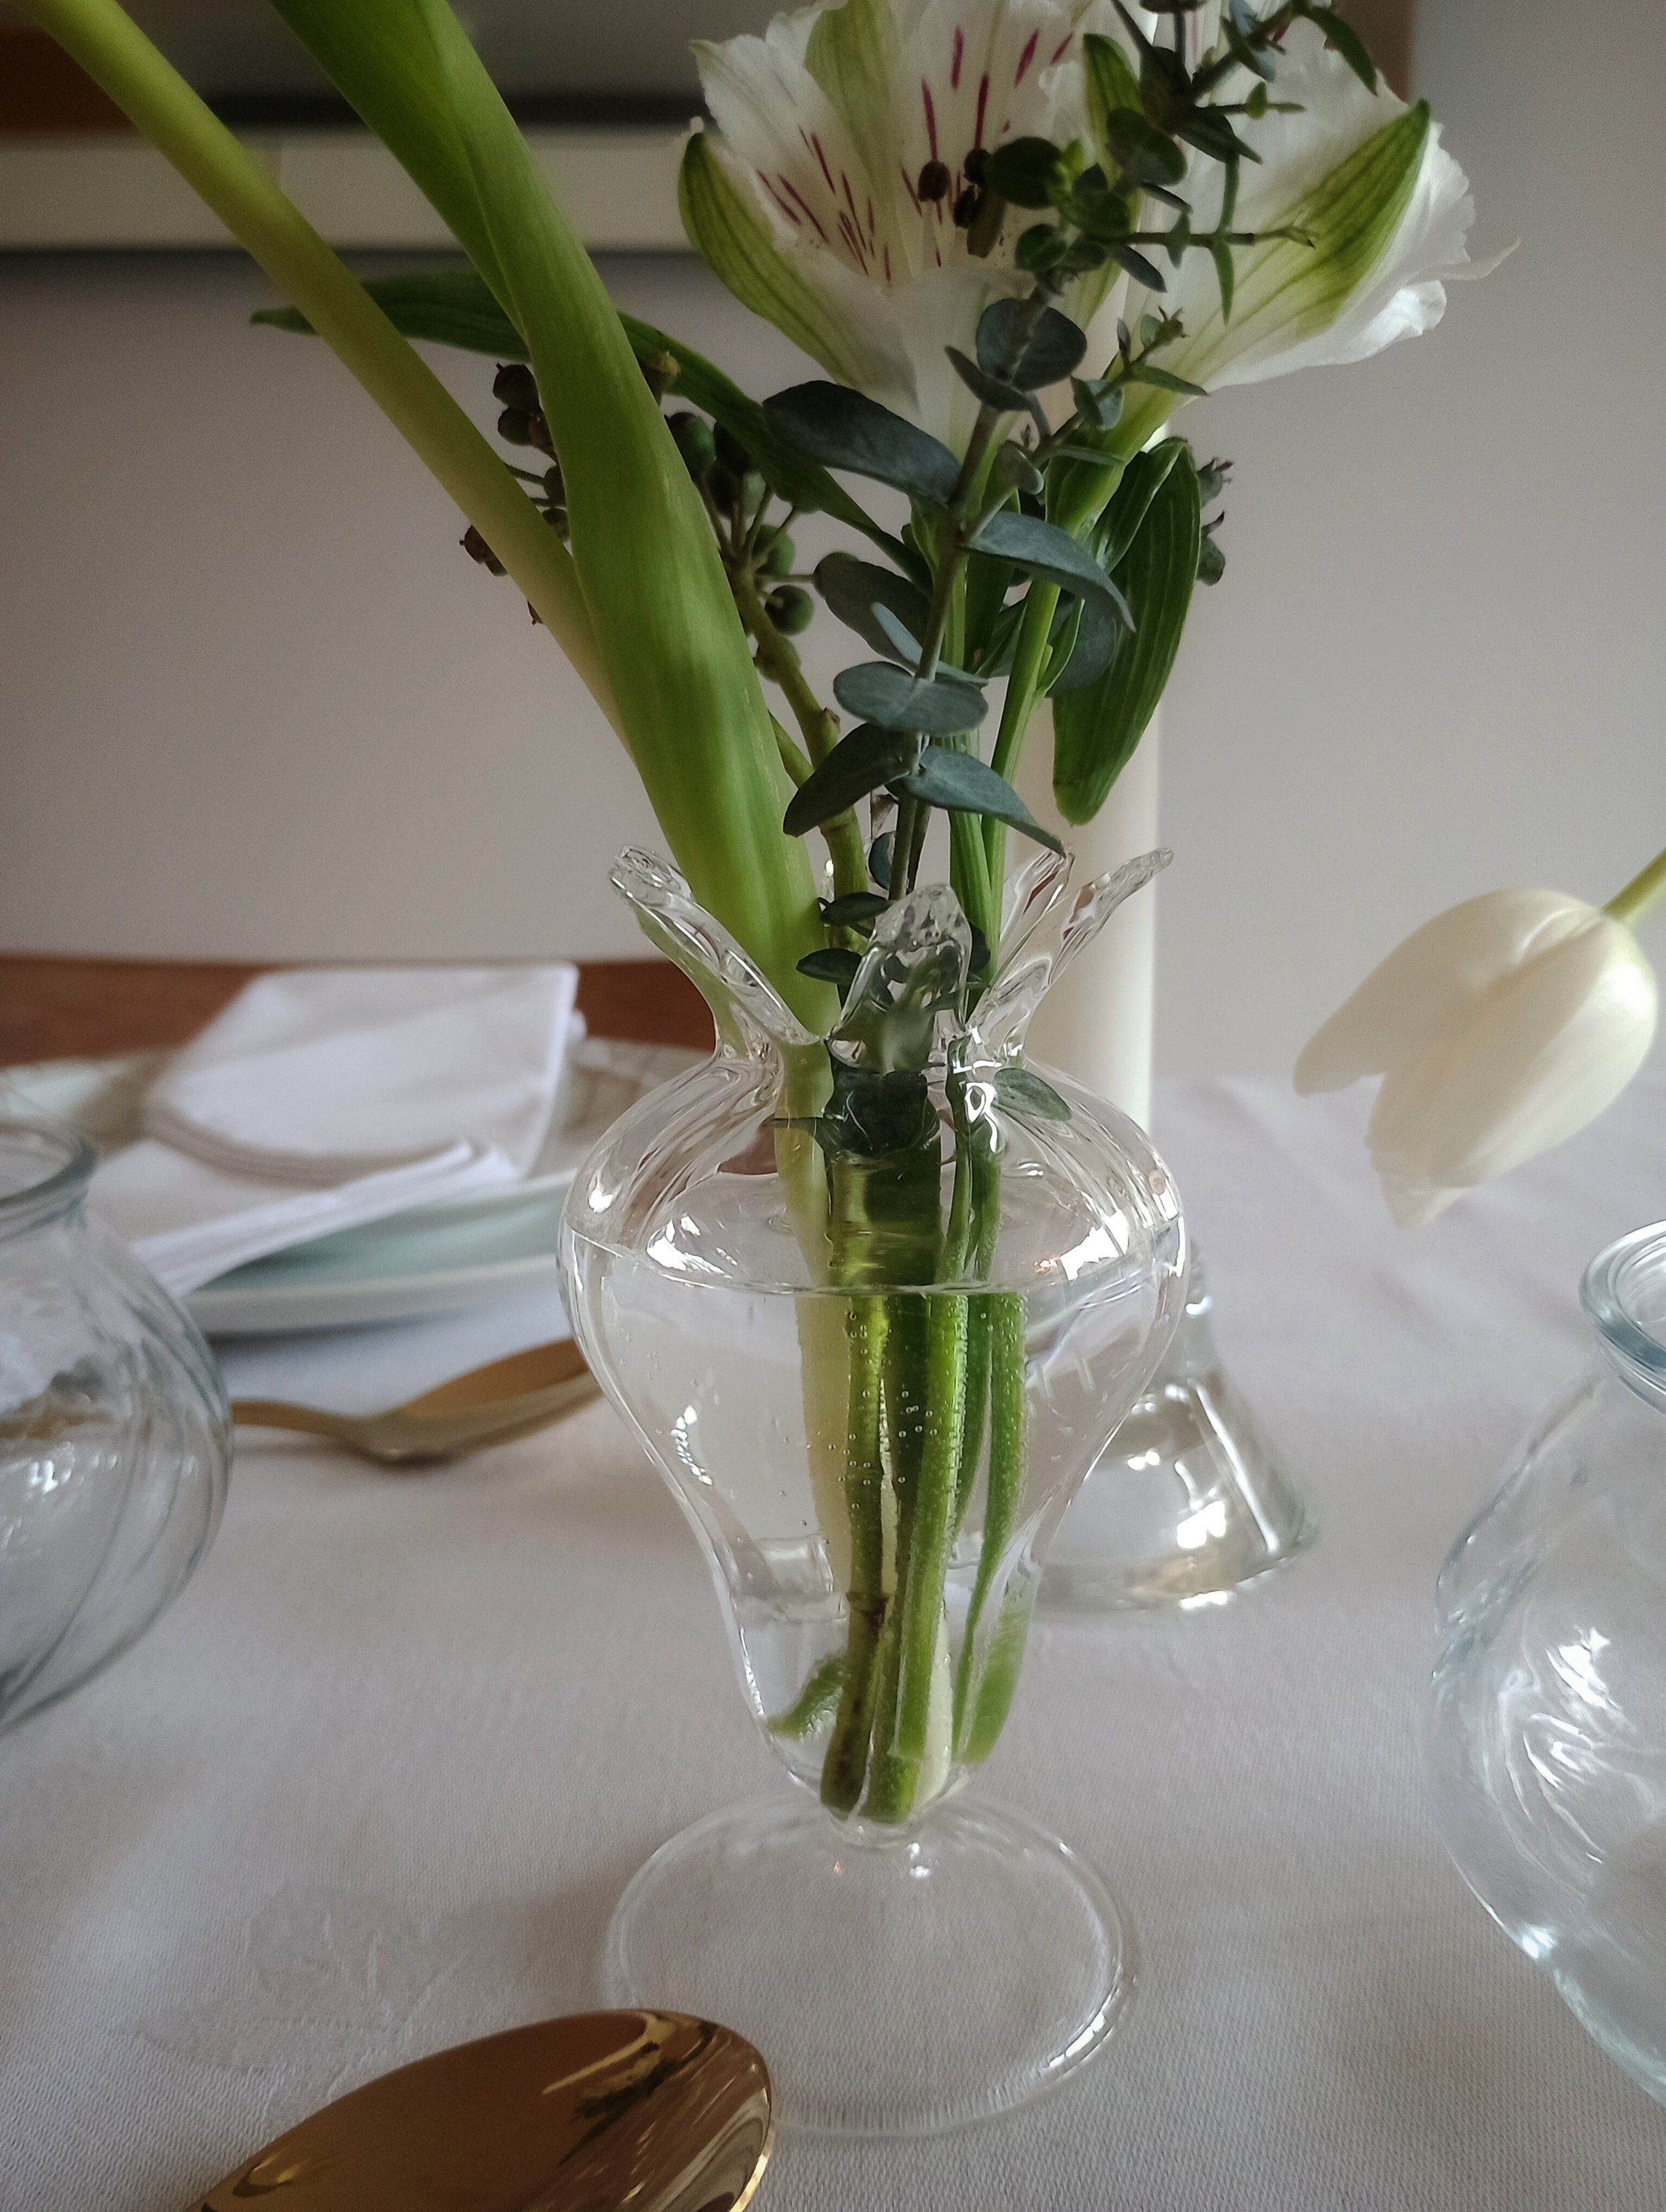
Step 3:
Next, arrange the Tulips first as they have thicker stems. Once you have added the Tulips to the bud vases add the Alstroemerias and any last few stems of foliage, if needed. Make sure you vary the height by cutting the flowers at different heights and using different sizes of bus vases.
Step 4:
Dress the table. I wanted to go for a crisp white and green theme with a bit of gold for Hogmany! I used a white tablecloth and napkins. I arranged the candles first and then the bud vases. Make sure the flowers do not obstruct the view of your guests across the table. I added some apple geranium to the napkins - even in the winter months it smells amazing.
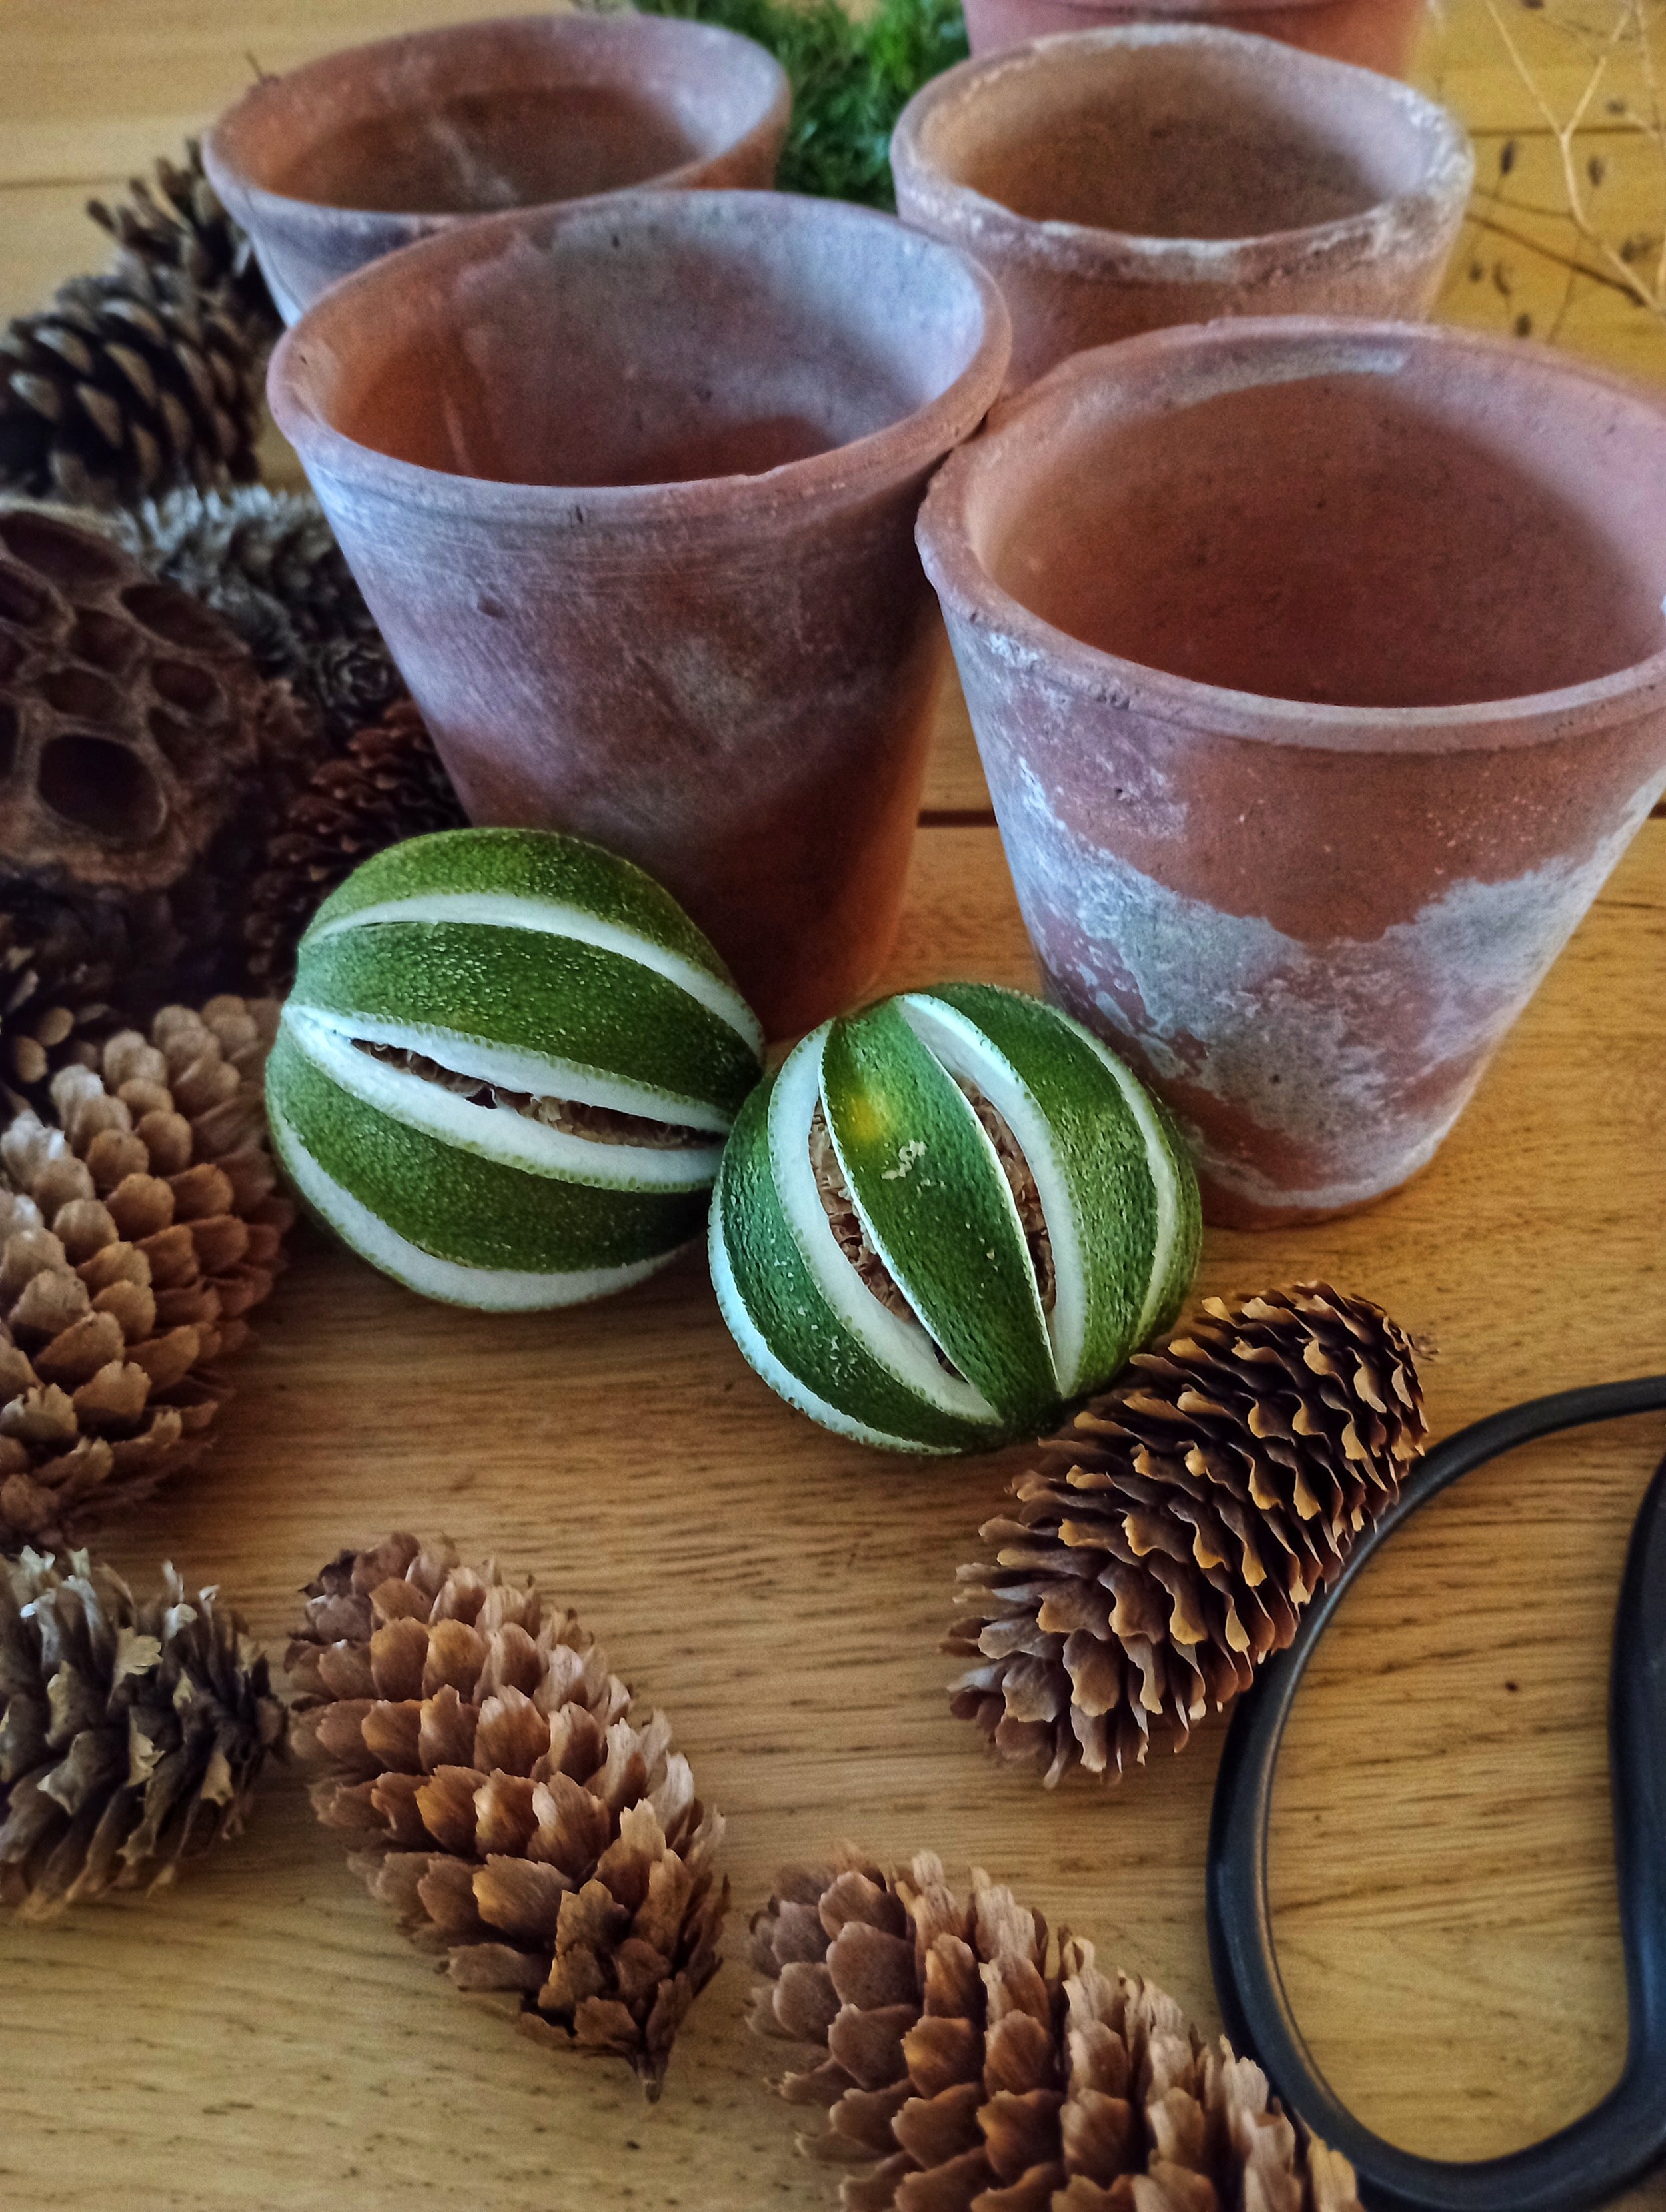
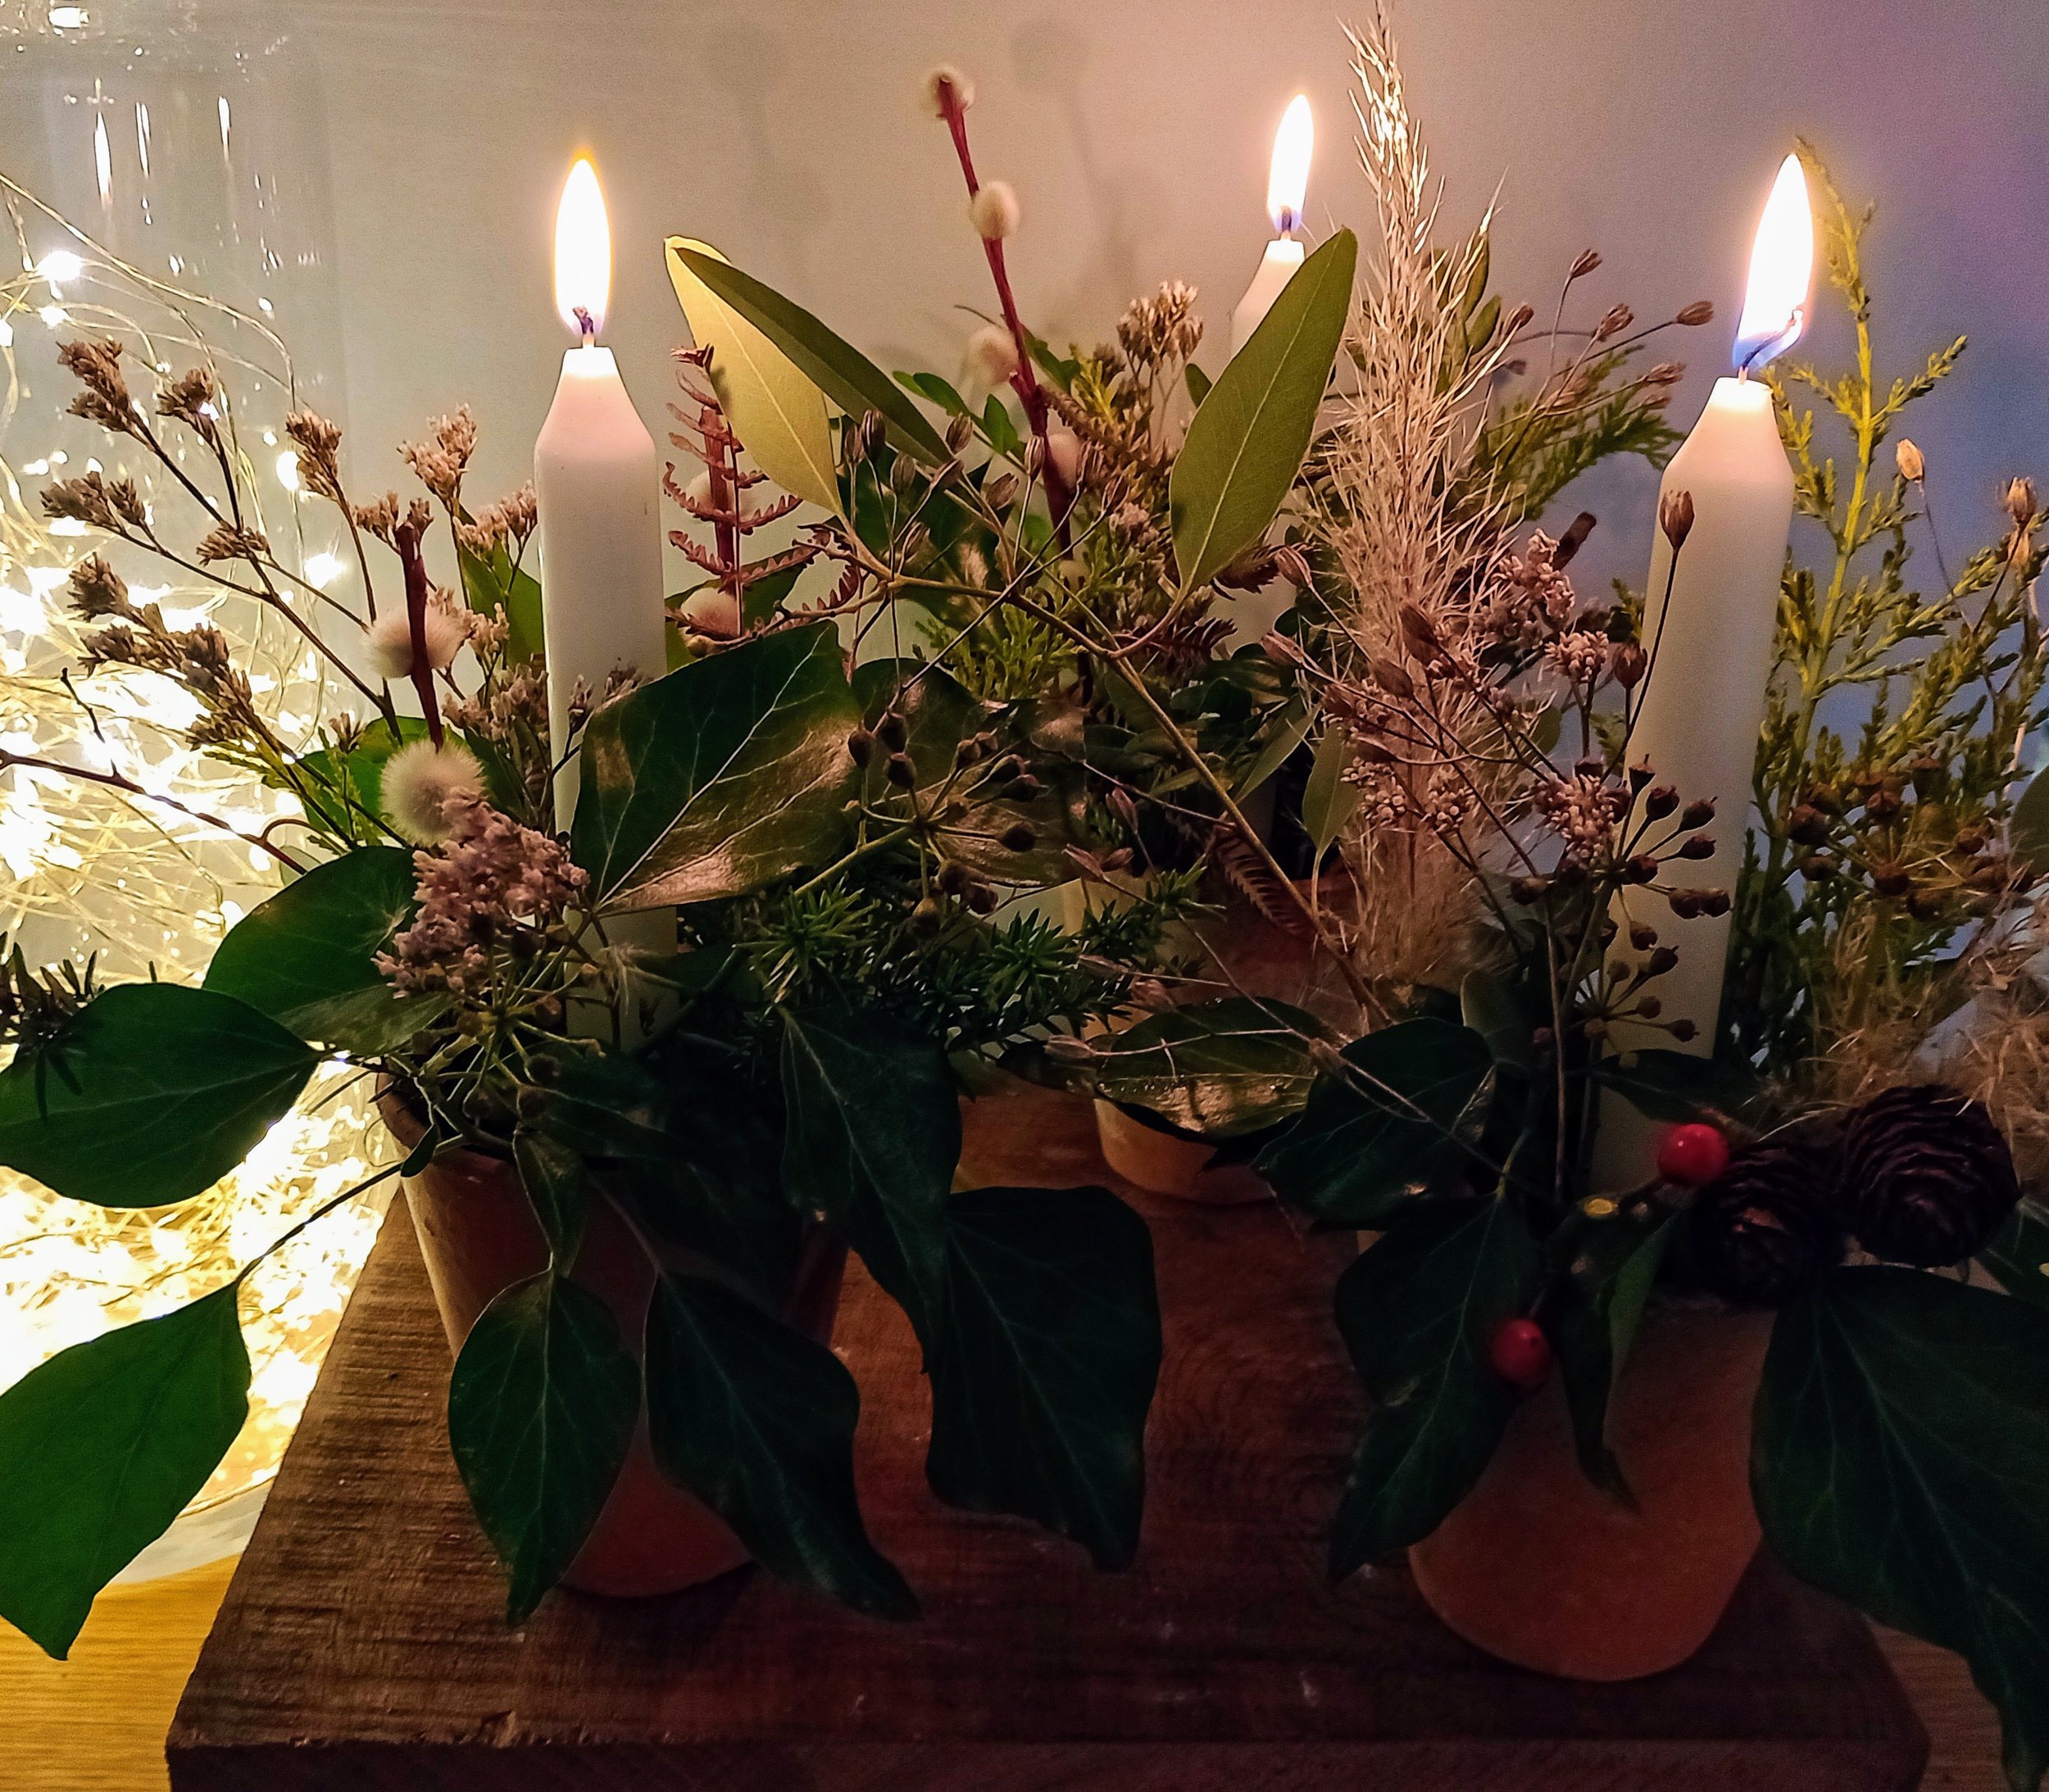
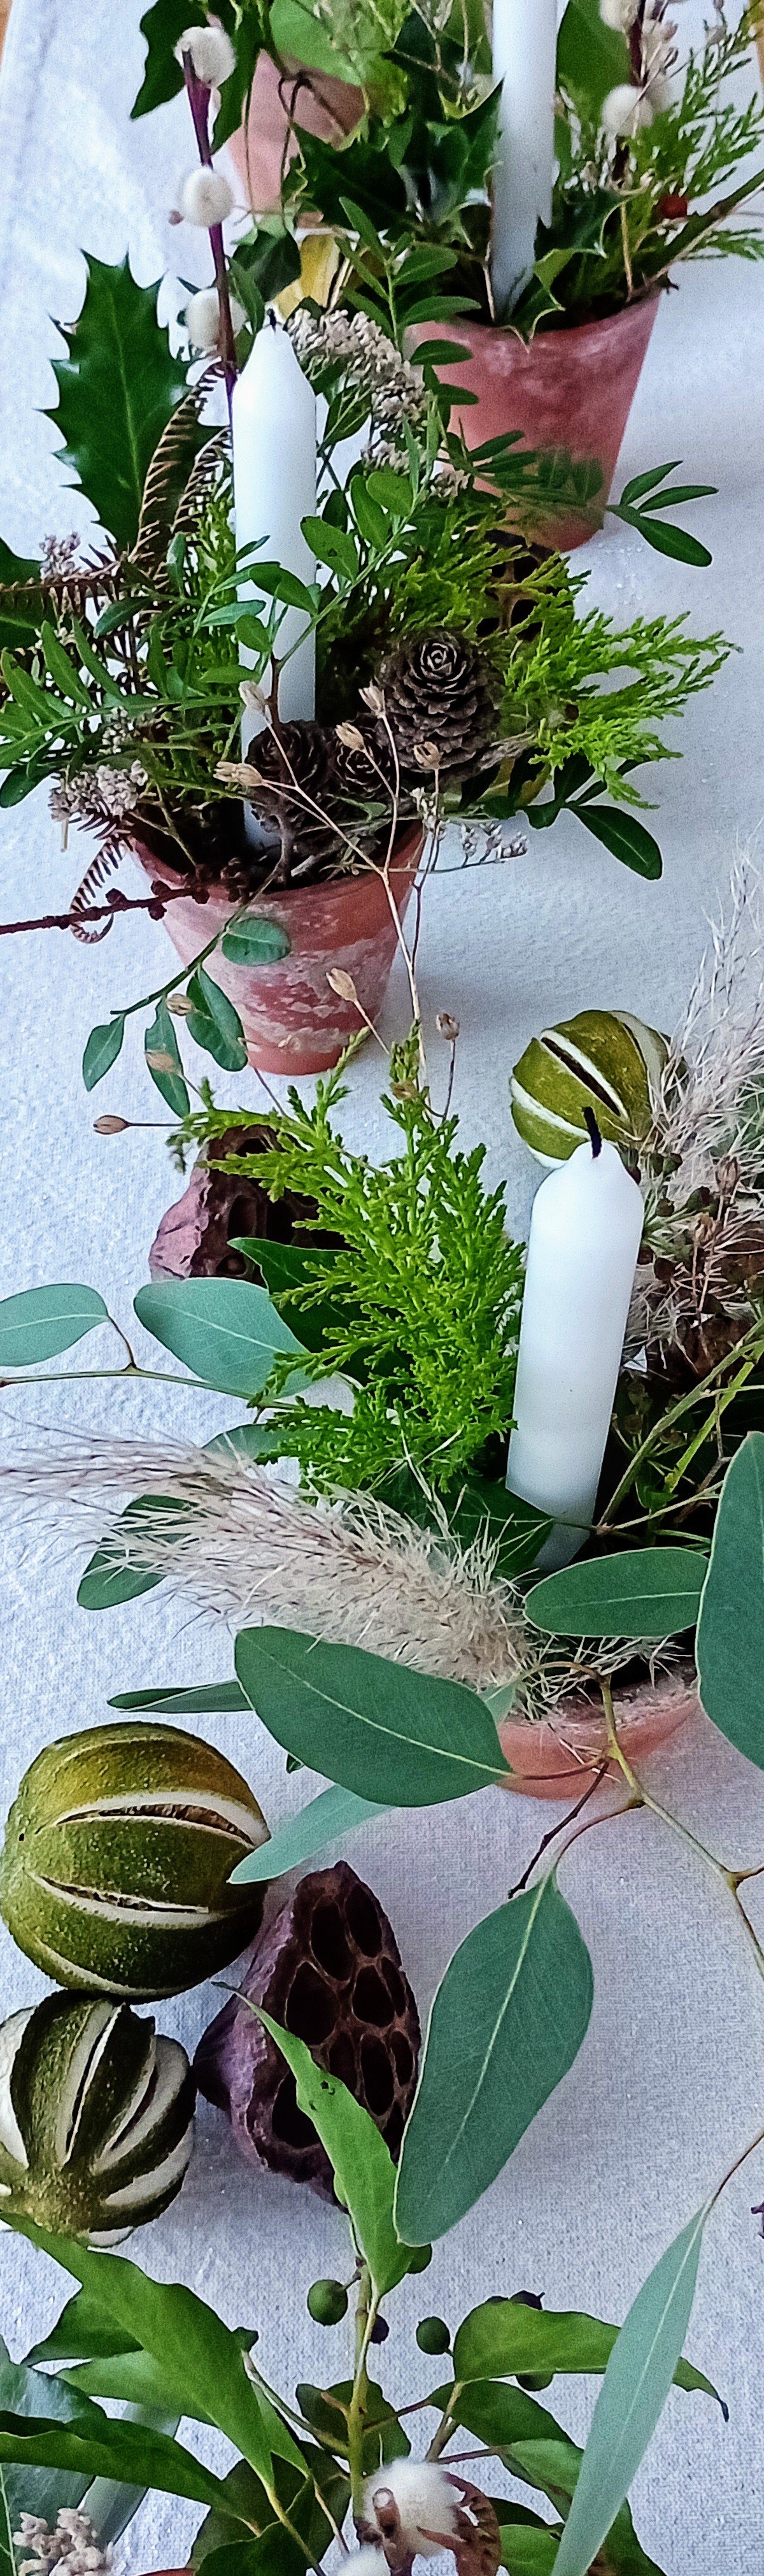
If you want a more rustic look, another inexpensive idea is to use small antique terracotta pots as candle holders.
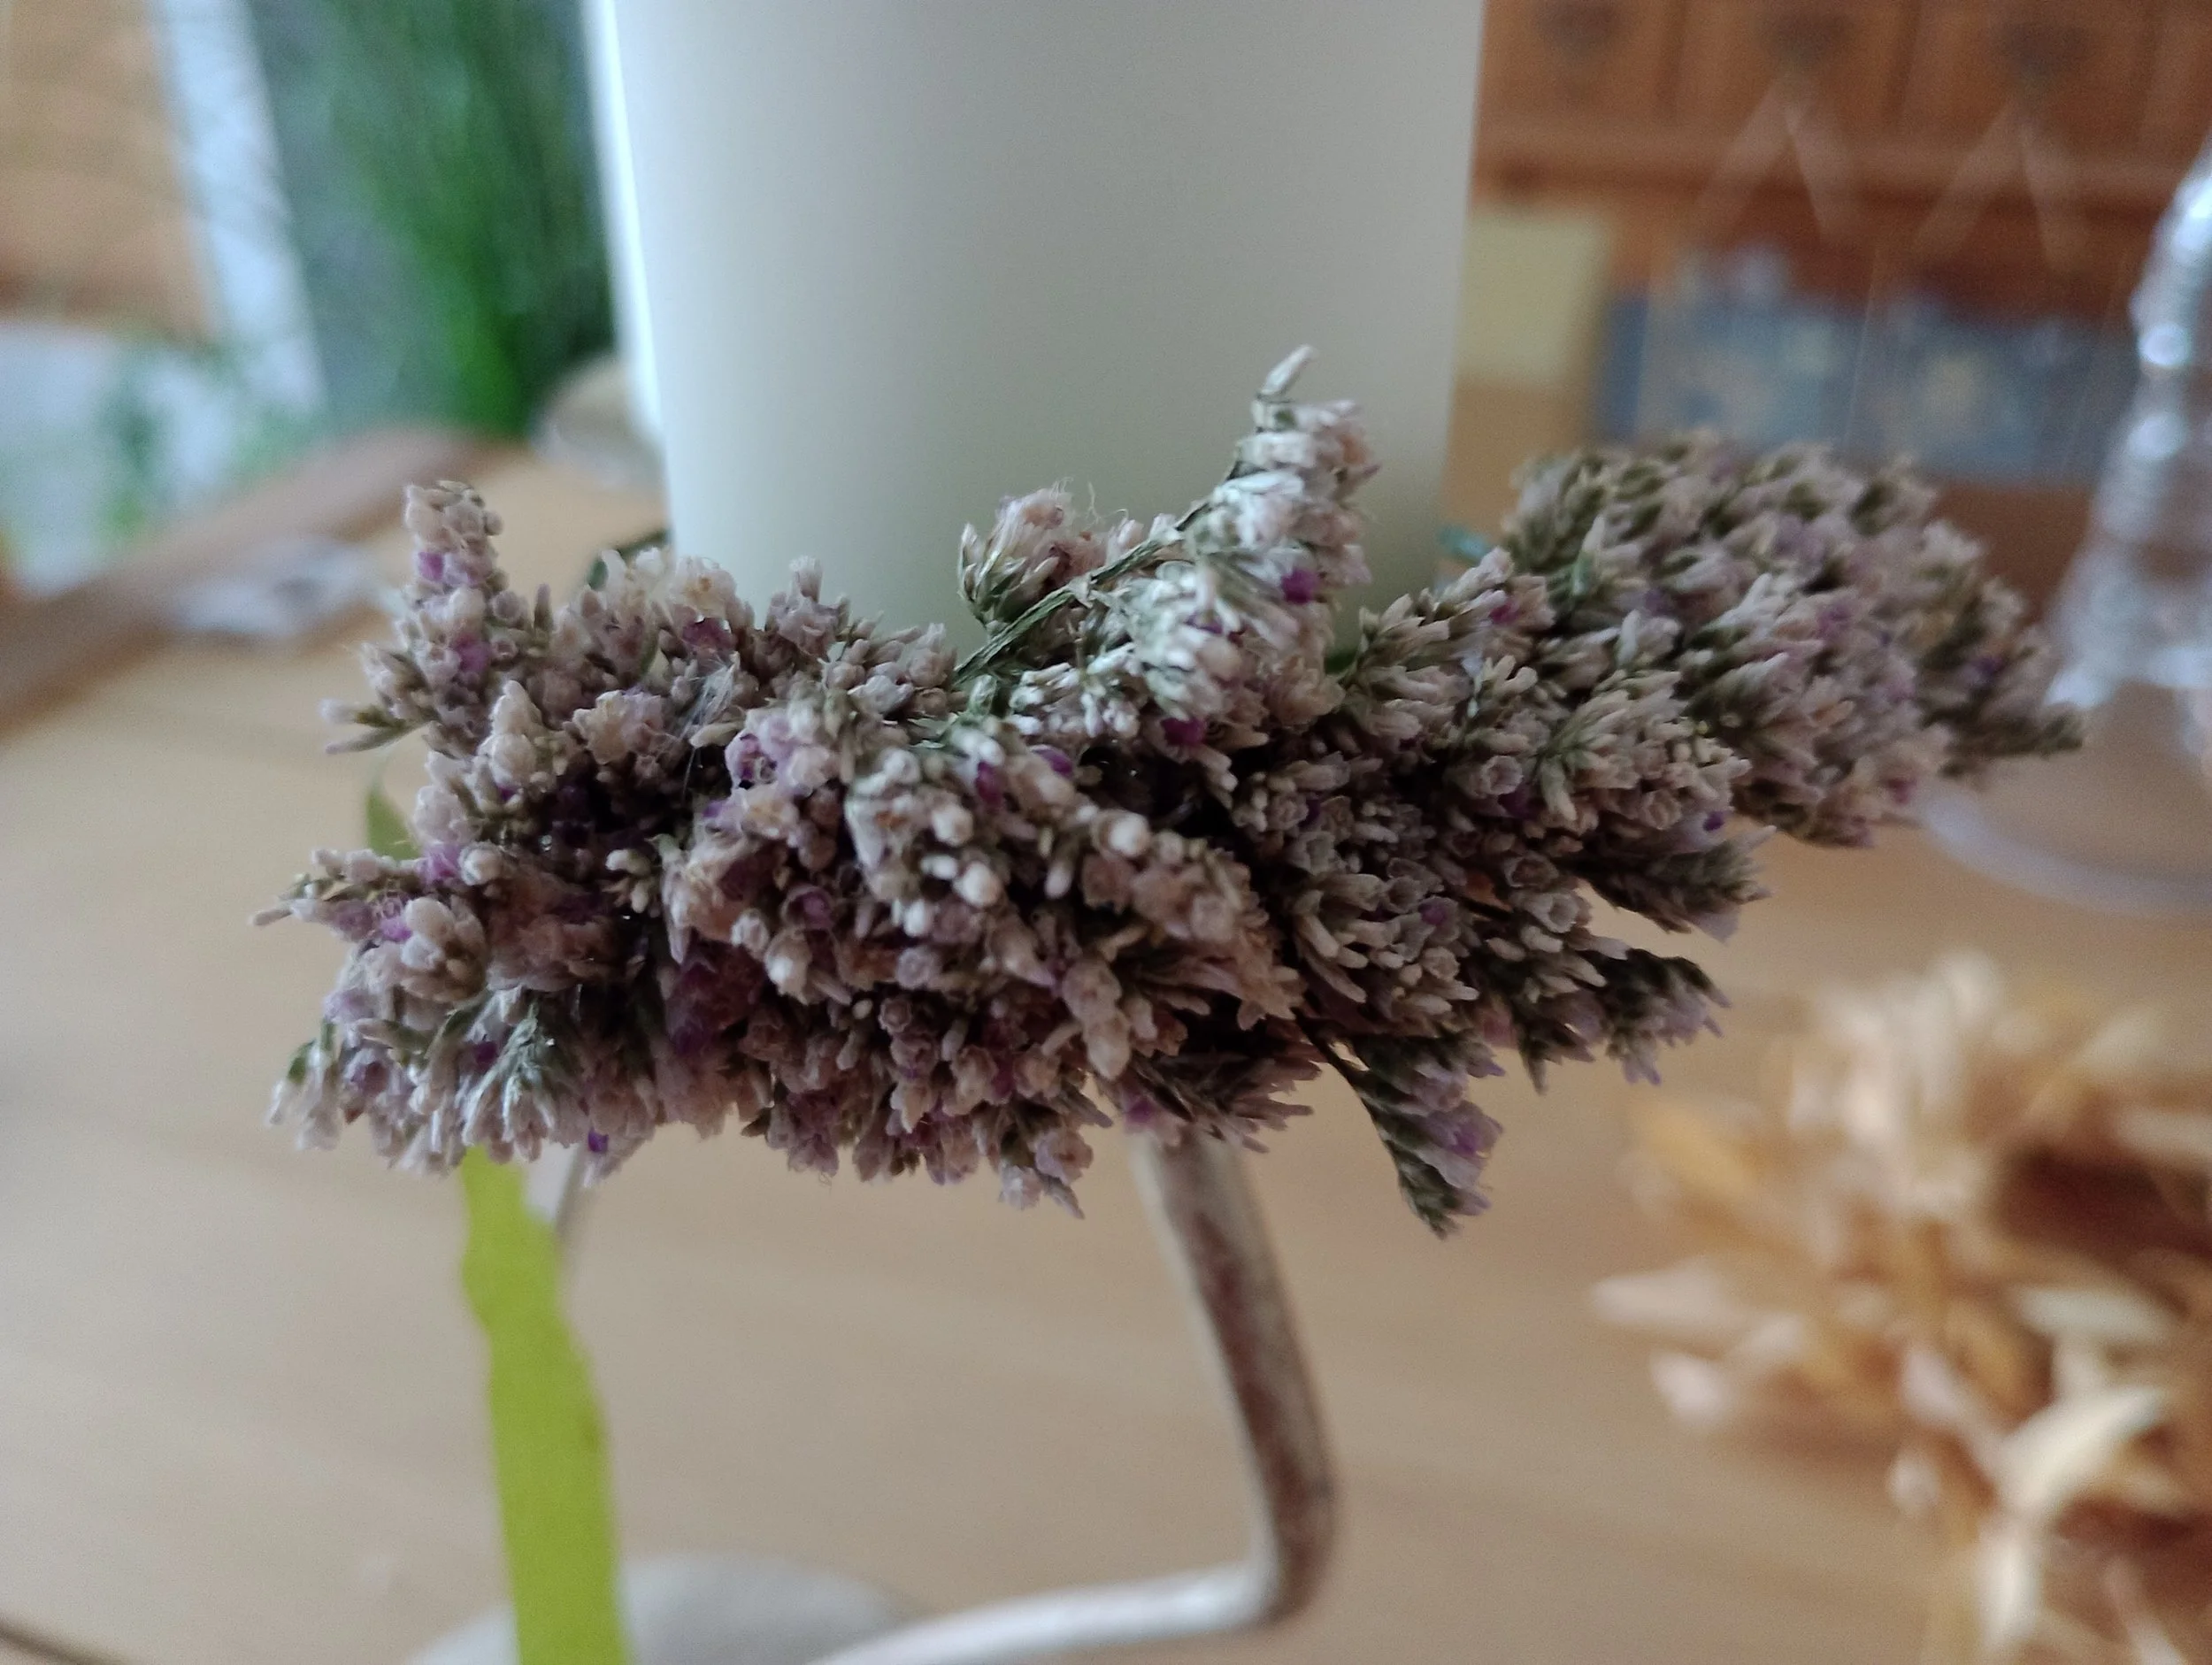
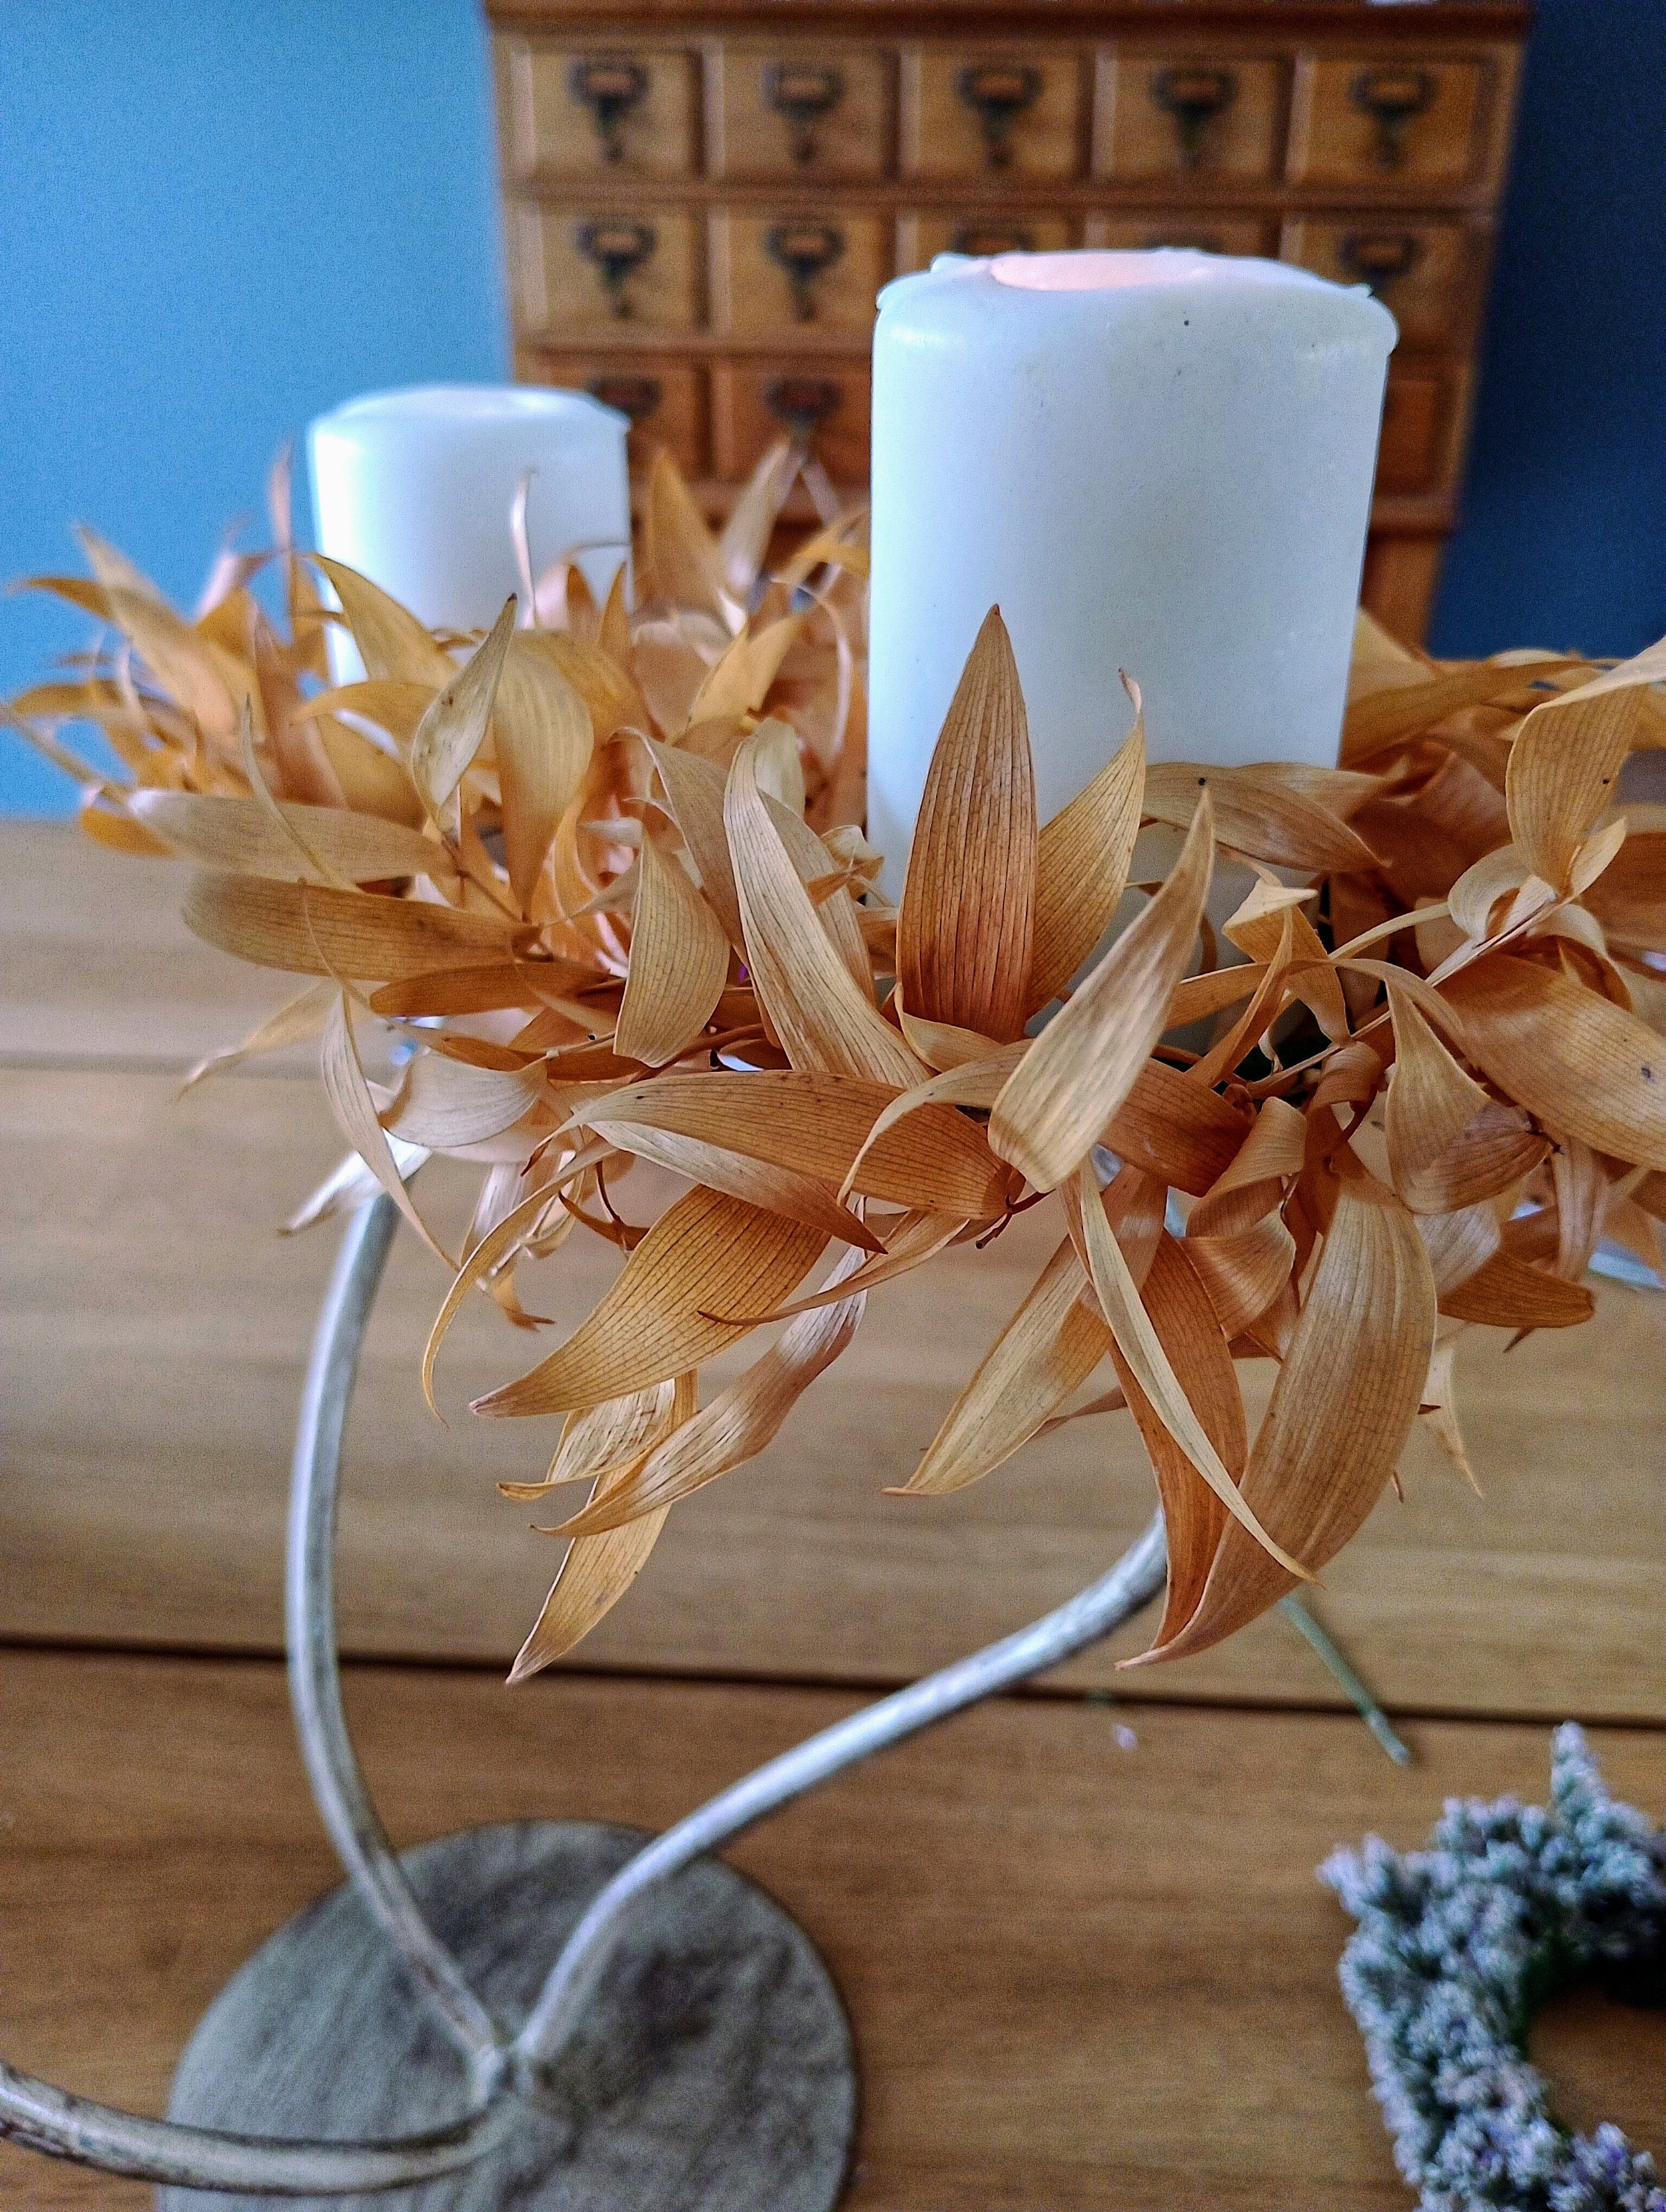
I purchased the ones below for a few pounds each from a local antique shop in Settle, North Yorkshire. I added moss to the pots, plastic candle holders with spikes (which I will reuse), small white candles (purchased for £4 from a local shop) and a mixture of foraged finds (Ivy, Connifer and Bracken) and some dried Limonium, Pussy Willow and Pampas Grass that I found in my workshop. I cut the foliage at an angle and inserted it into the moss. The moss holds the foliage in place and keeps the foliage moist.
Very simple and inexpensive and they look great dotted down a table!
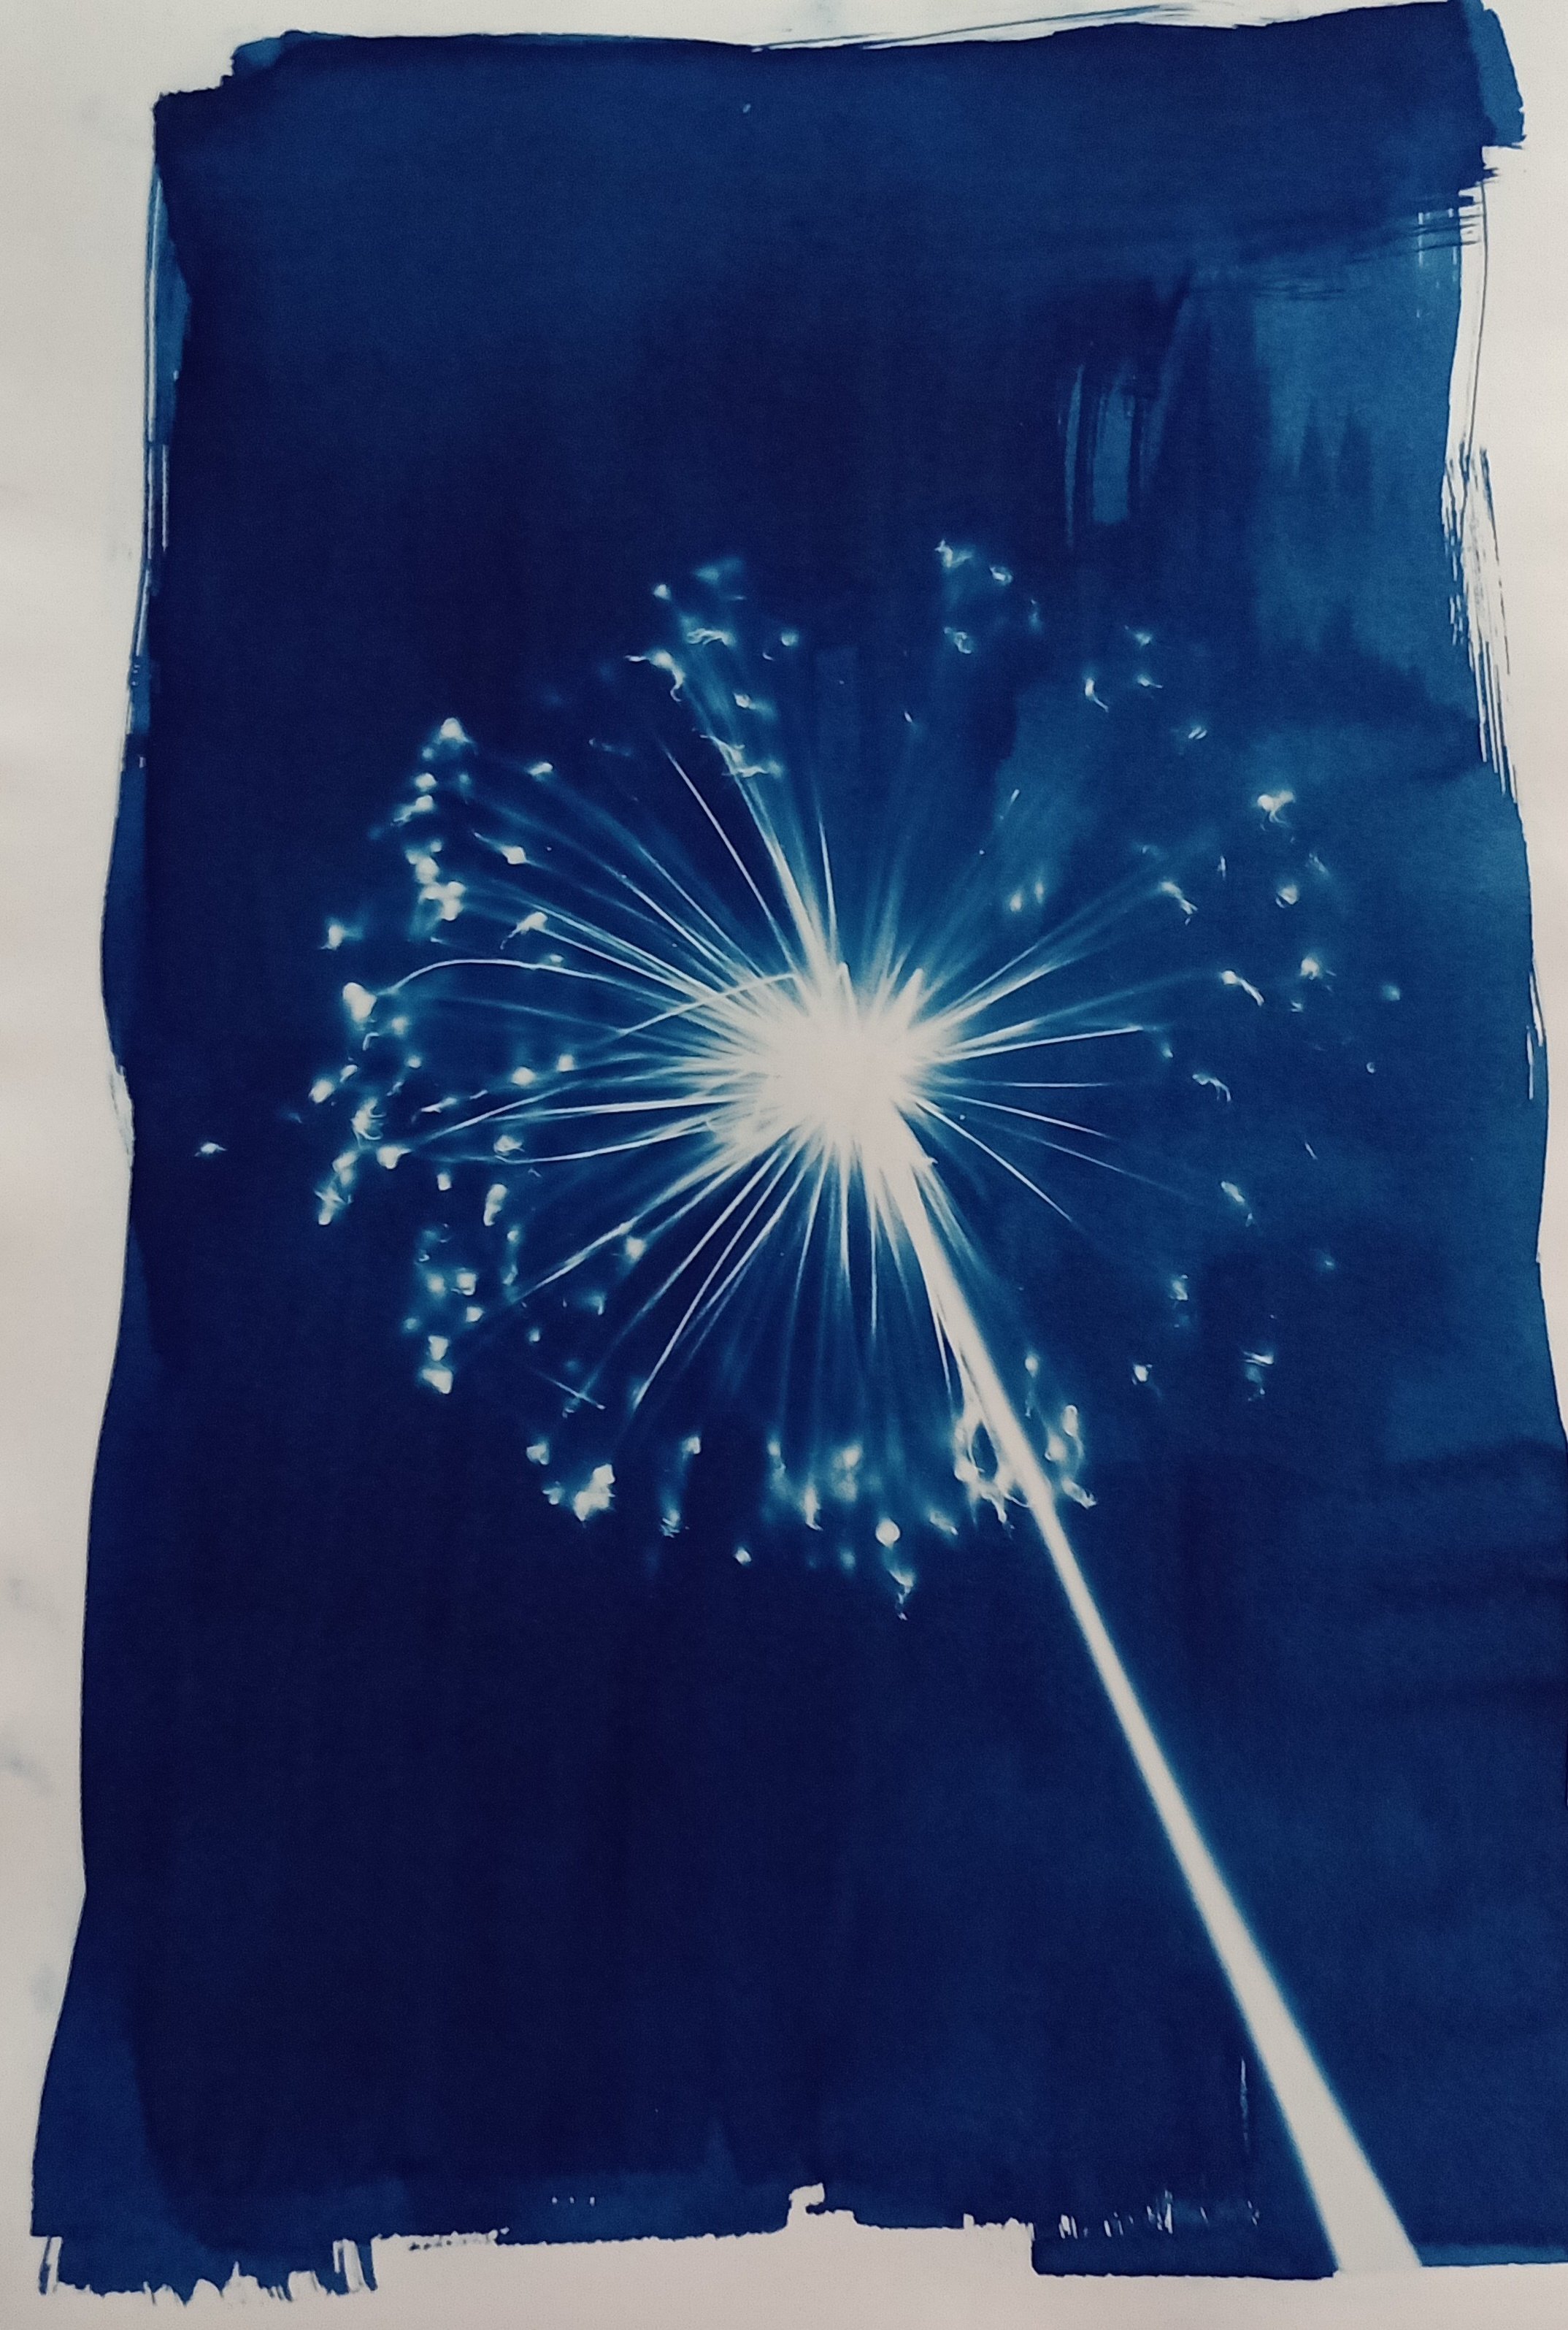
Making Pressed Flower Cyanotypes
Over the last few years, I have developed a love of pressing flowers. Whilst researching the history of pressing flowers, I came across an article on cyanotypes. Having always been interested in History, I was fascinated to read that cyanotypes were invented in 1842 by John Herschel and in 1843 the botanist, Anna Atkins, used cyanotype printing to create an album of algae specimens.

Allium Cyanotype (A3)
Over the last few years, I have developed a love of pressing flowers. Whilst researching the history of pressing flowers, I came across an article on cyanotypes. Cyanotype is a 180-year-old photographic printing process that produces prints of a dark blue colour. I was fascinated to read that cyanotypes were invented in 1842 by John Herschel and in 1843 the botanist, Anna Atkins, used cyanotype printing to create an album of algae specimens.
The cyanotypes created by Anna are simply beautiful. It was then that I wanted to learn as much as I could about creating cyanotypes with my pressed flowers. So, my research began and after some experimentation, I decided to make some for family and friends. I now sell them on my webshop.
I use the following:
Thick archival paper (A4 and A3 size).
Cyanotype chemicals.
A sponge brush or paint brush.
A large piece of MDF.
An A4 piece of glass.
Large clips/clamps.
Pressed Flowers and Ferns.
Sunshine!
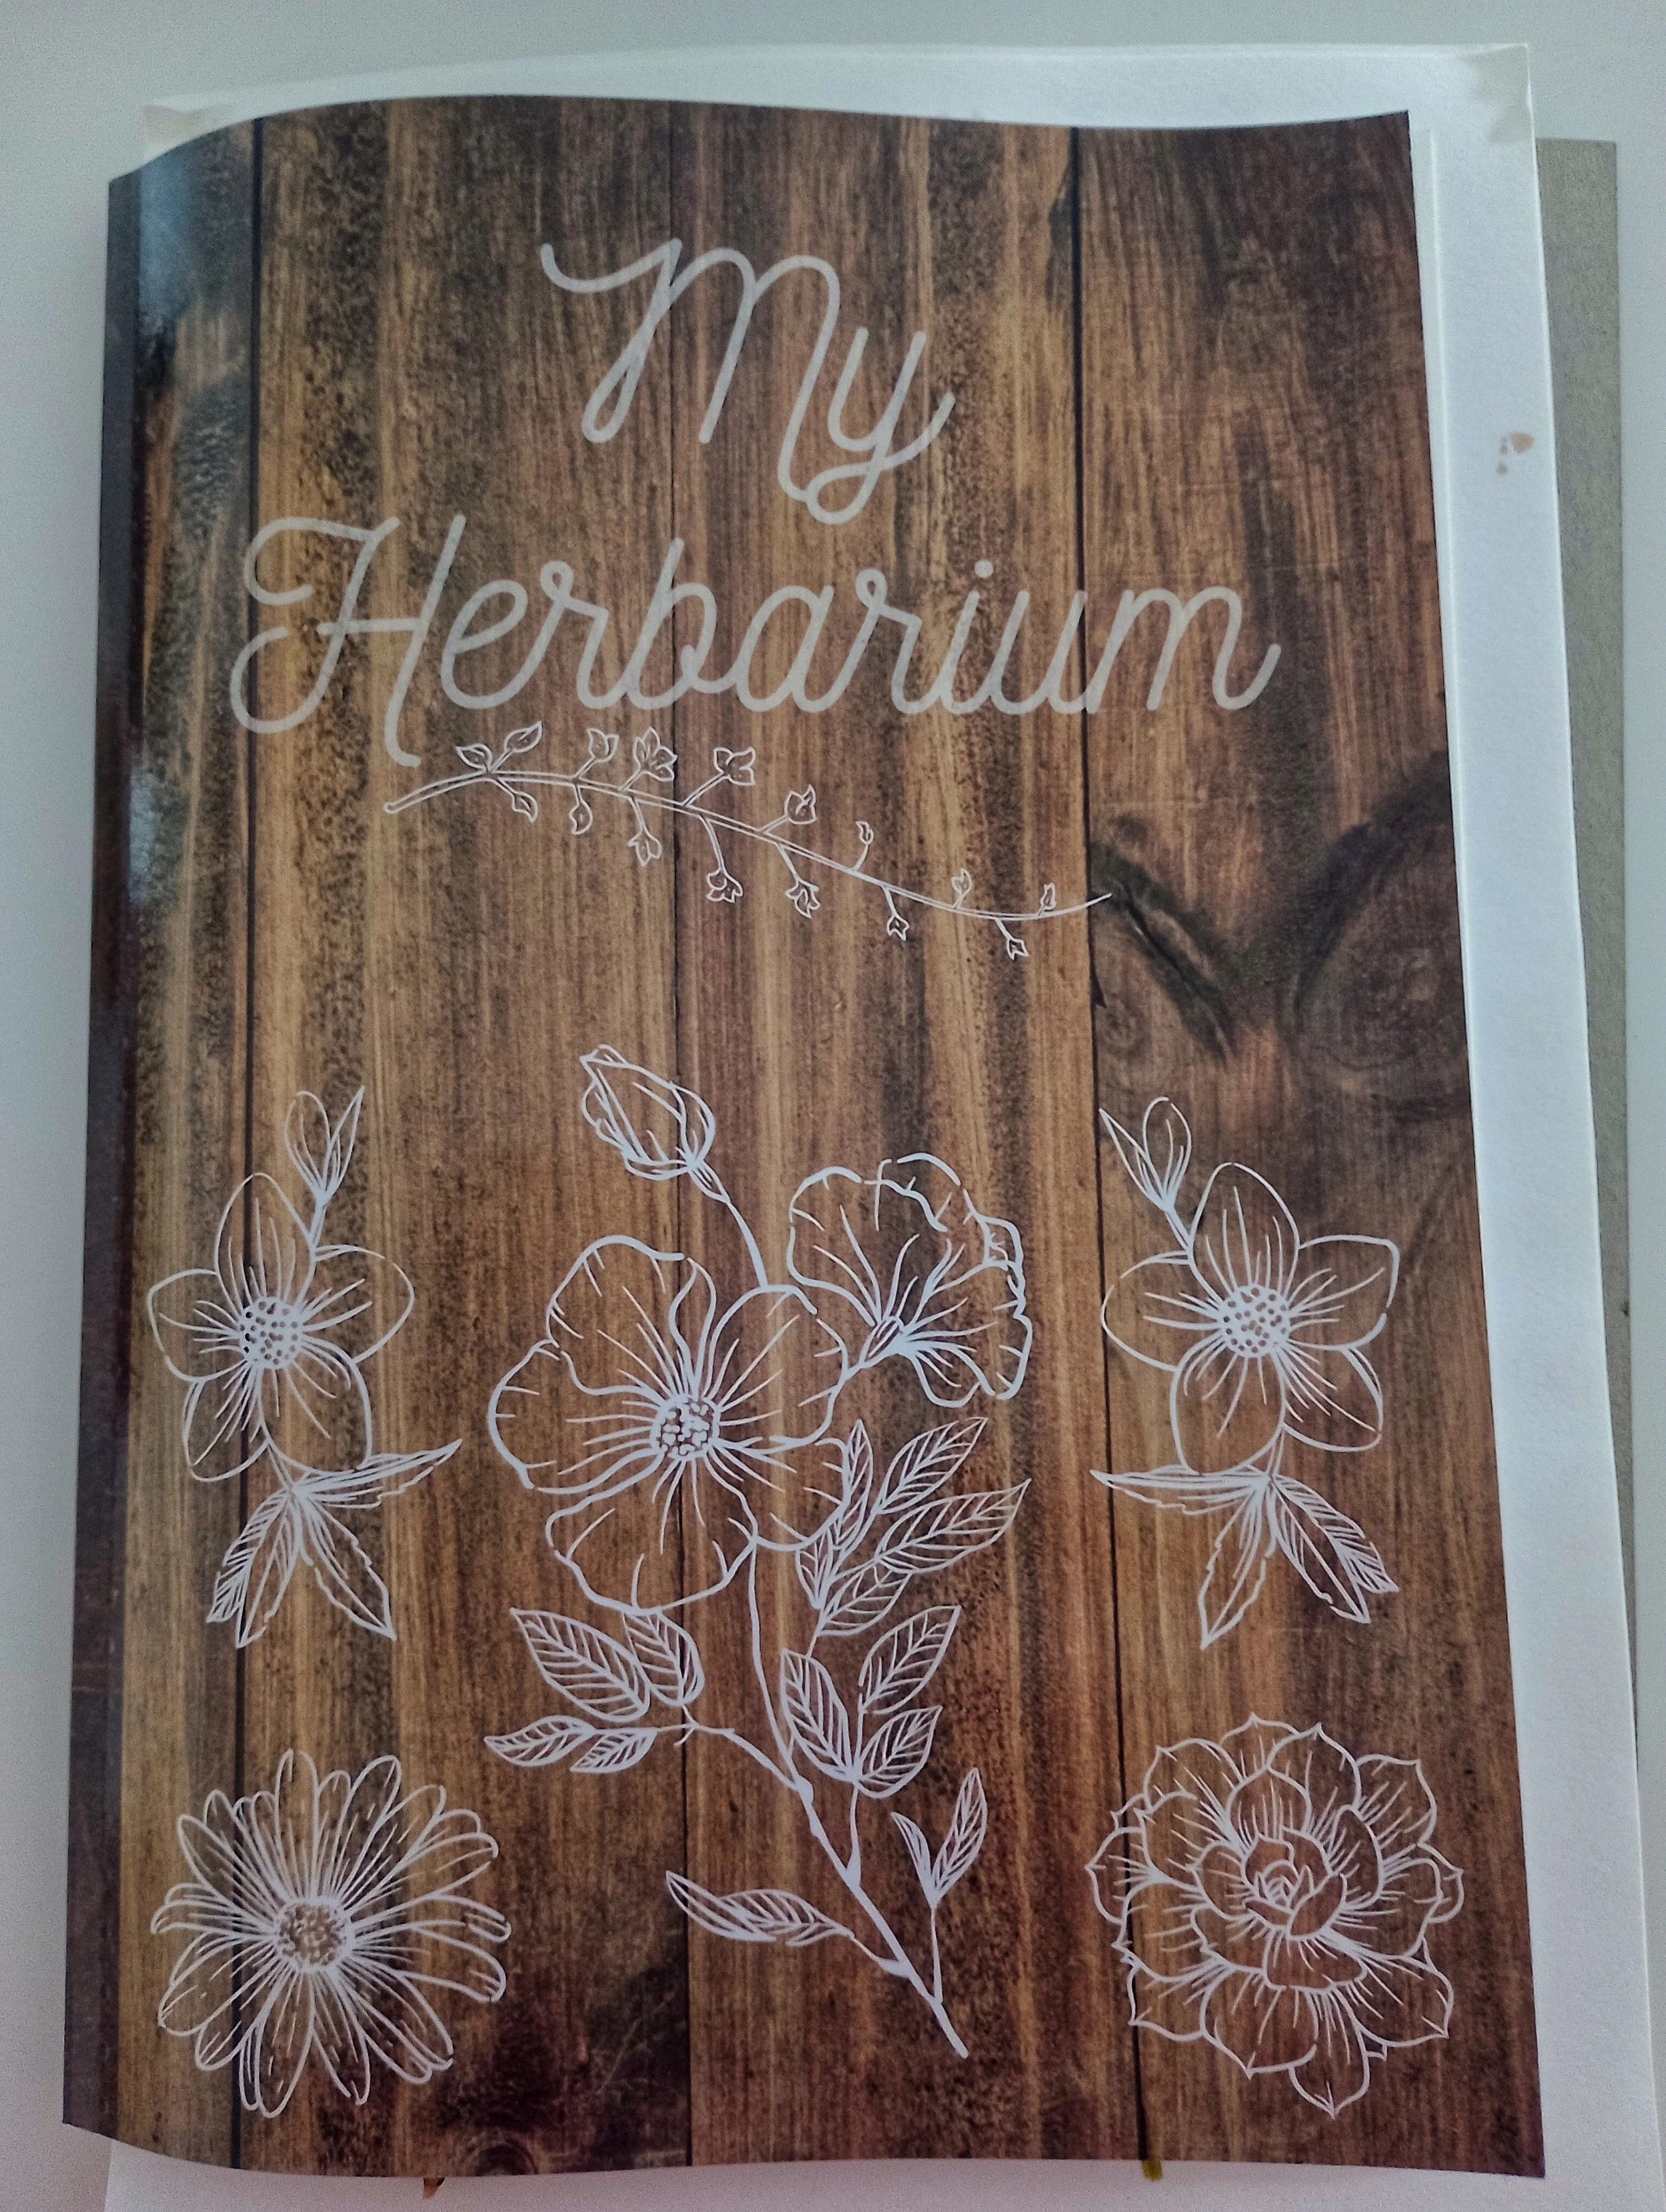
Firstly, I select the pressed flowers that I am going to use. I keep all my pressed flowers for making cyanotypes in ‘My Herbarium’ book.
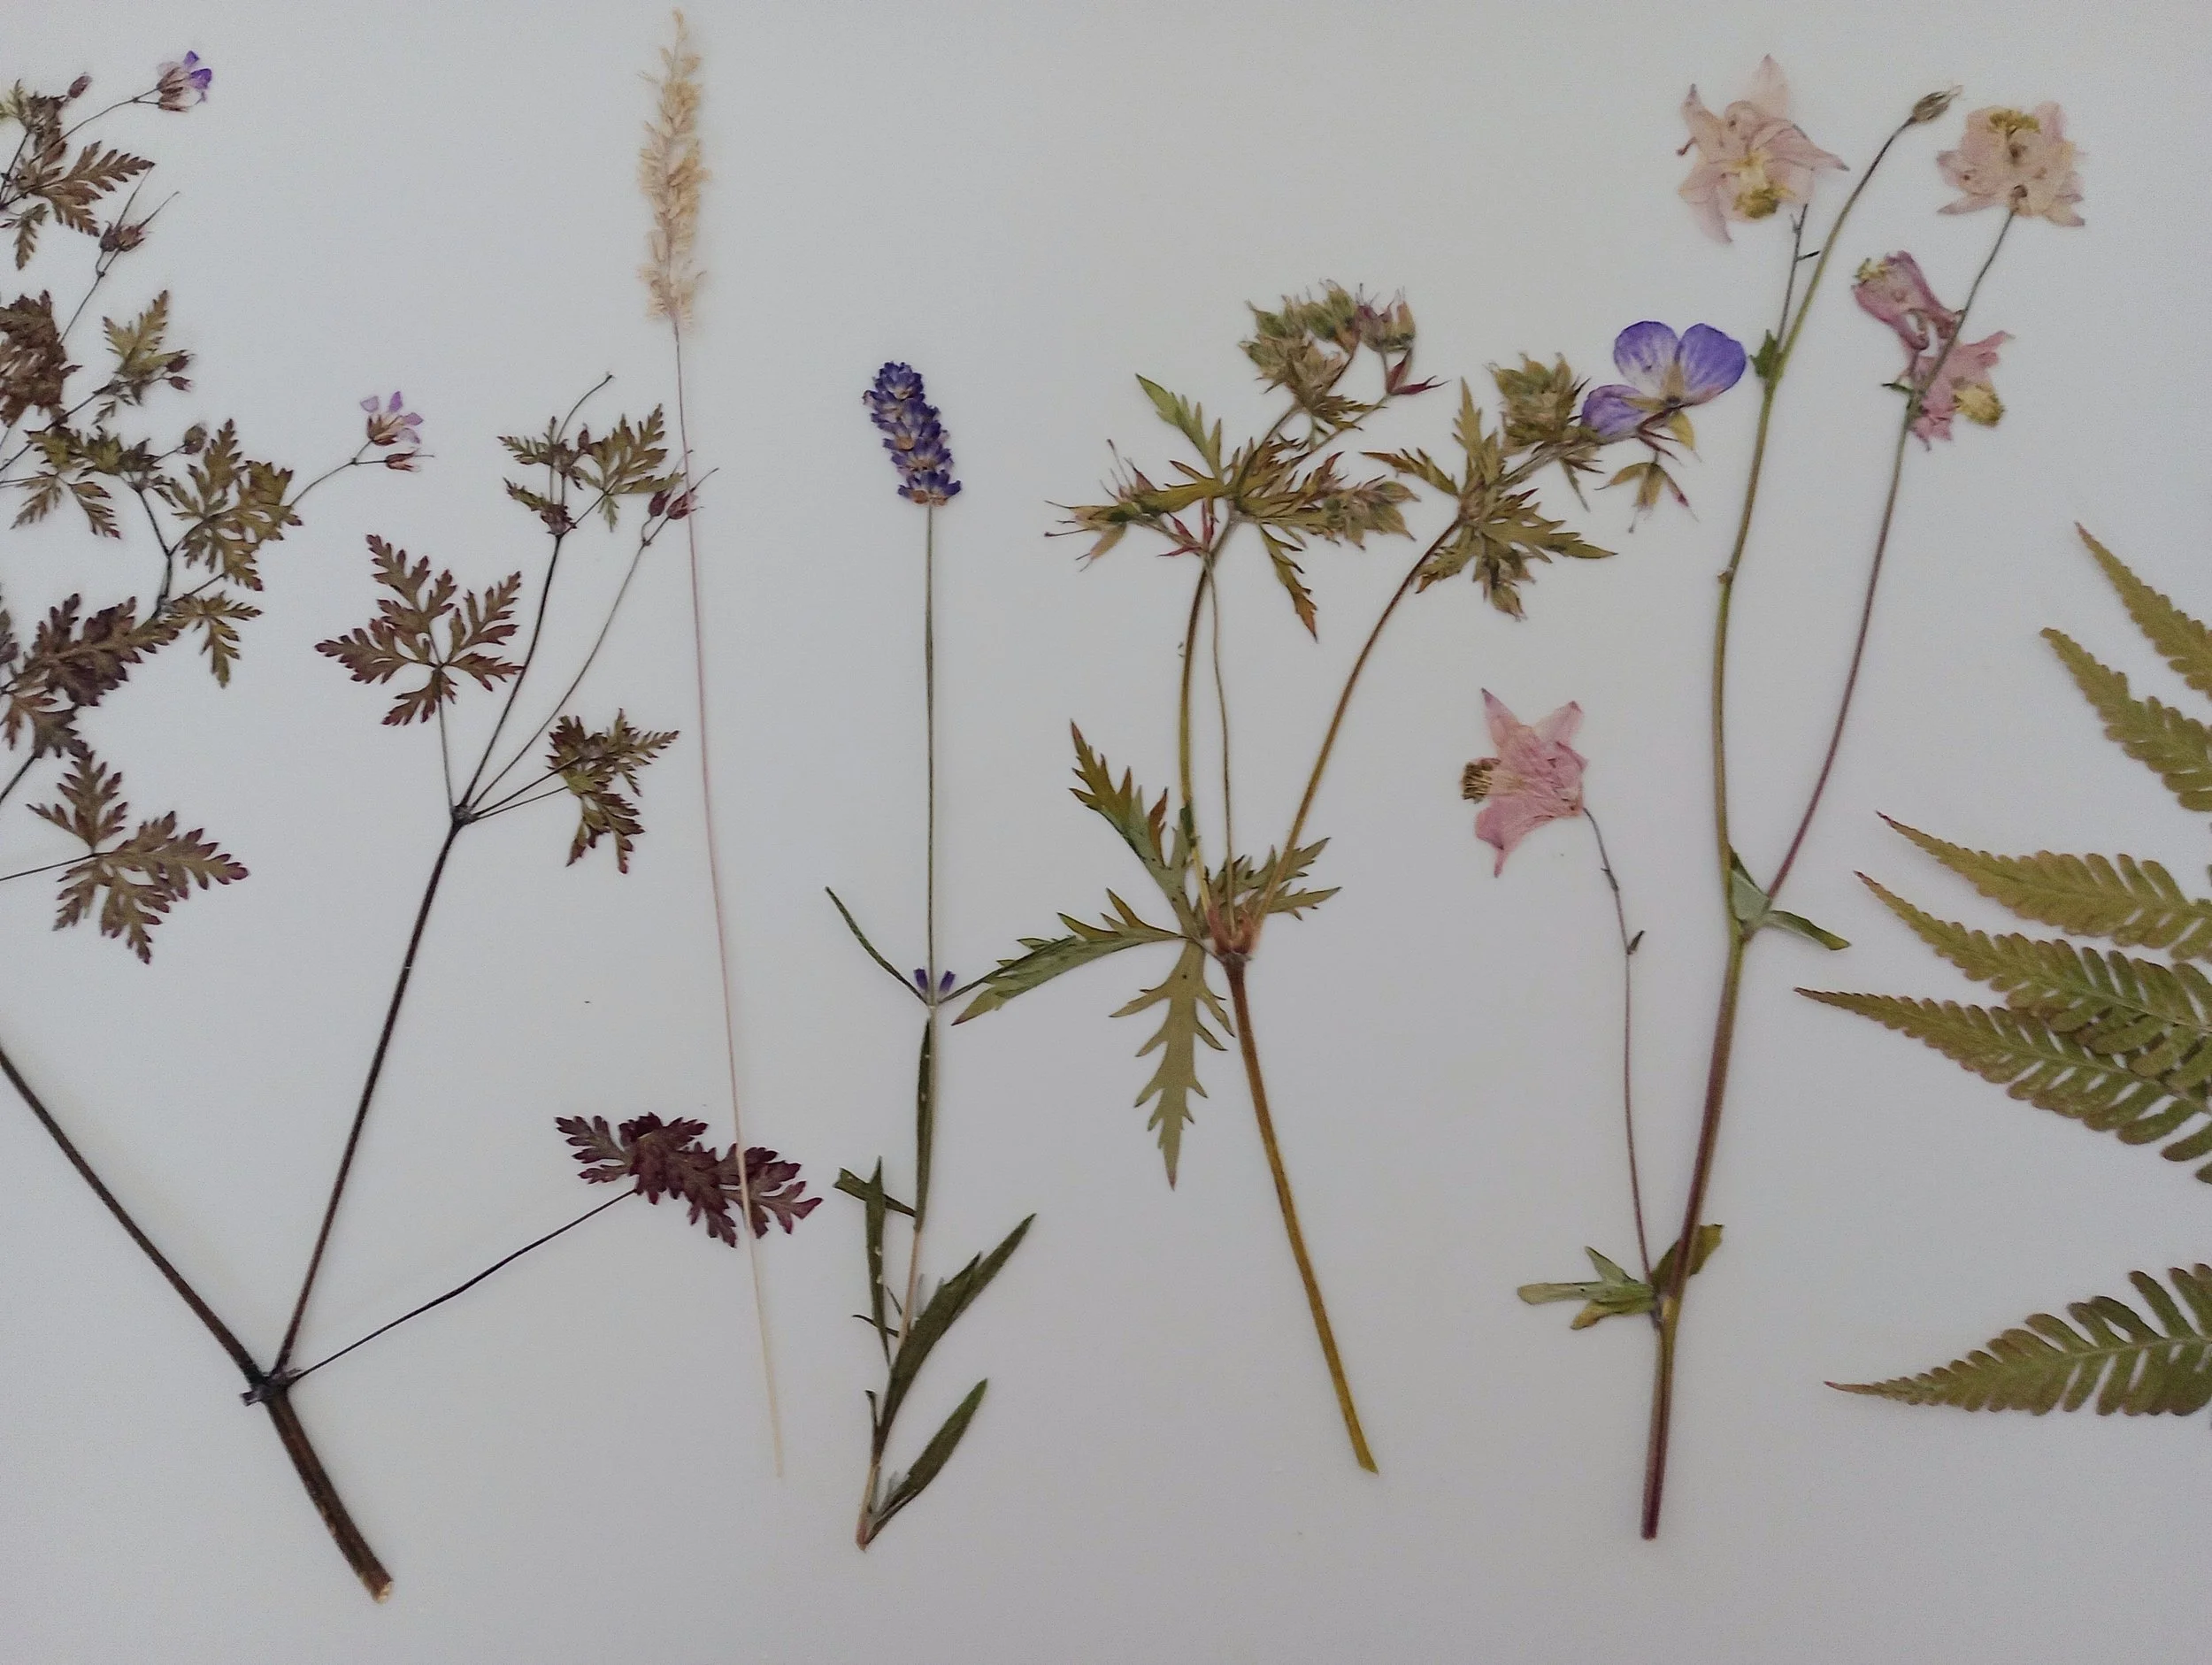
Selection of pressed flowers
I then prepare the paper. I hand-paint the solution onto the archival paper so that the brush strokes are visible in the final composition. I leave the paper to dry in my workshop overnight. My workshop has no windows and no natural light, so it is ideal. It is important not to expose the paper to UV light. I typically prepare 20-30 sheets of paper at a time. I then store them in a light-proof bag until I am ready to use or until the sun comes out!
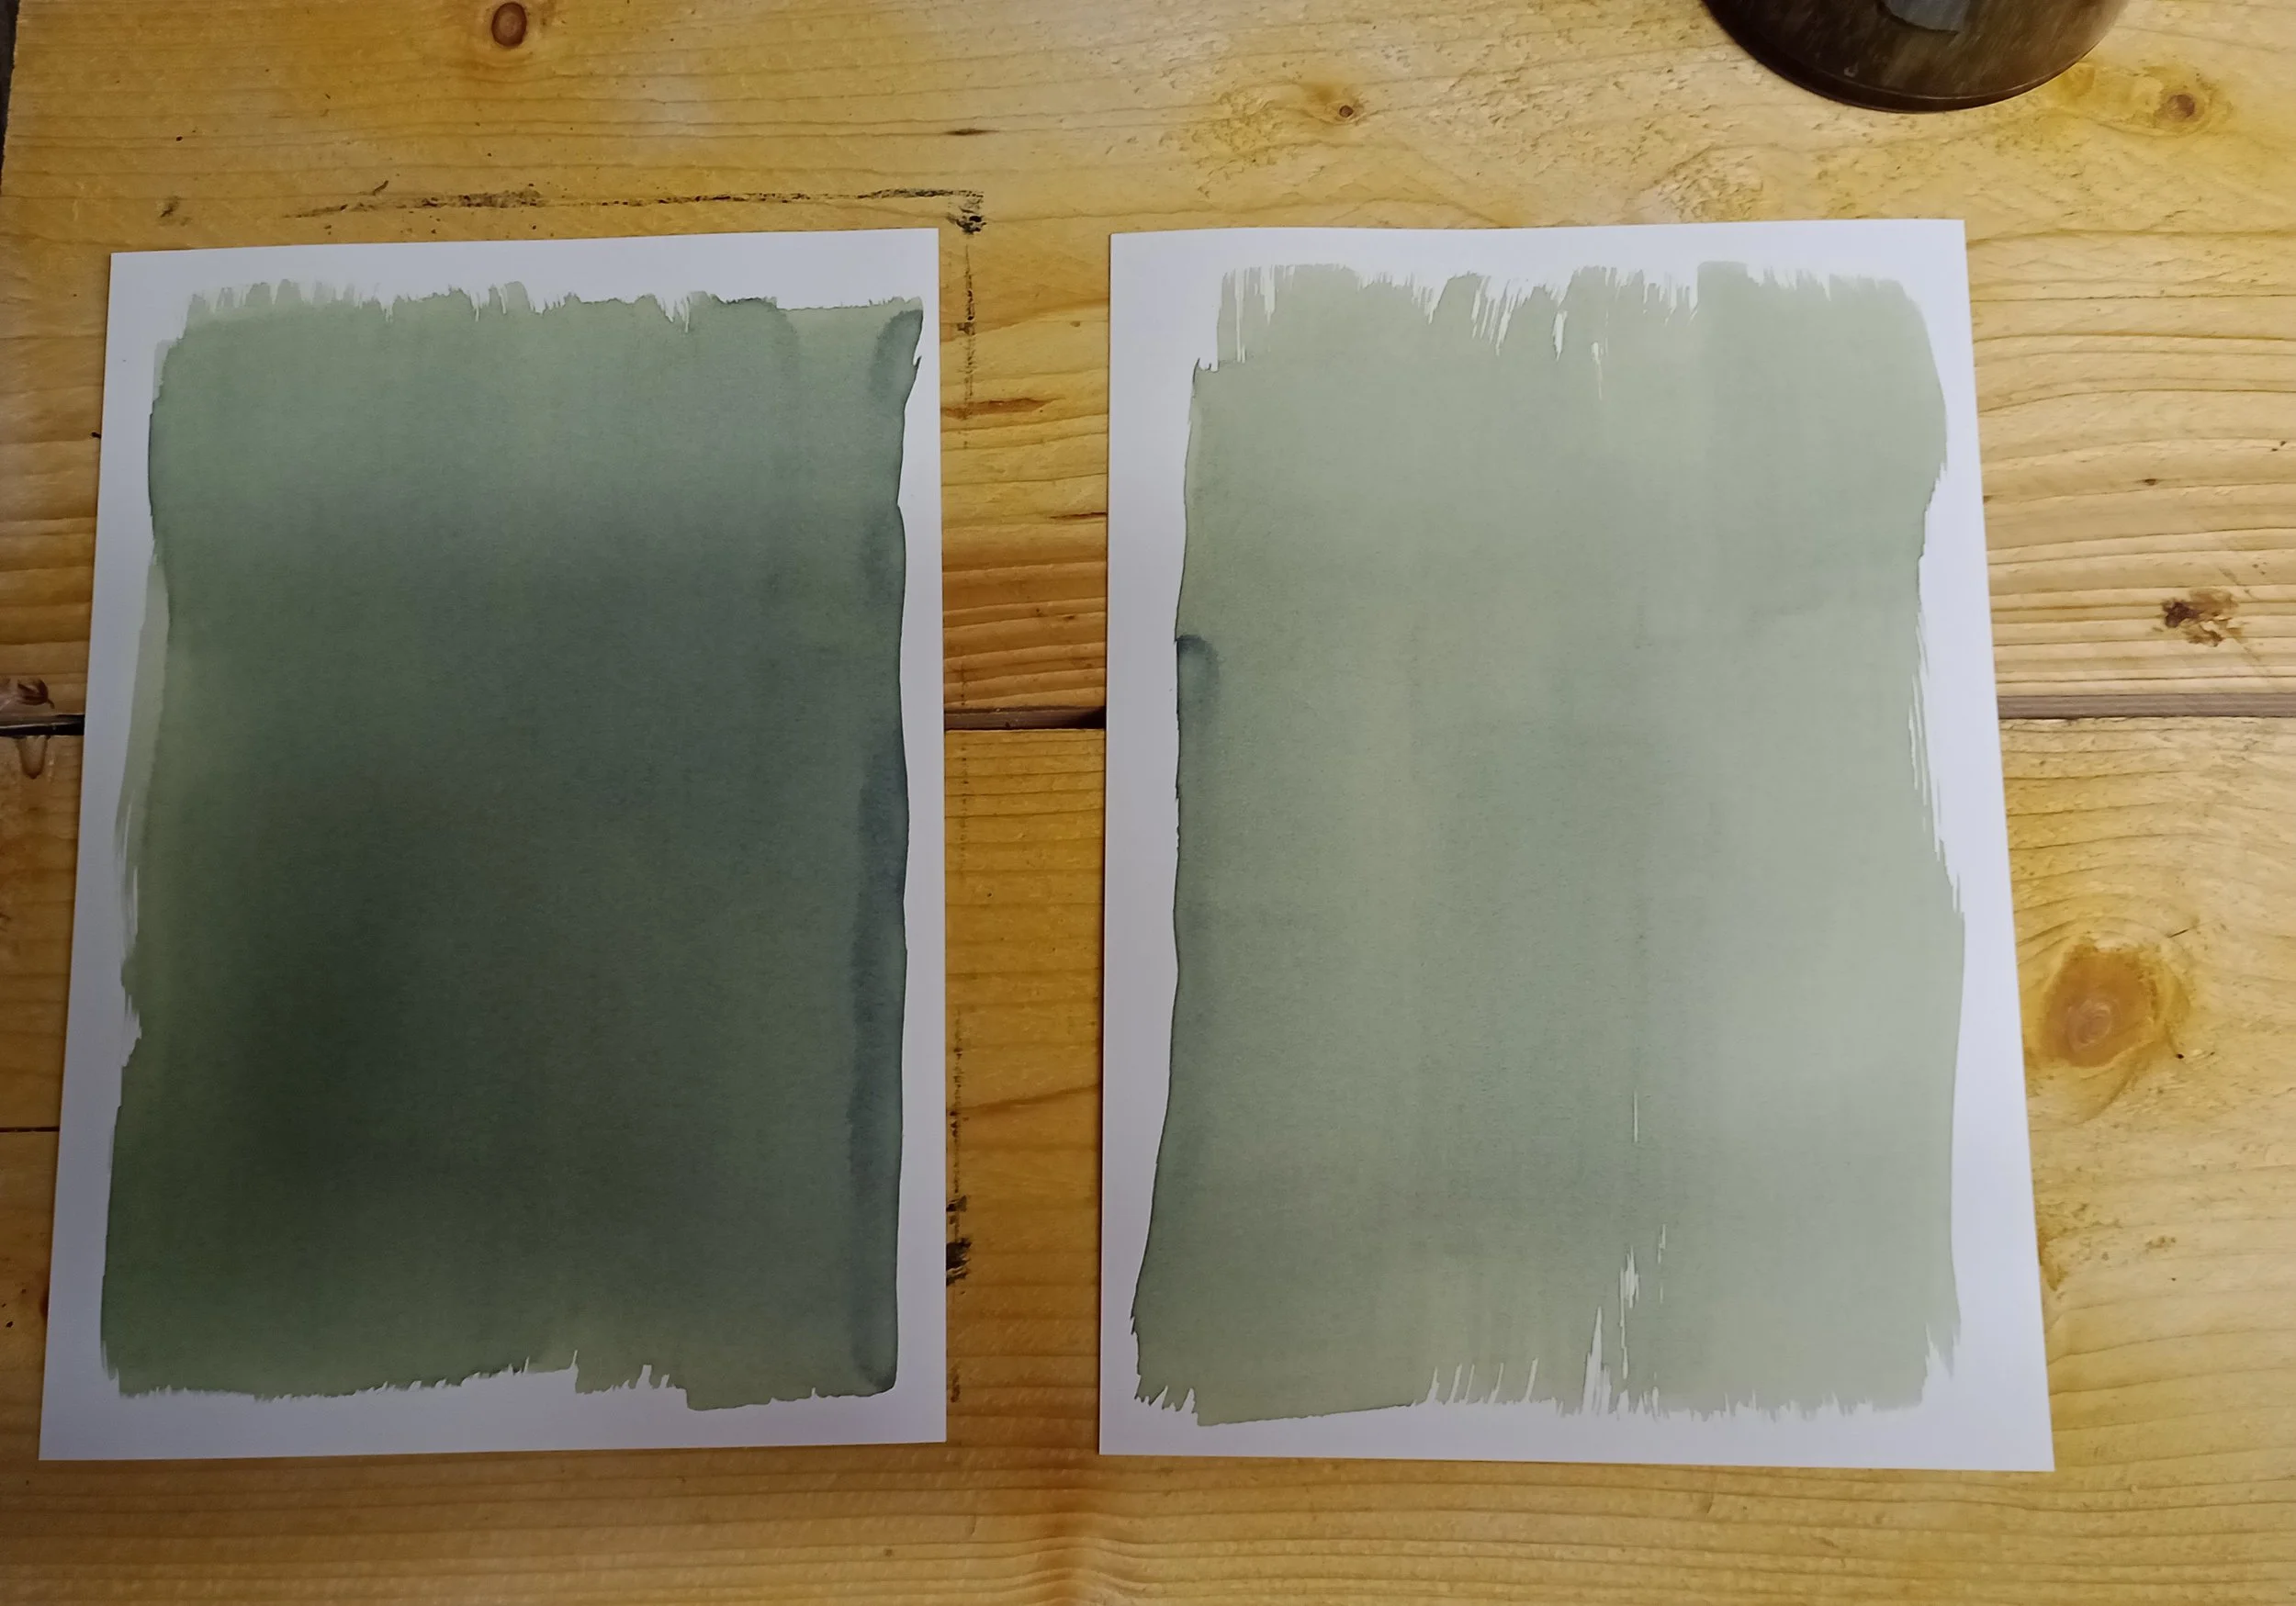
Preparing the paper
Once the paper has been left to dry overnight, I position the flowers onto the paper. The paper and flowers are then placed under glass and exposed to sunlight for approximately 10 minutes (longer on a cloudy day). The dried flowers in the image below are Nigella.

Exposure to the sun
Once the paper has been exposed to the sun, I rinse the paper in water for around 10 minutes.
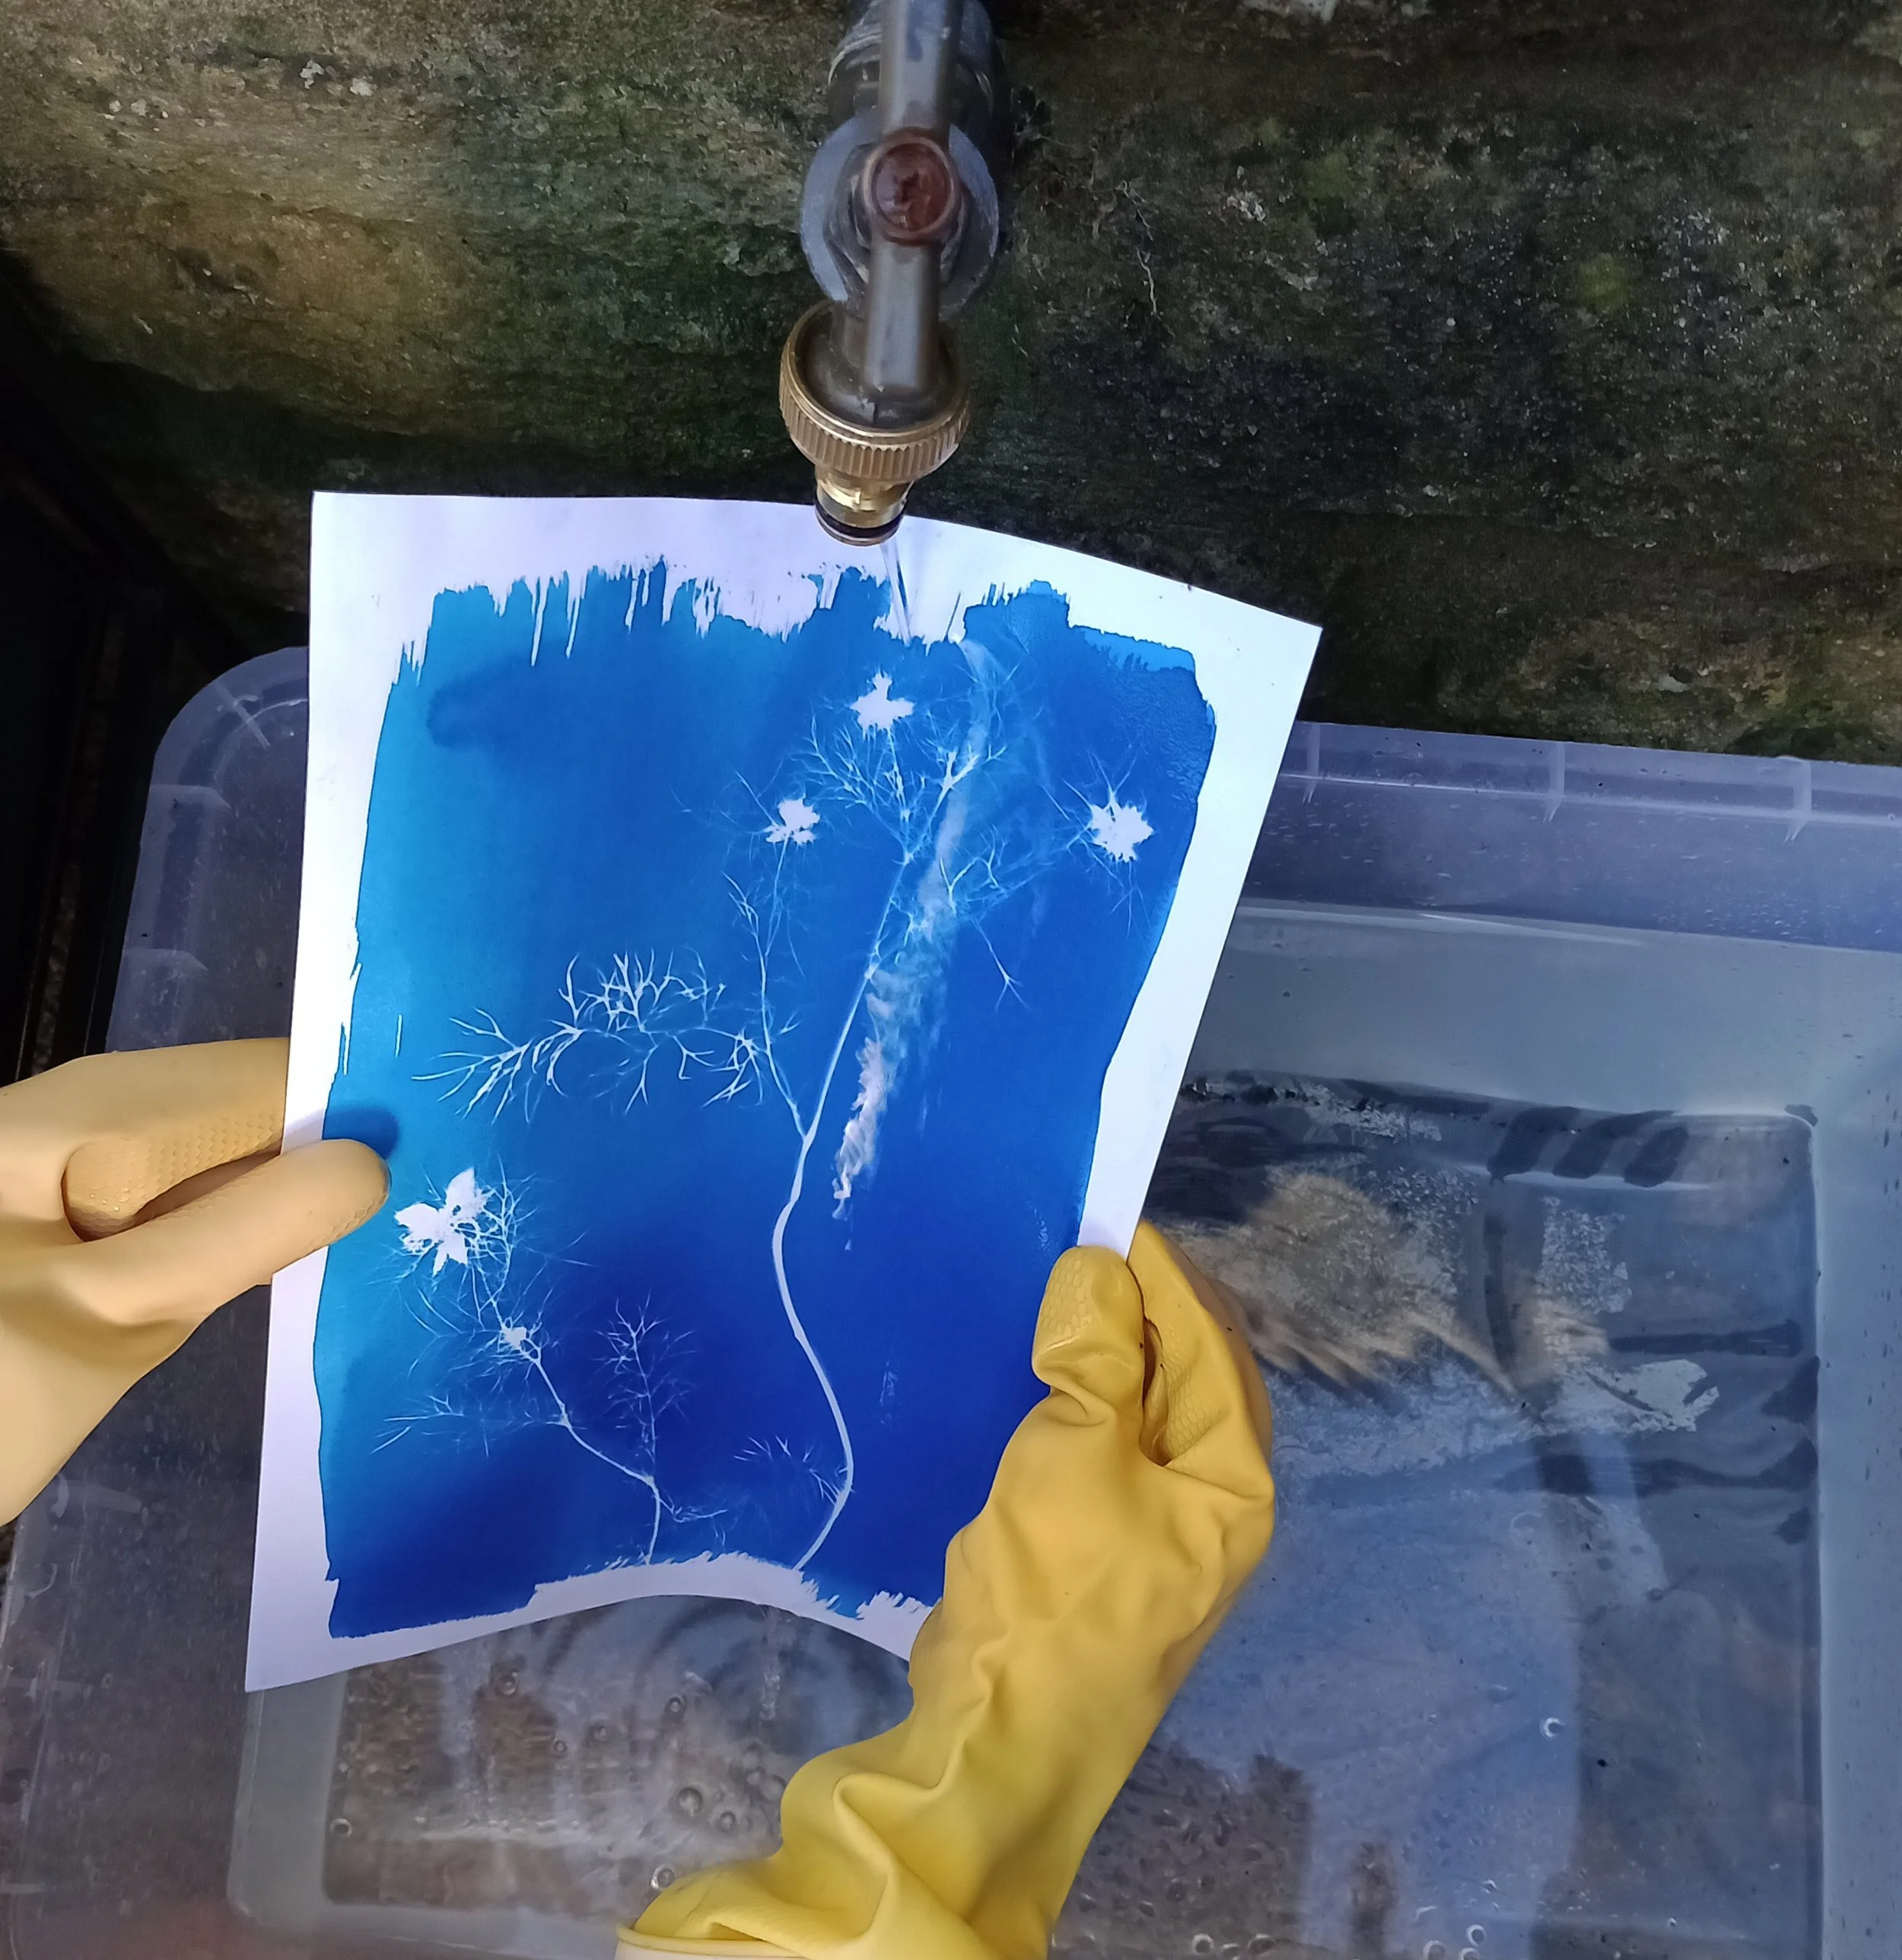
Once all of the chemicals have been washed off, the cyanotype is then left to dry overnight. As they dry a deeper blue colour emerges.
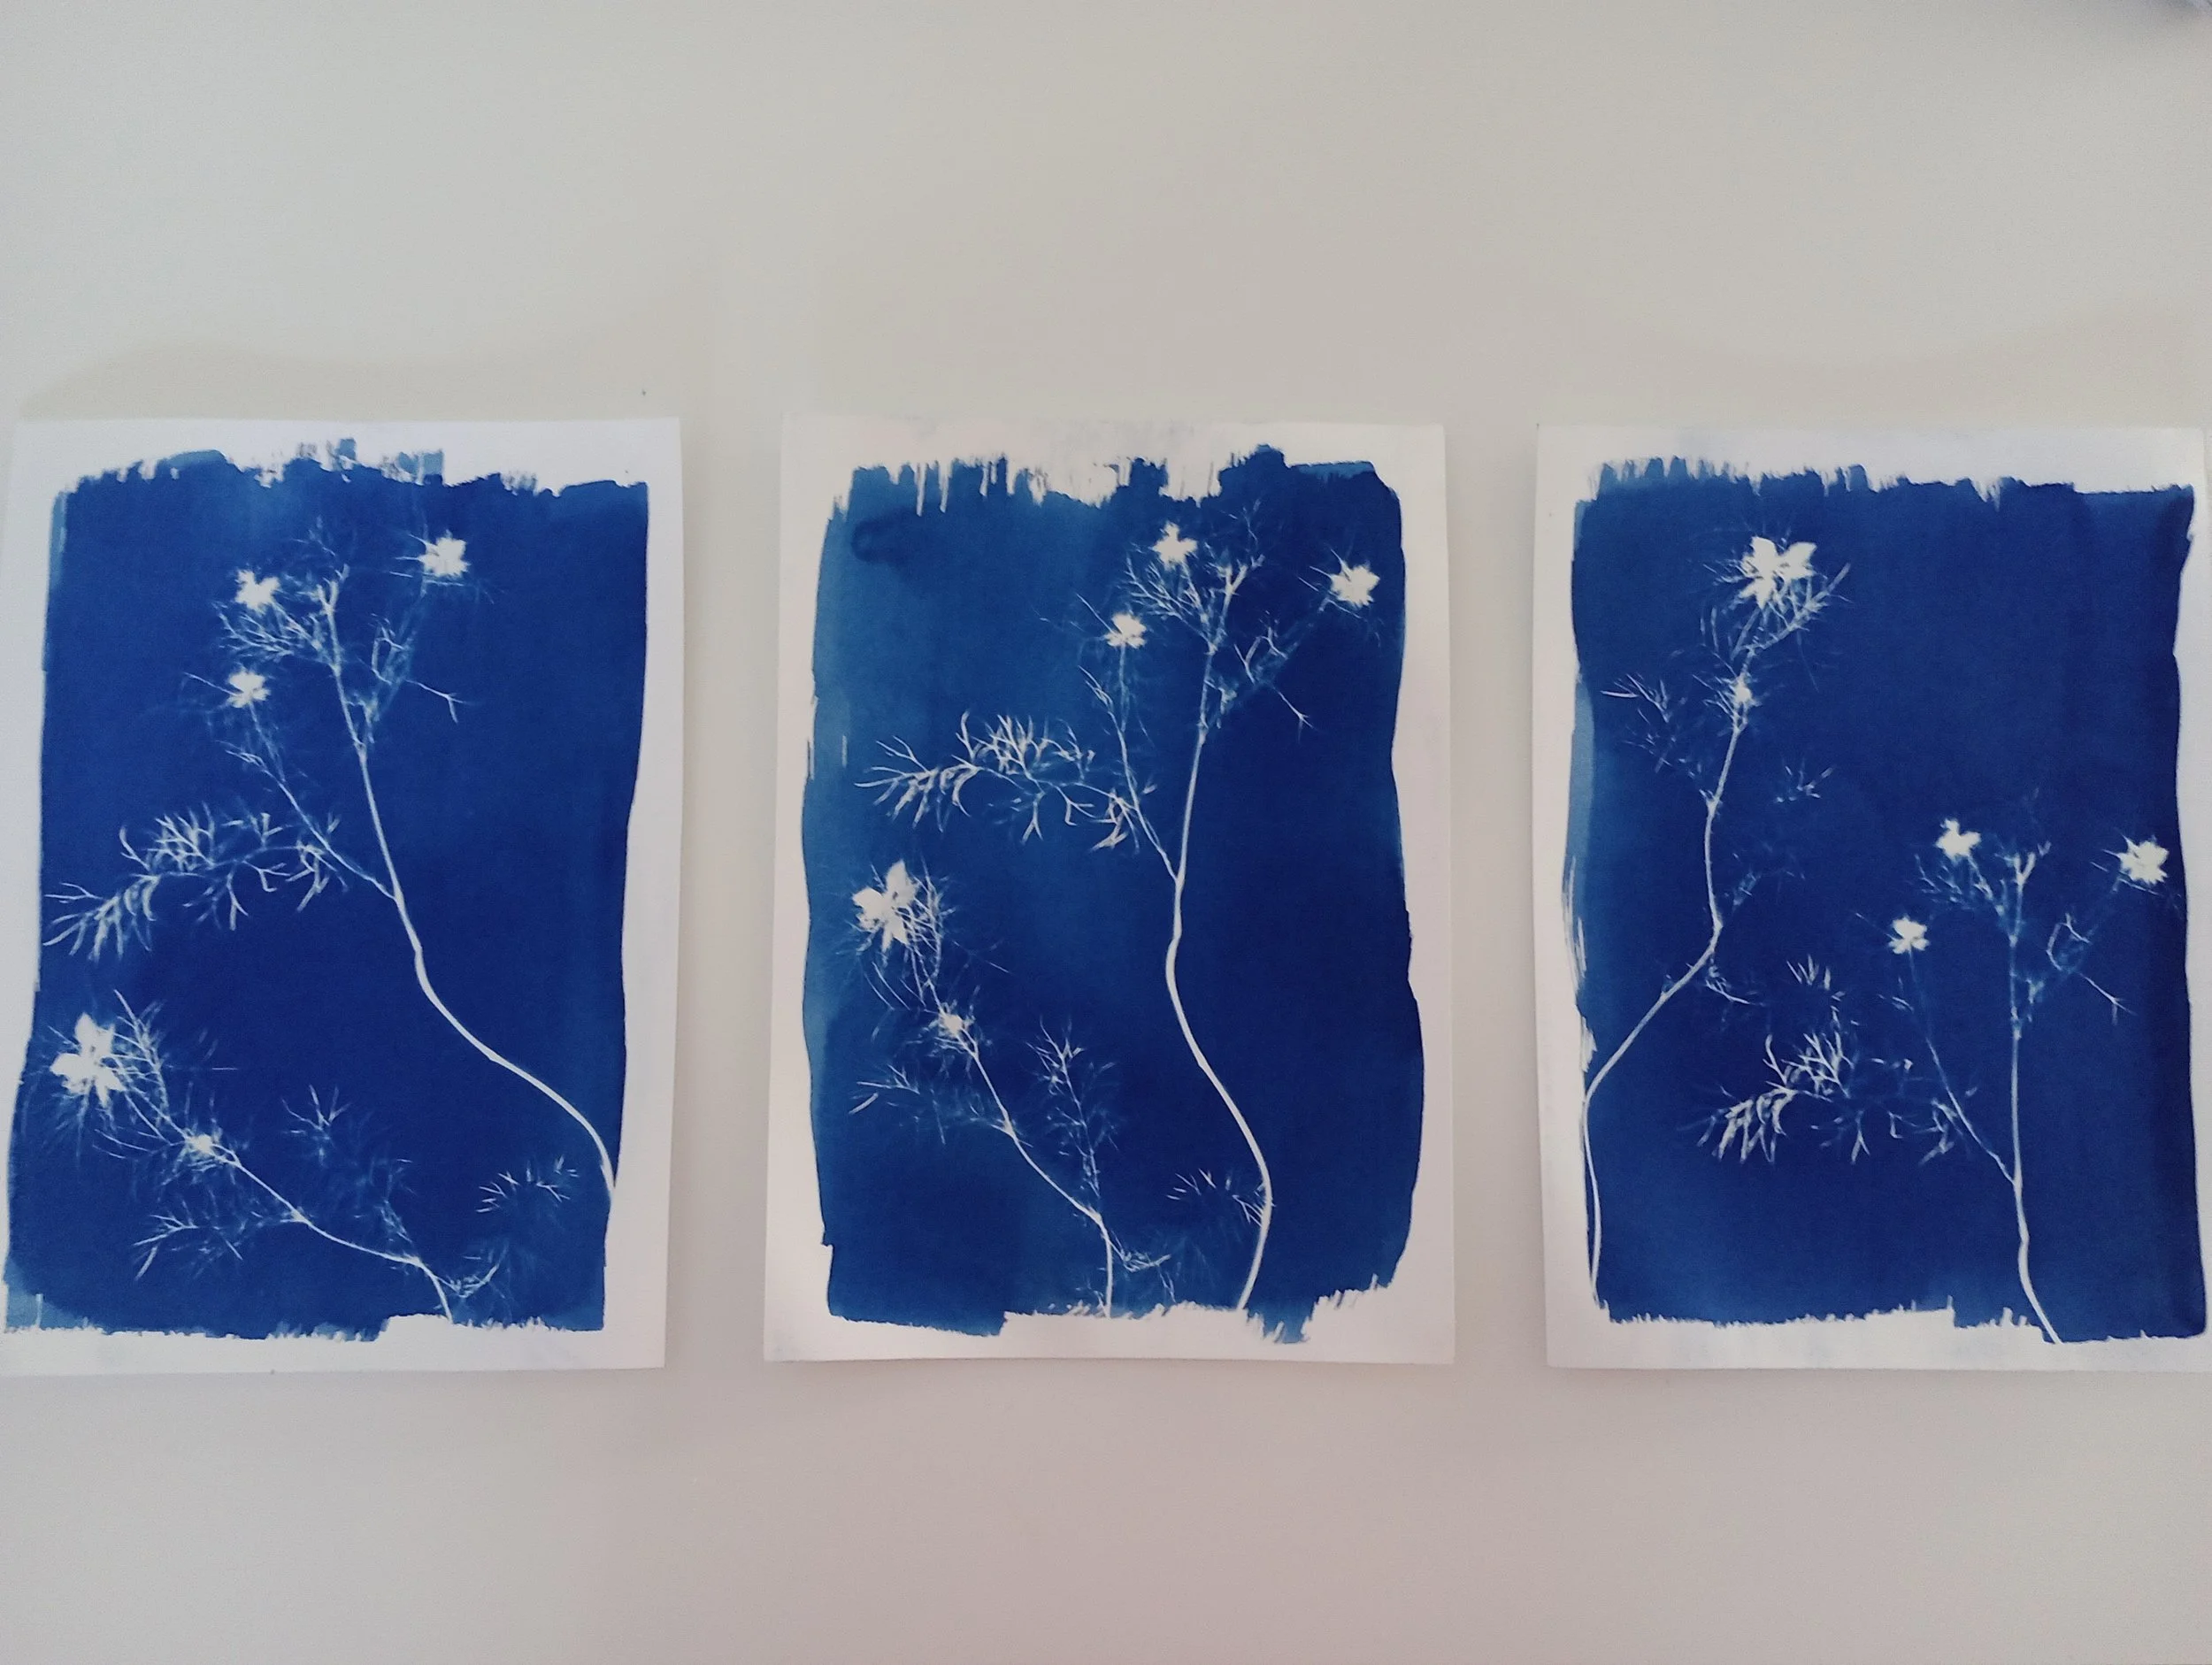
Nigela Cyanotypes drying overnight
Every cyanotype is unique. I never know what the final cyanotype will look like - so each one is a surprise! Some work out well, some do not!
There are a number of flower cyanotypes on the market. However, some are giclée prints. My cyanotypes are not prints; they are the original compositions. Each one is unique - no two are the same!


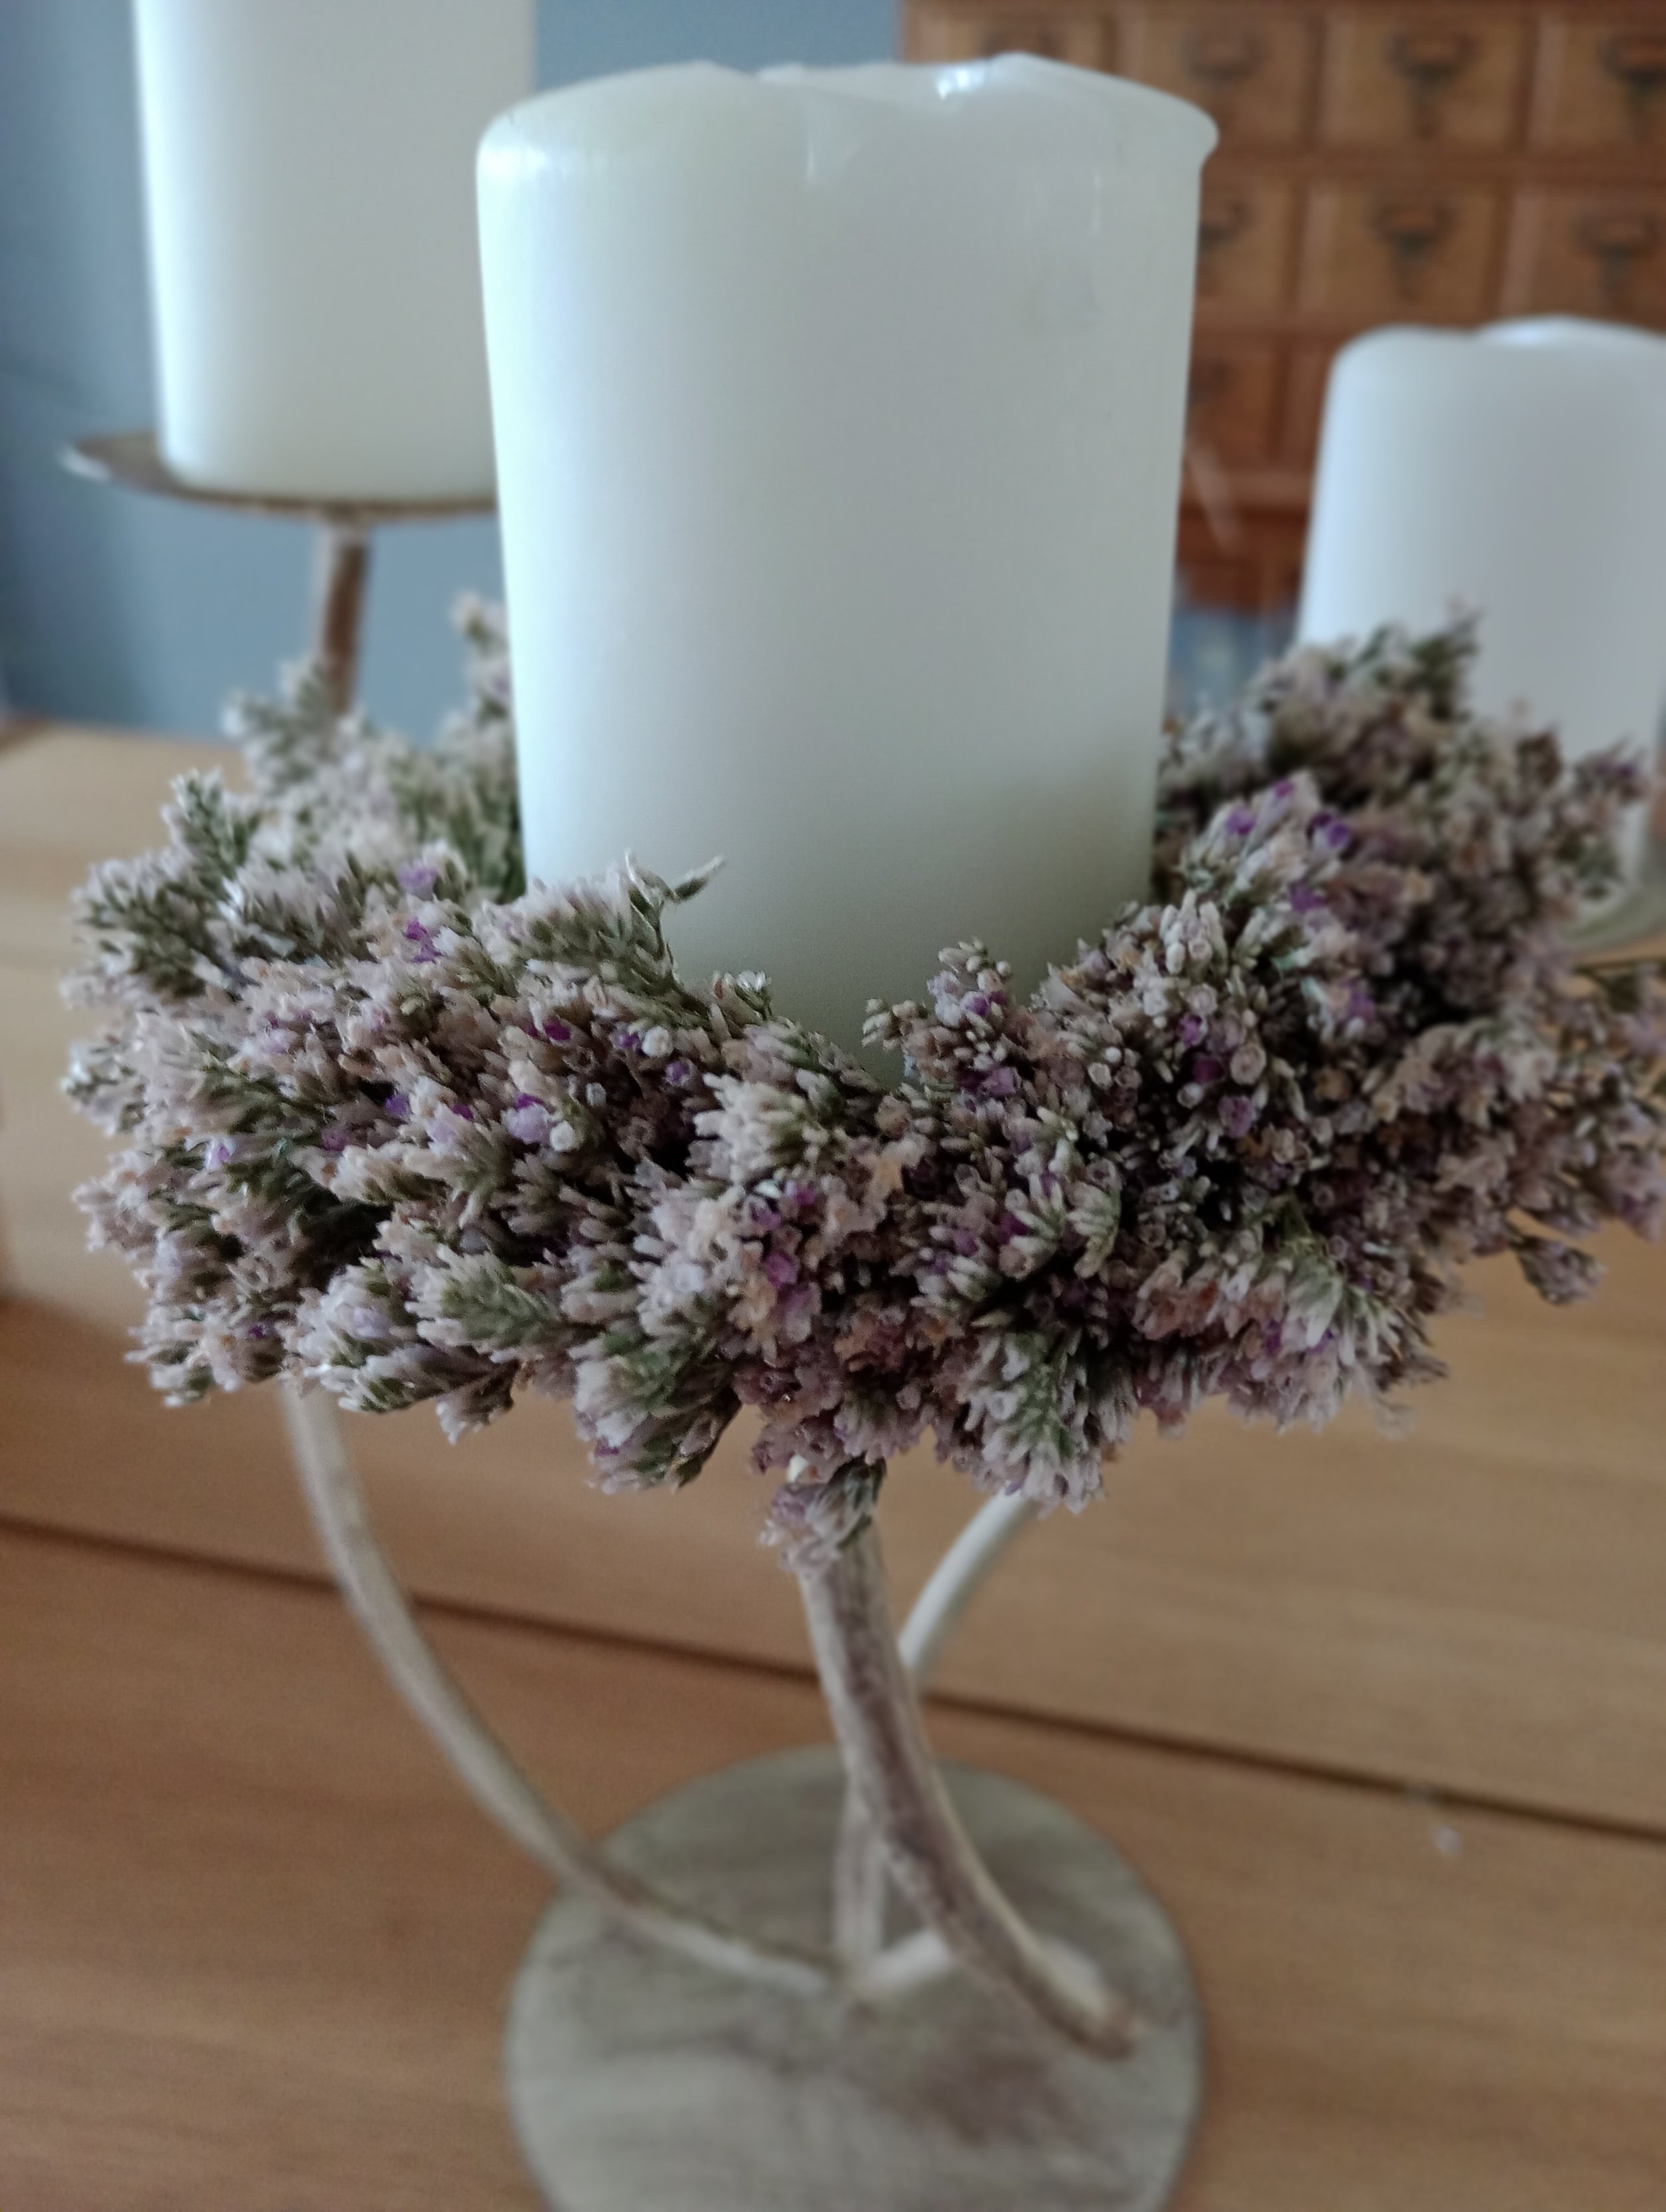
A Bobeche
A bobeche is traditionally made from glass or paper. Bobeches are used to collect candle wax. Bobeches can be made out of dried or fresh flowers and foliage.
A bobeche is traditionally made from glass or paper. Bobeches are used to collect candle wax. They can be made out of dried or fresh flowers and foliage.
You will need:
Fresh or dried flowers/foliage
Paper-covered wire
Stemtex (floral binding tape)
Secateurs

Paper-covered wire and stemtex
Step 1:
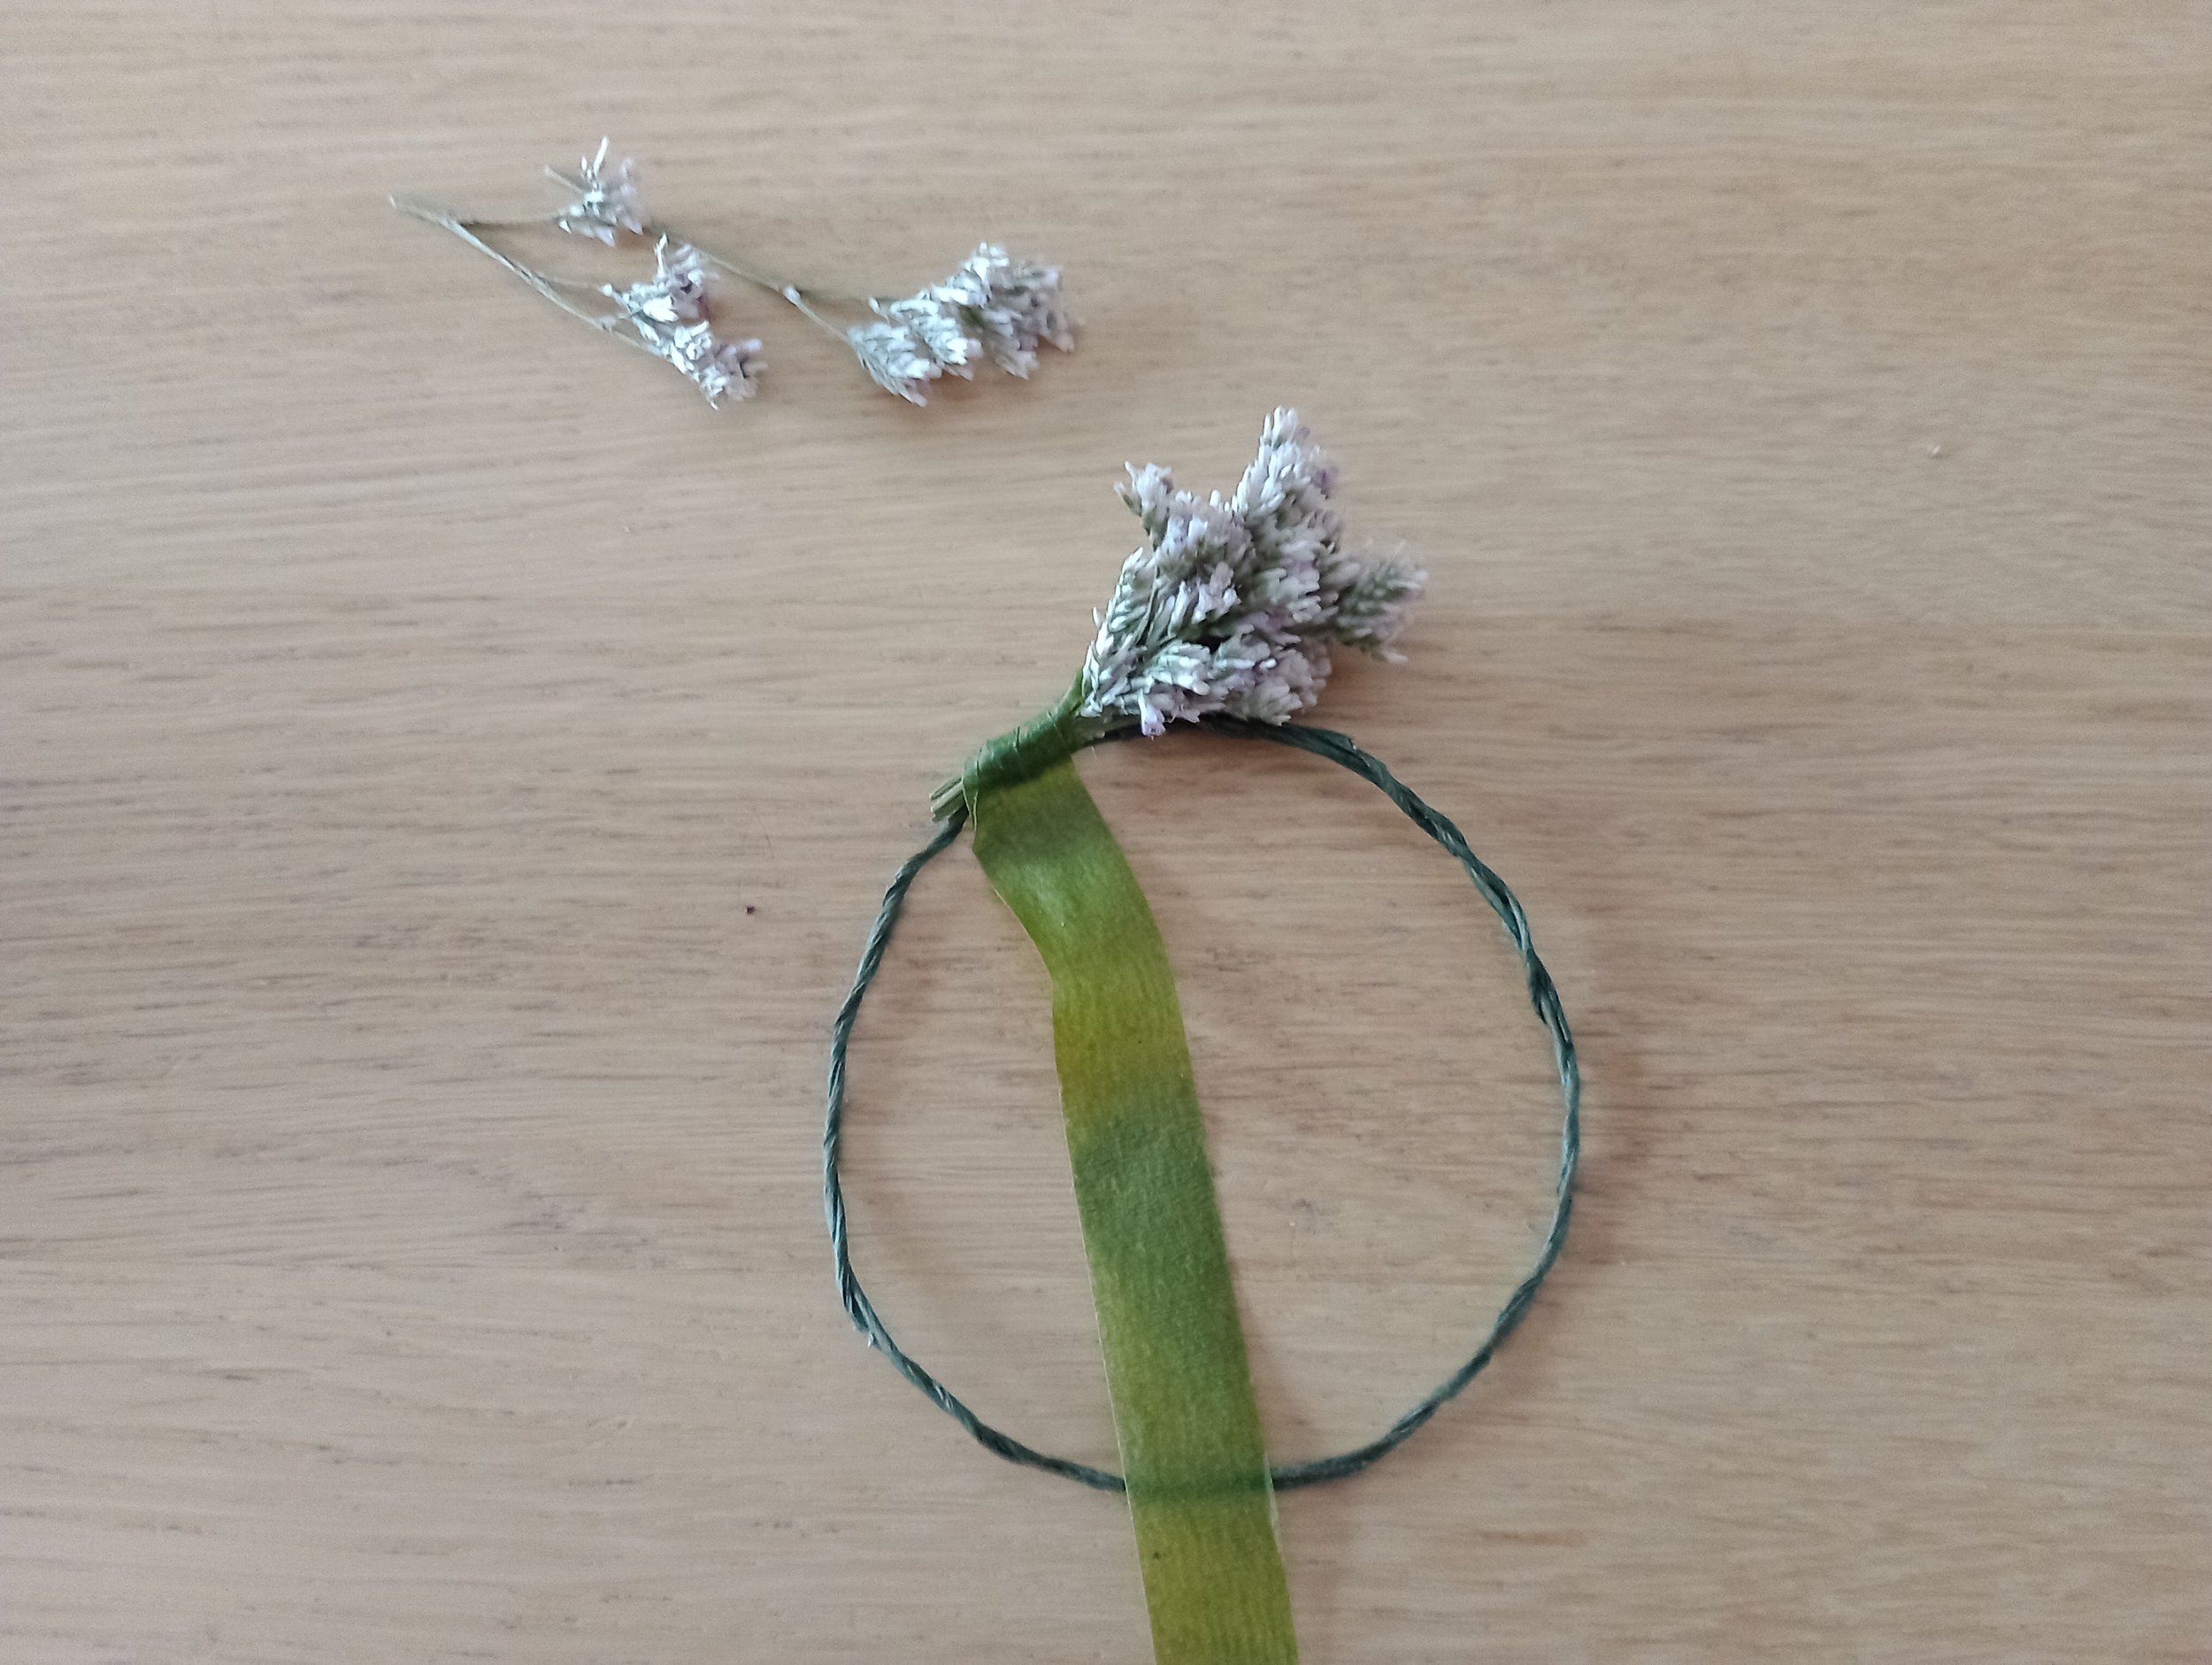
Measure the paper-covered wire slightly larger than the size of the candle. I make a rough measurement by placing the paper-covered wire around the candle. Make the base in a circular shape using the paper-covered wire (see image below). Wrap the wire around itself to secure. I used green paper-covered wire to make the base. However, you can use any wire. When using wire that is not green, cover the base with stemtex.

Step 2:
Cut the Limonium into small bundles.
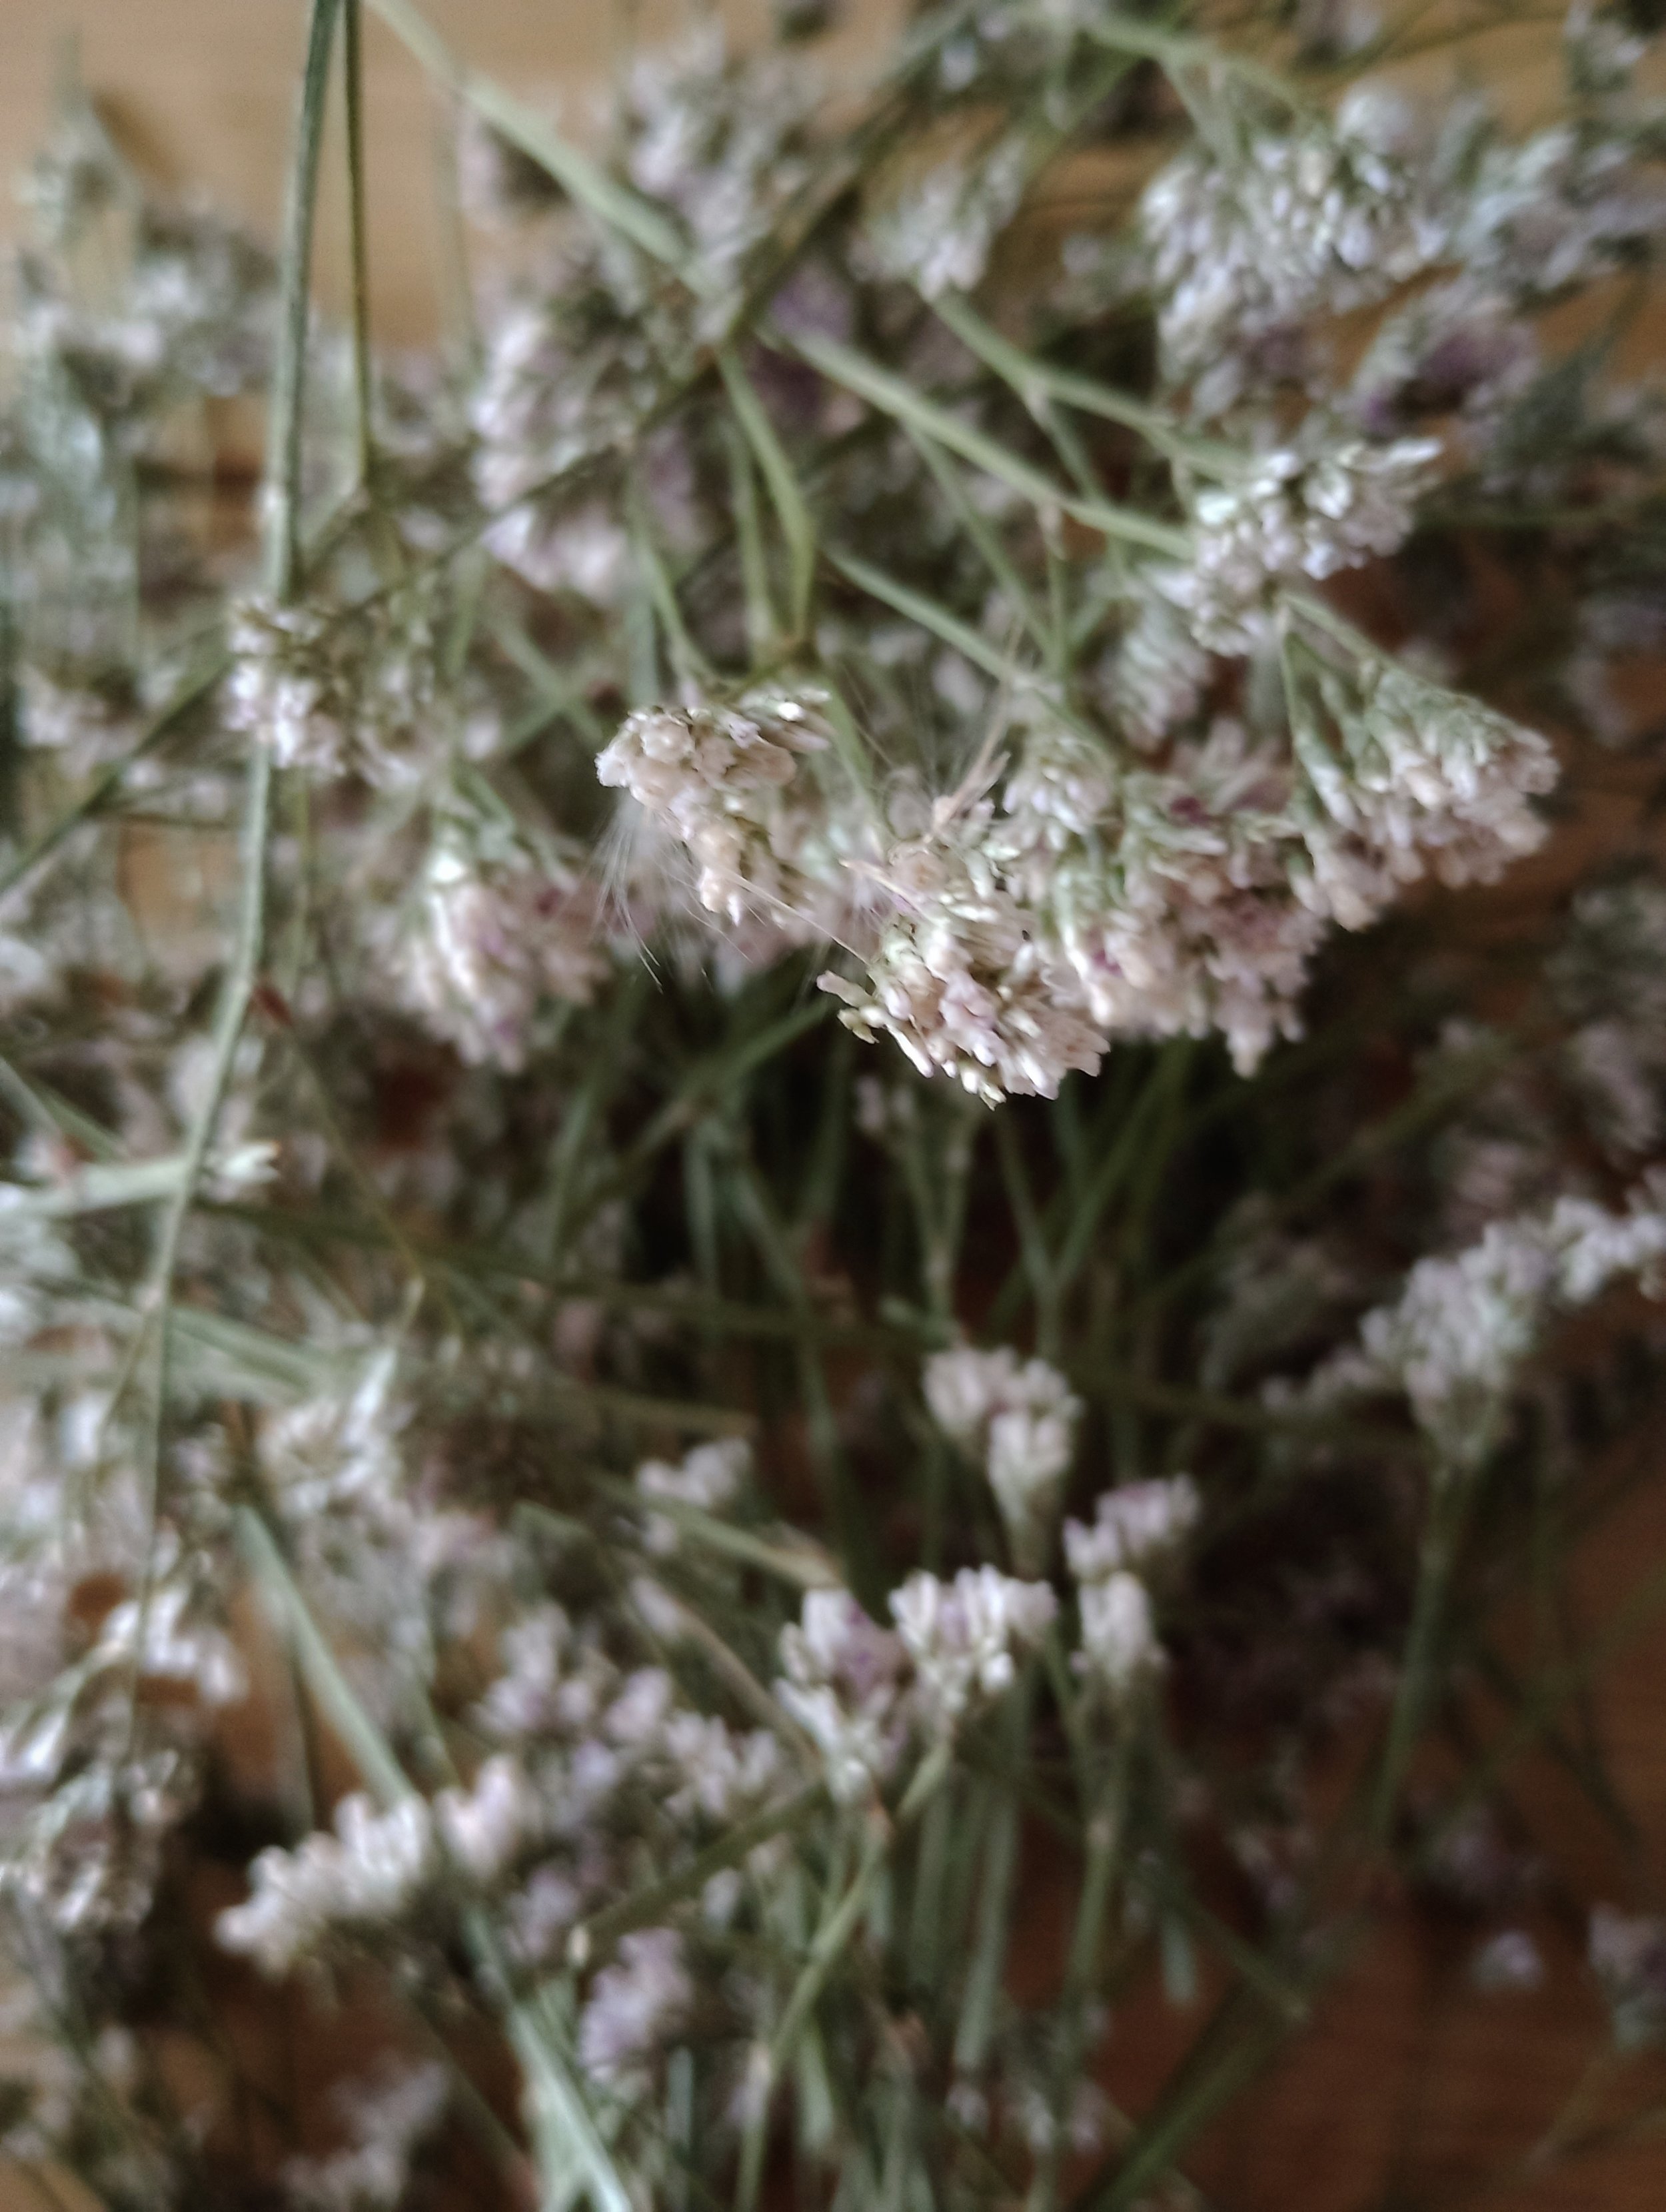
Dried Limonium
Step 3:
Cut a piece of stemtex and use this to bind the first bunch of Limonium (see image below). When stemtex is pulled it gets sticky and tacky. When stretched stemtex adheres to itself. Continue to add small bunches of Limonium slightly on top of the first bundle.
Add the first bunch
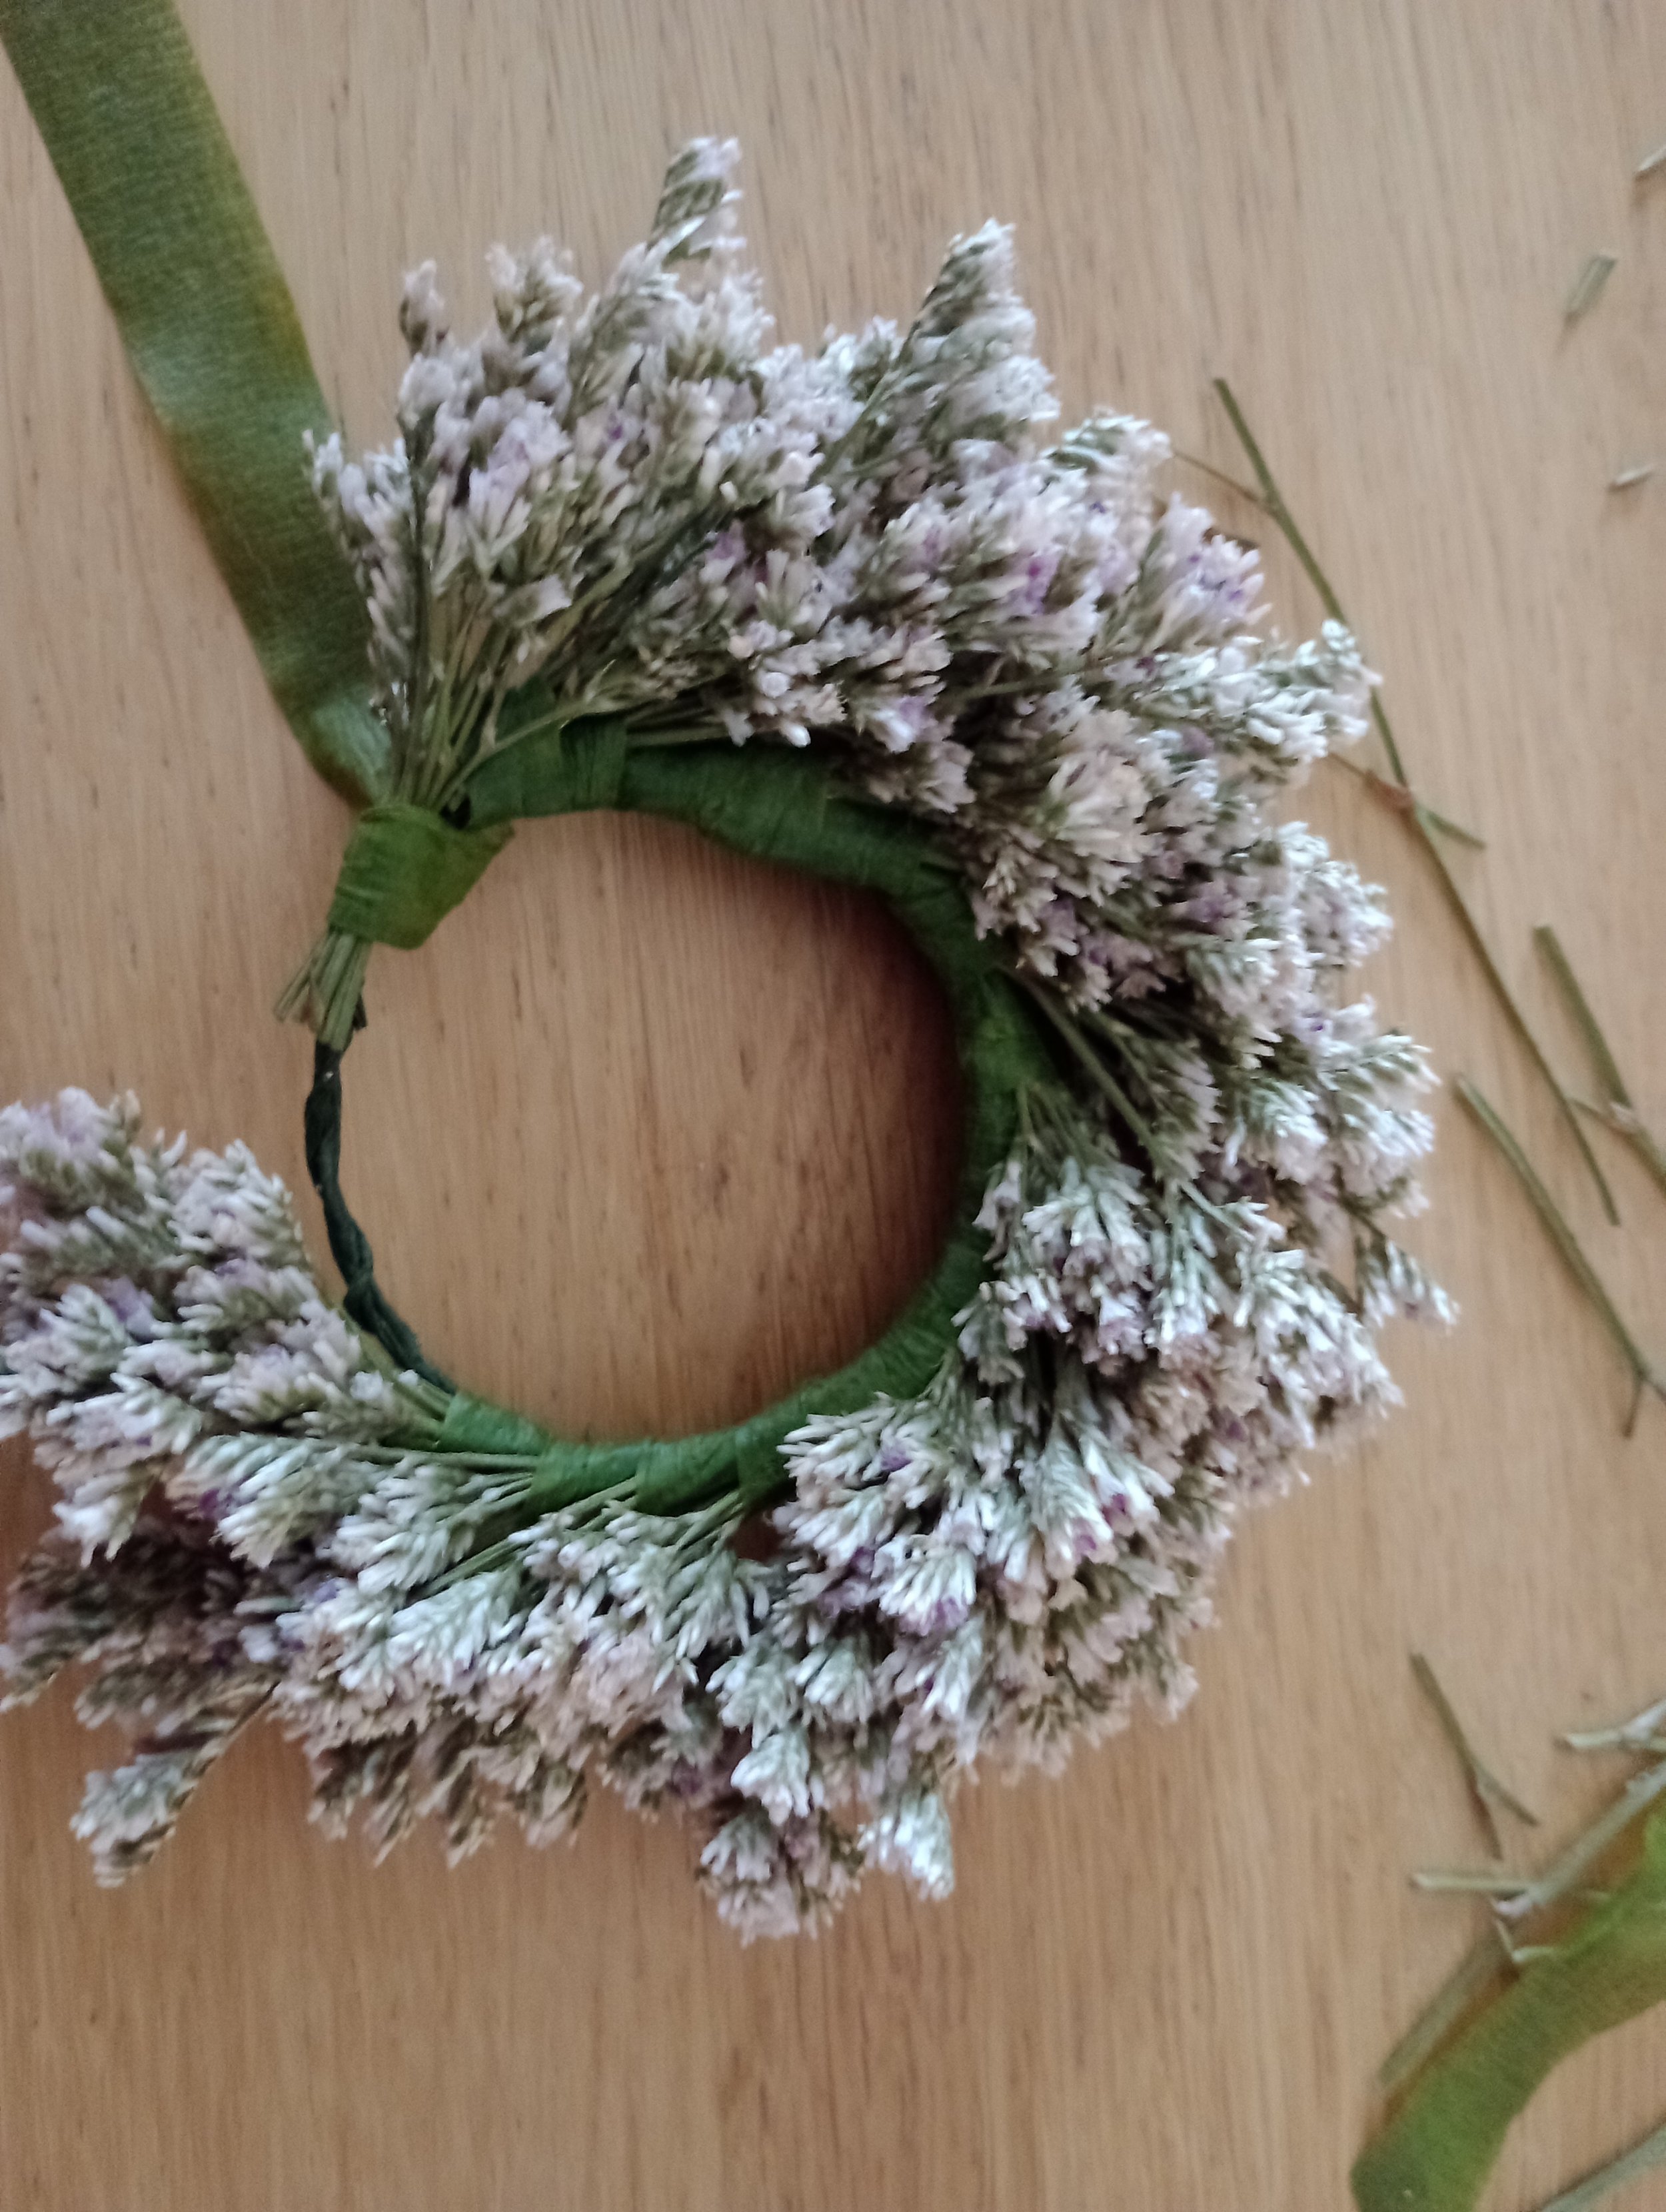
Keep adding small bunches in the same direction
Step 4:
Half-way through making the bobeche, place it over the candle to check you are happy with the emerging design.
Half-way
Step 5:
It can be a little tricky as you get to the end of the bobeche - a little patience is required! Once the base is fully covered, secure the stemtex, position the bobeche on the candle holder, and light the candle!
You can use any ingredients when making bobeches. They look lovely on candles at Christmas made out of Holly, Ivy and Berries.
For a more rustic look, the bobeches below are made from Ruscus - they dry beautifully and are everlasting.
Dried Ruscus Bobeches

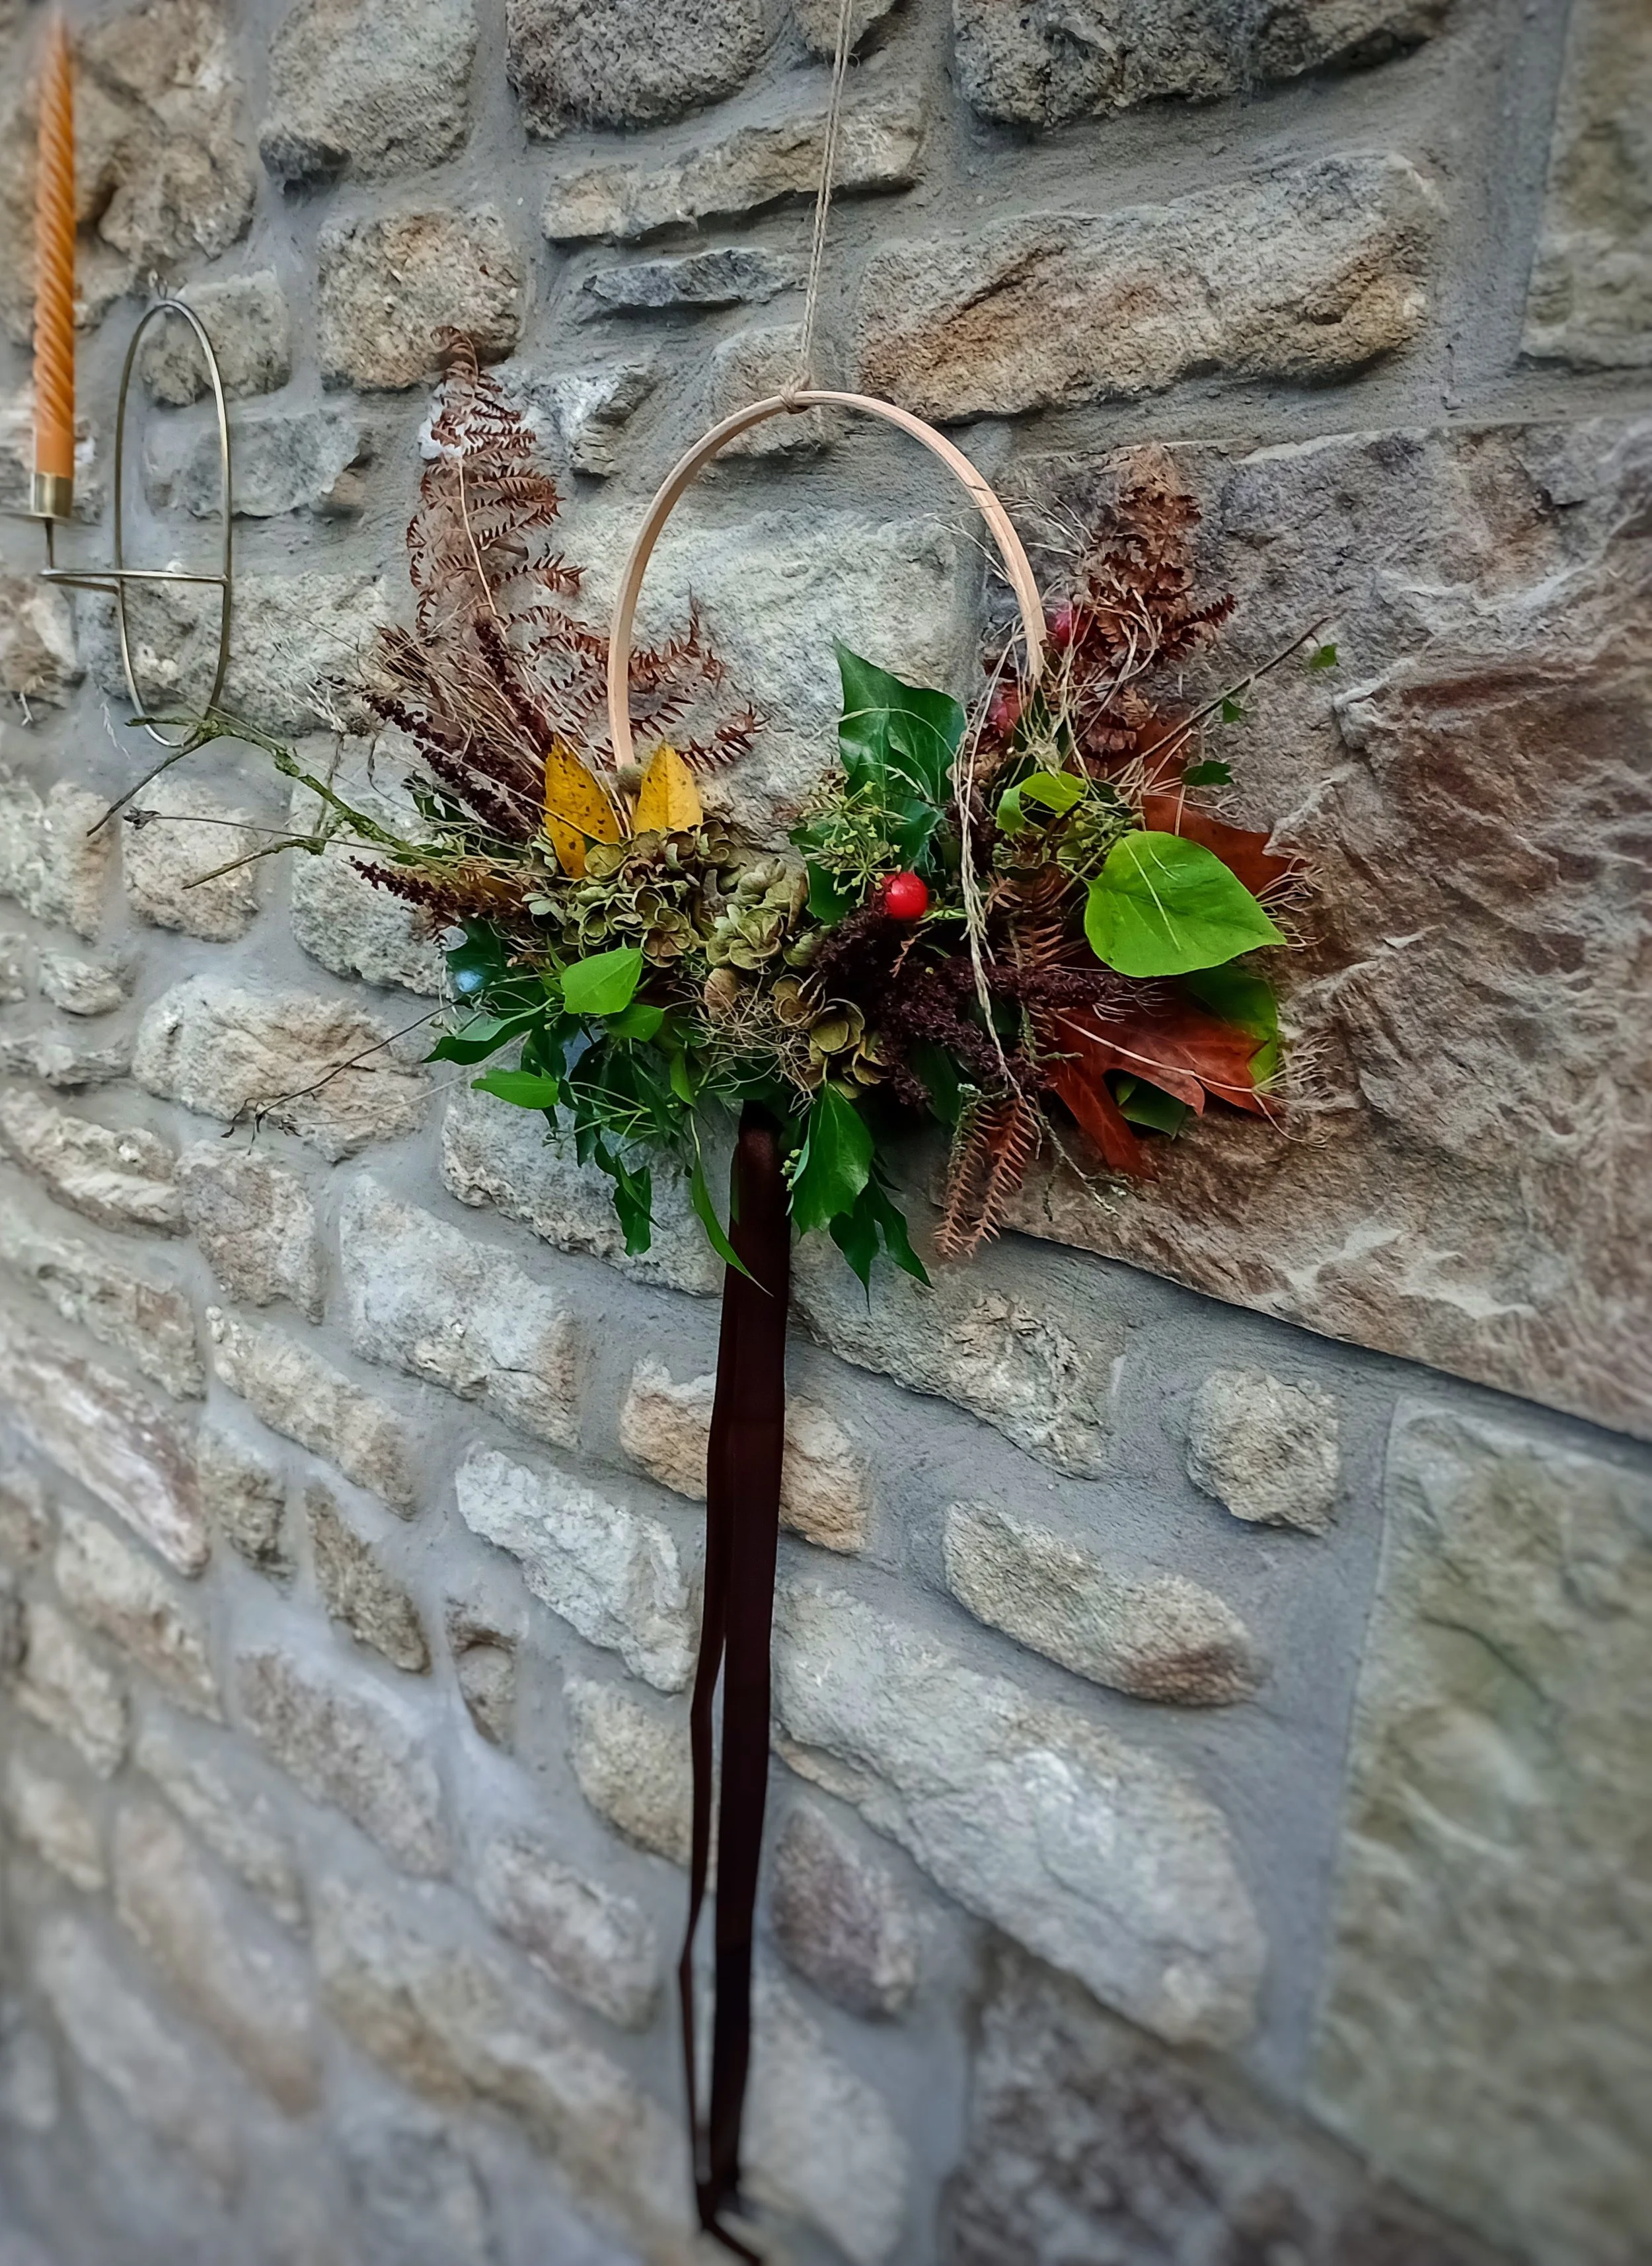
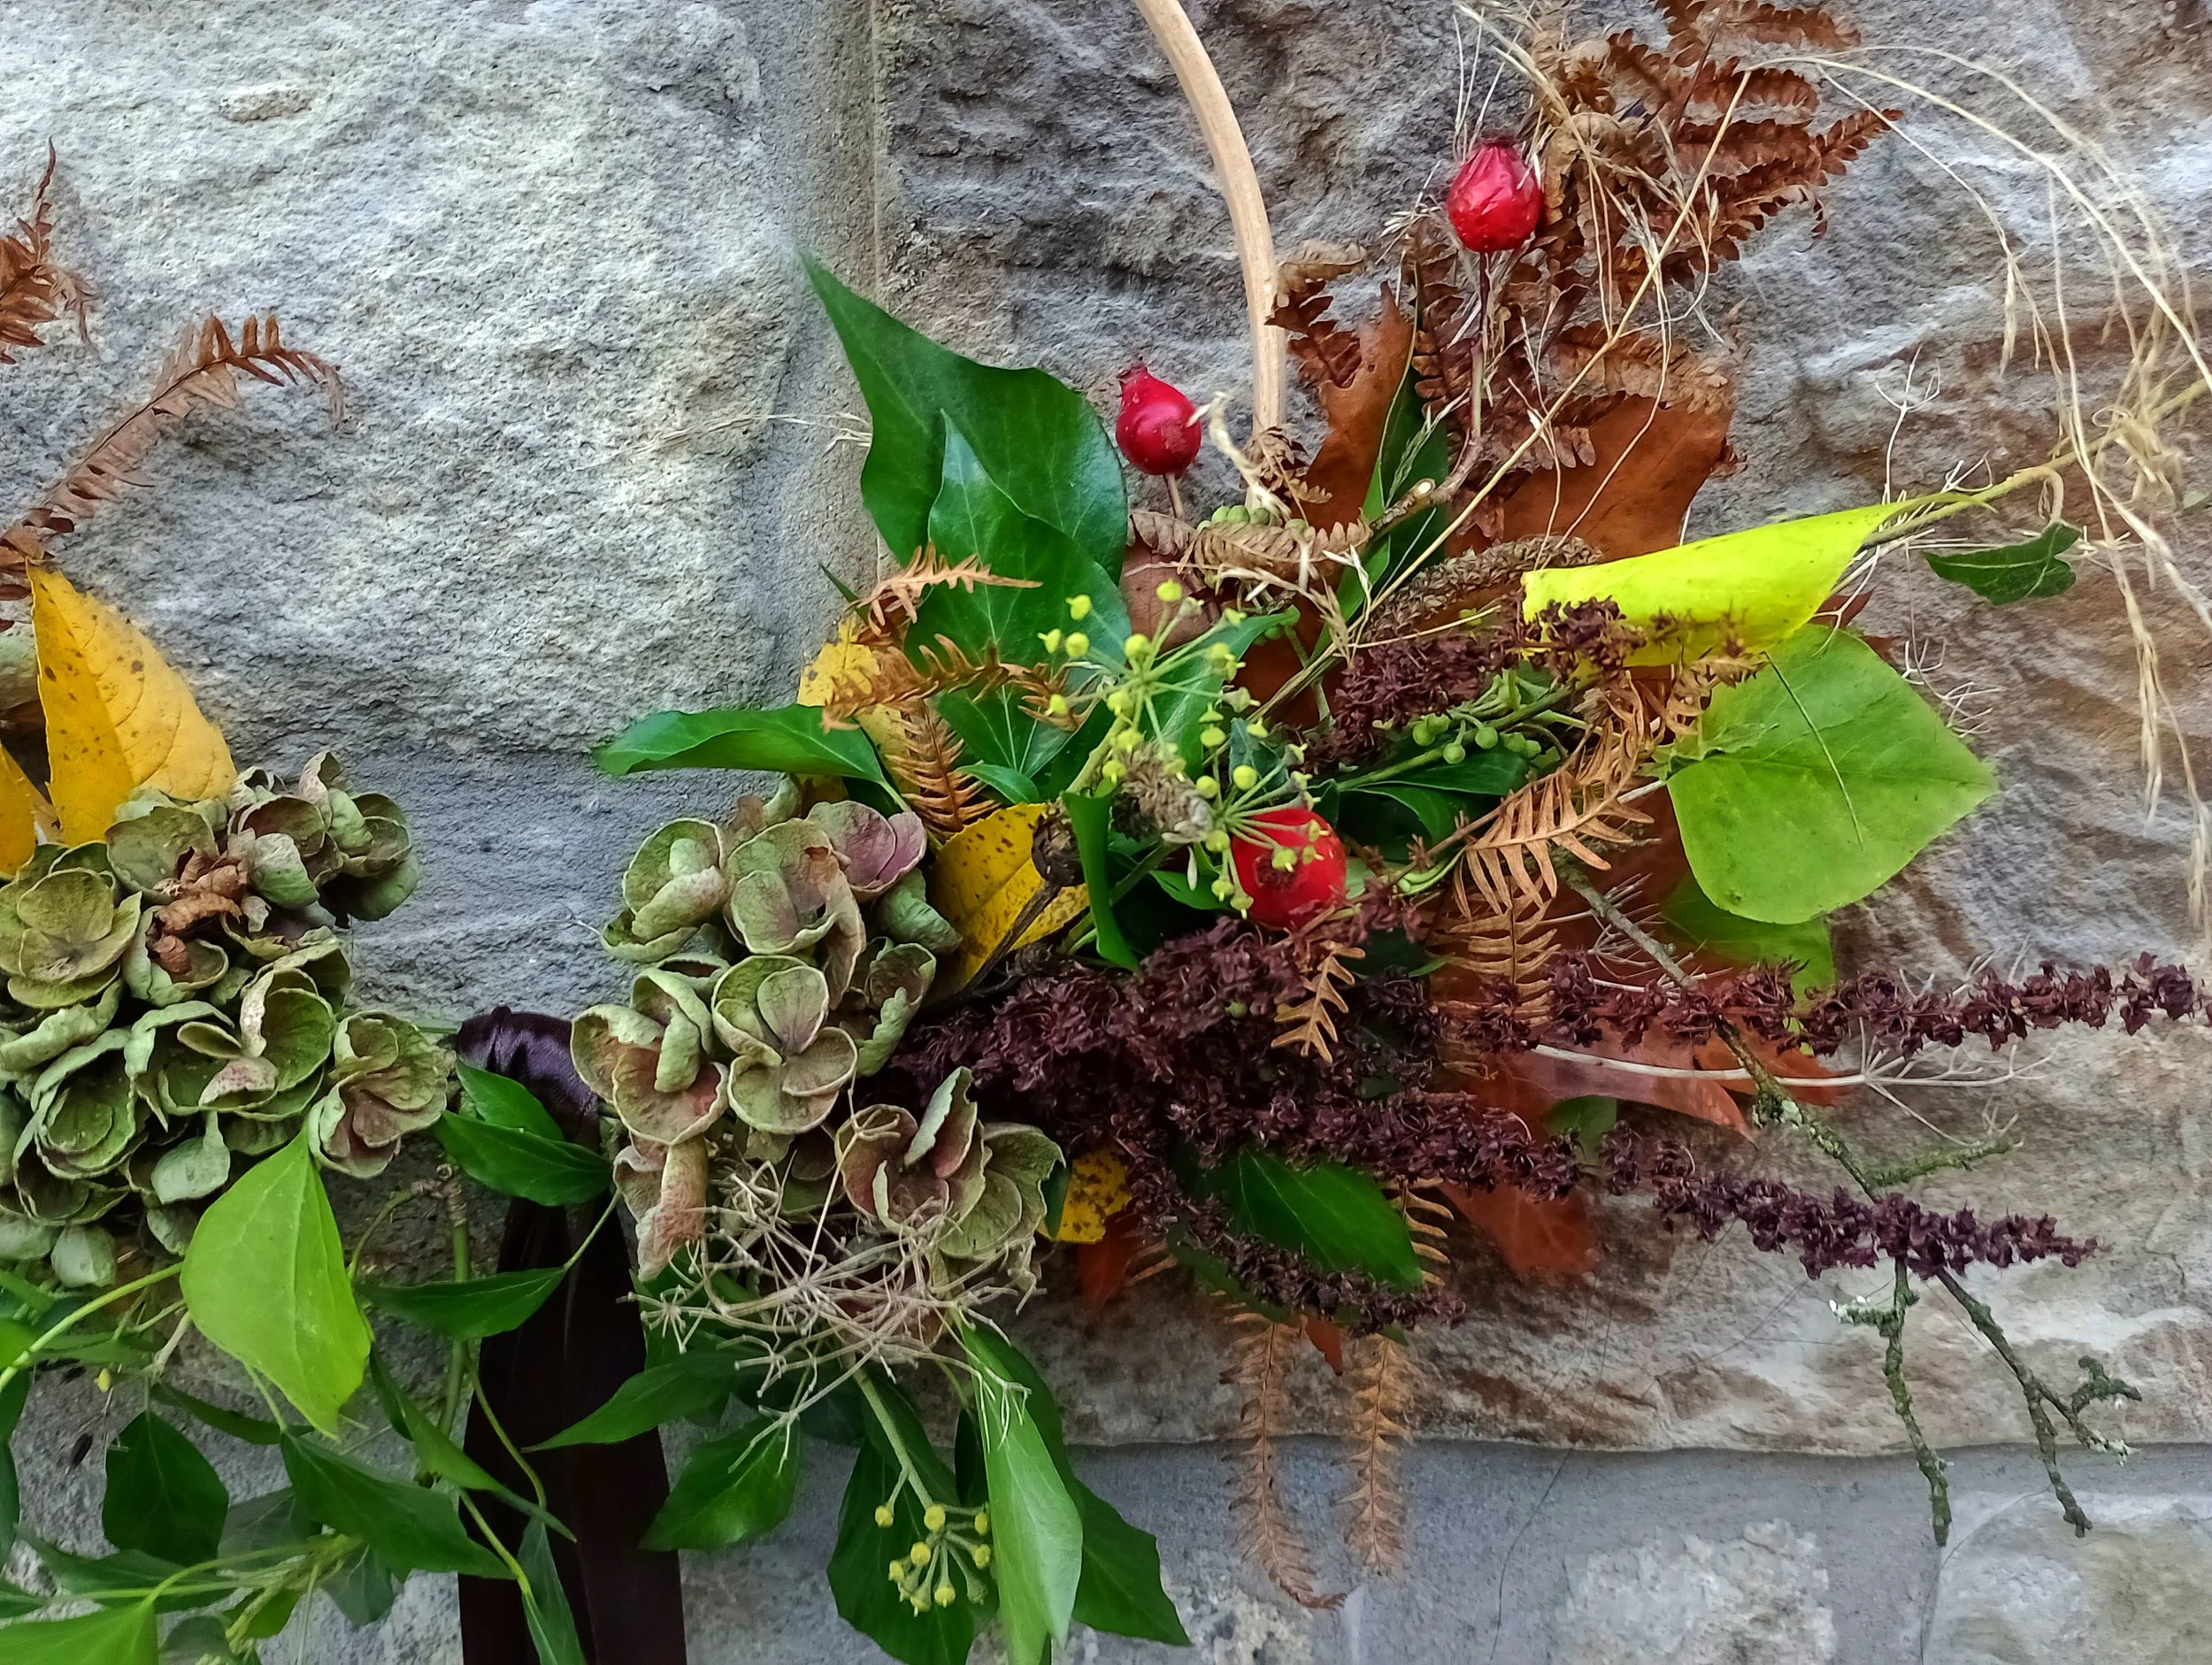
Autumn Wreath Making
You will need:
An embroidery hoop (or another wreath base)
Reel wire
Foraged finds
Ribbon
Twine
Step 1:
Go foraging! You will be surprised what you can forage from your local area. Look in the hedgerows and on the forest floor. There are lots of beautiful leaves and dried seed pods in the autumn. Always forage responsibly and don’t forage on private land without permission!
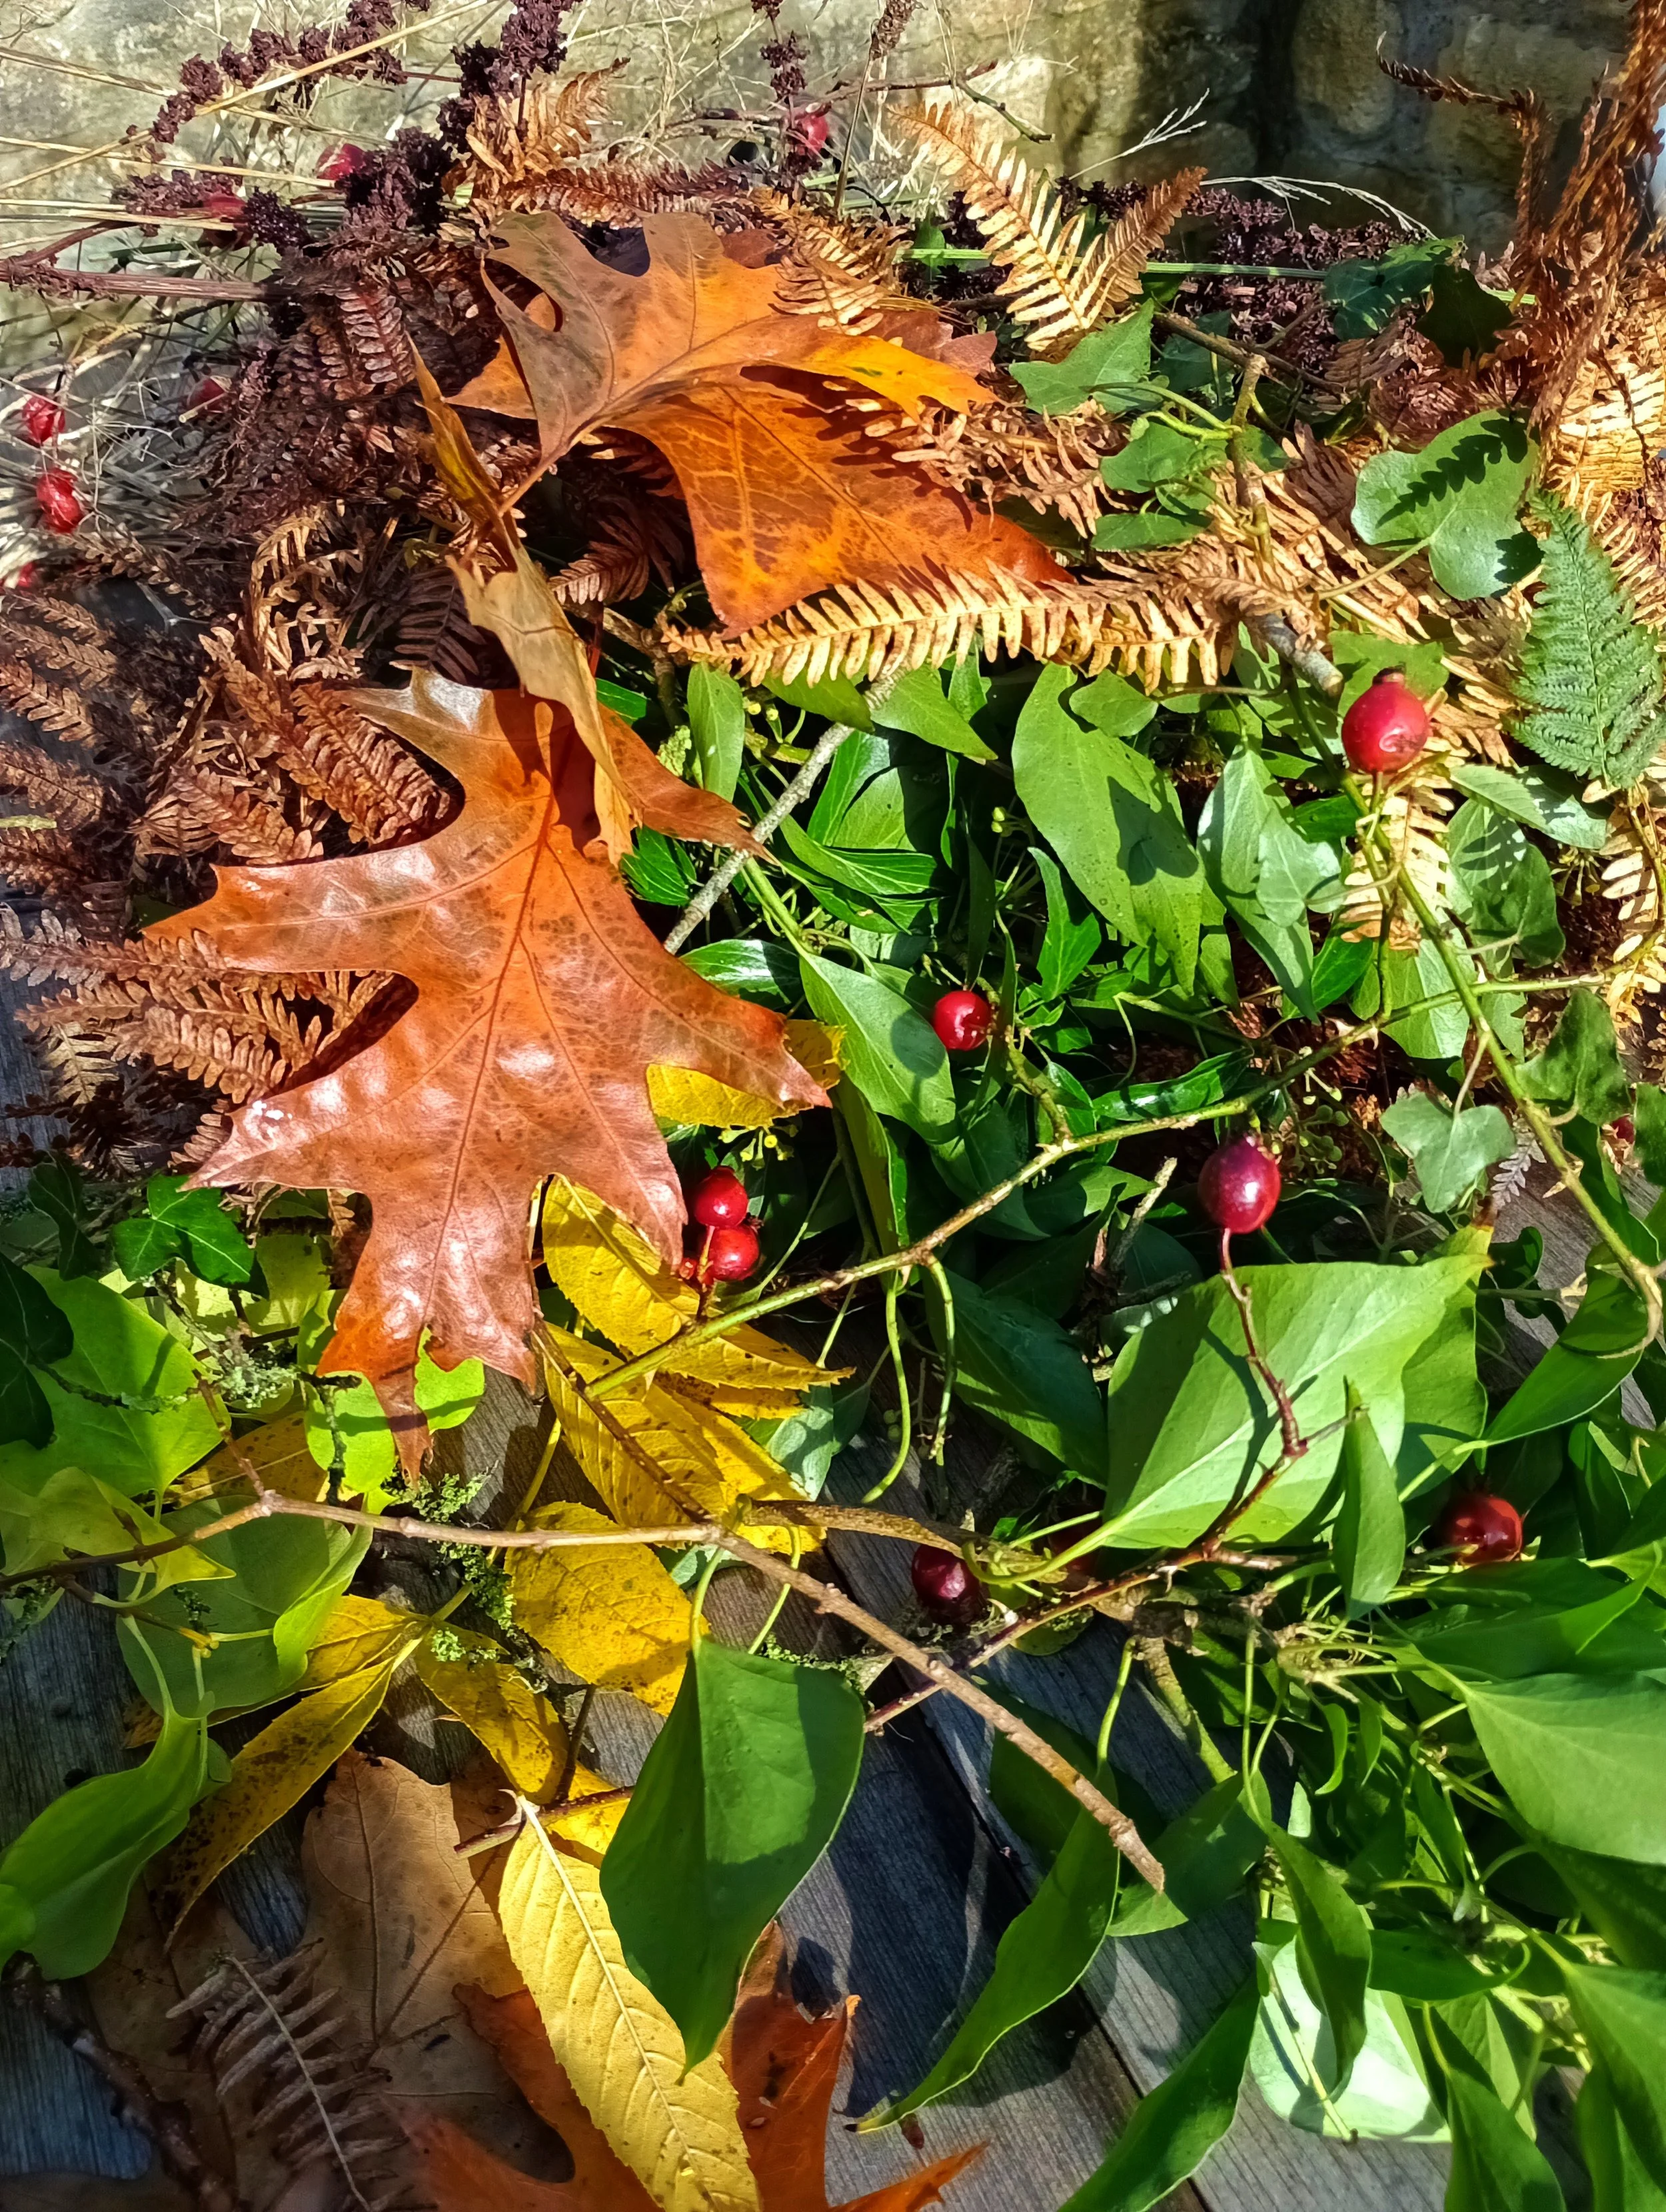
Foraged finds
Step 2:
You will need a wreath base. I used an embroidery hoop. However, you can use any wreath base for this design. You will also need some reel wire and some ribbon. I opted for brown ribbon to compliment the colours of the foliage.
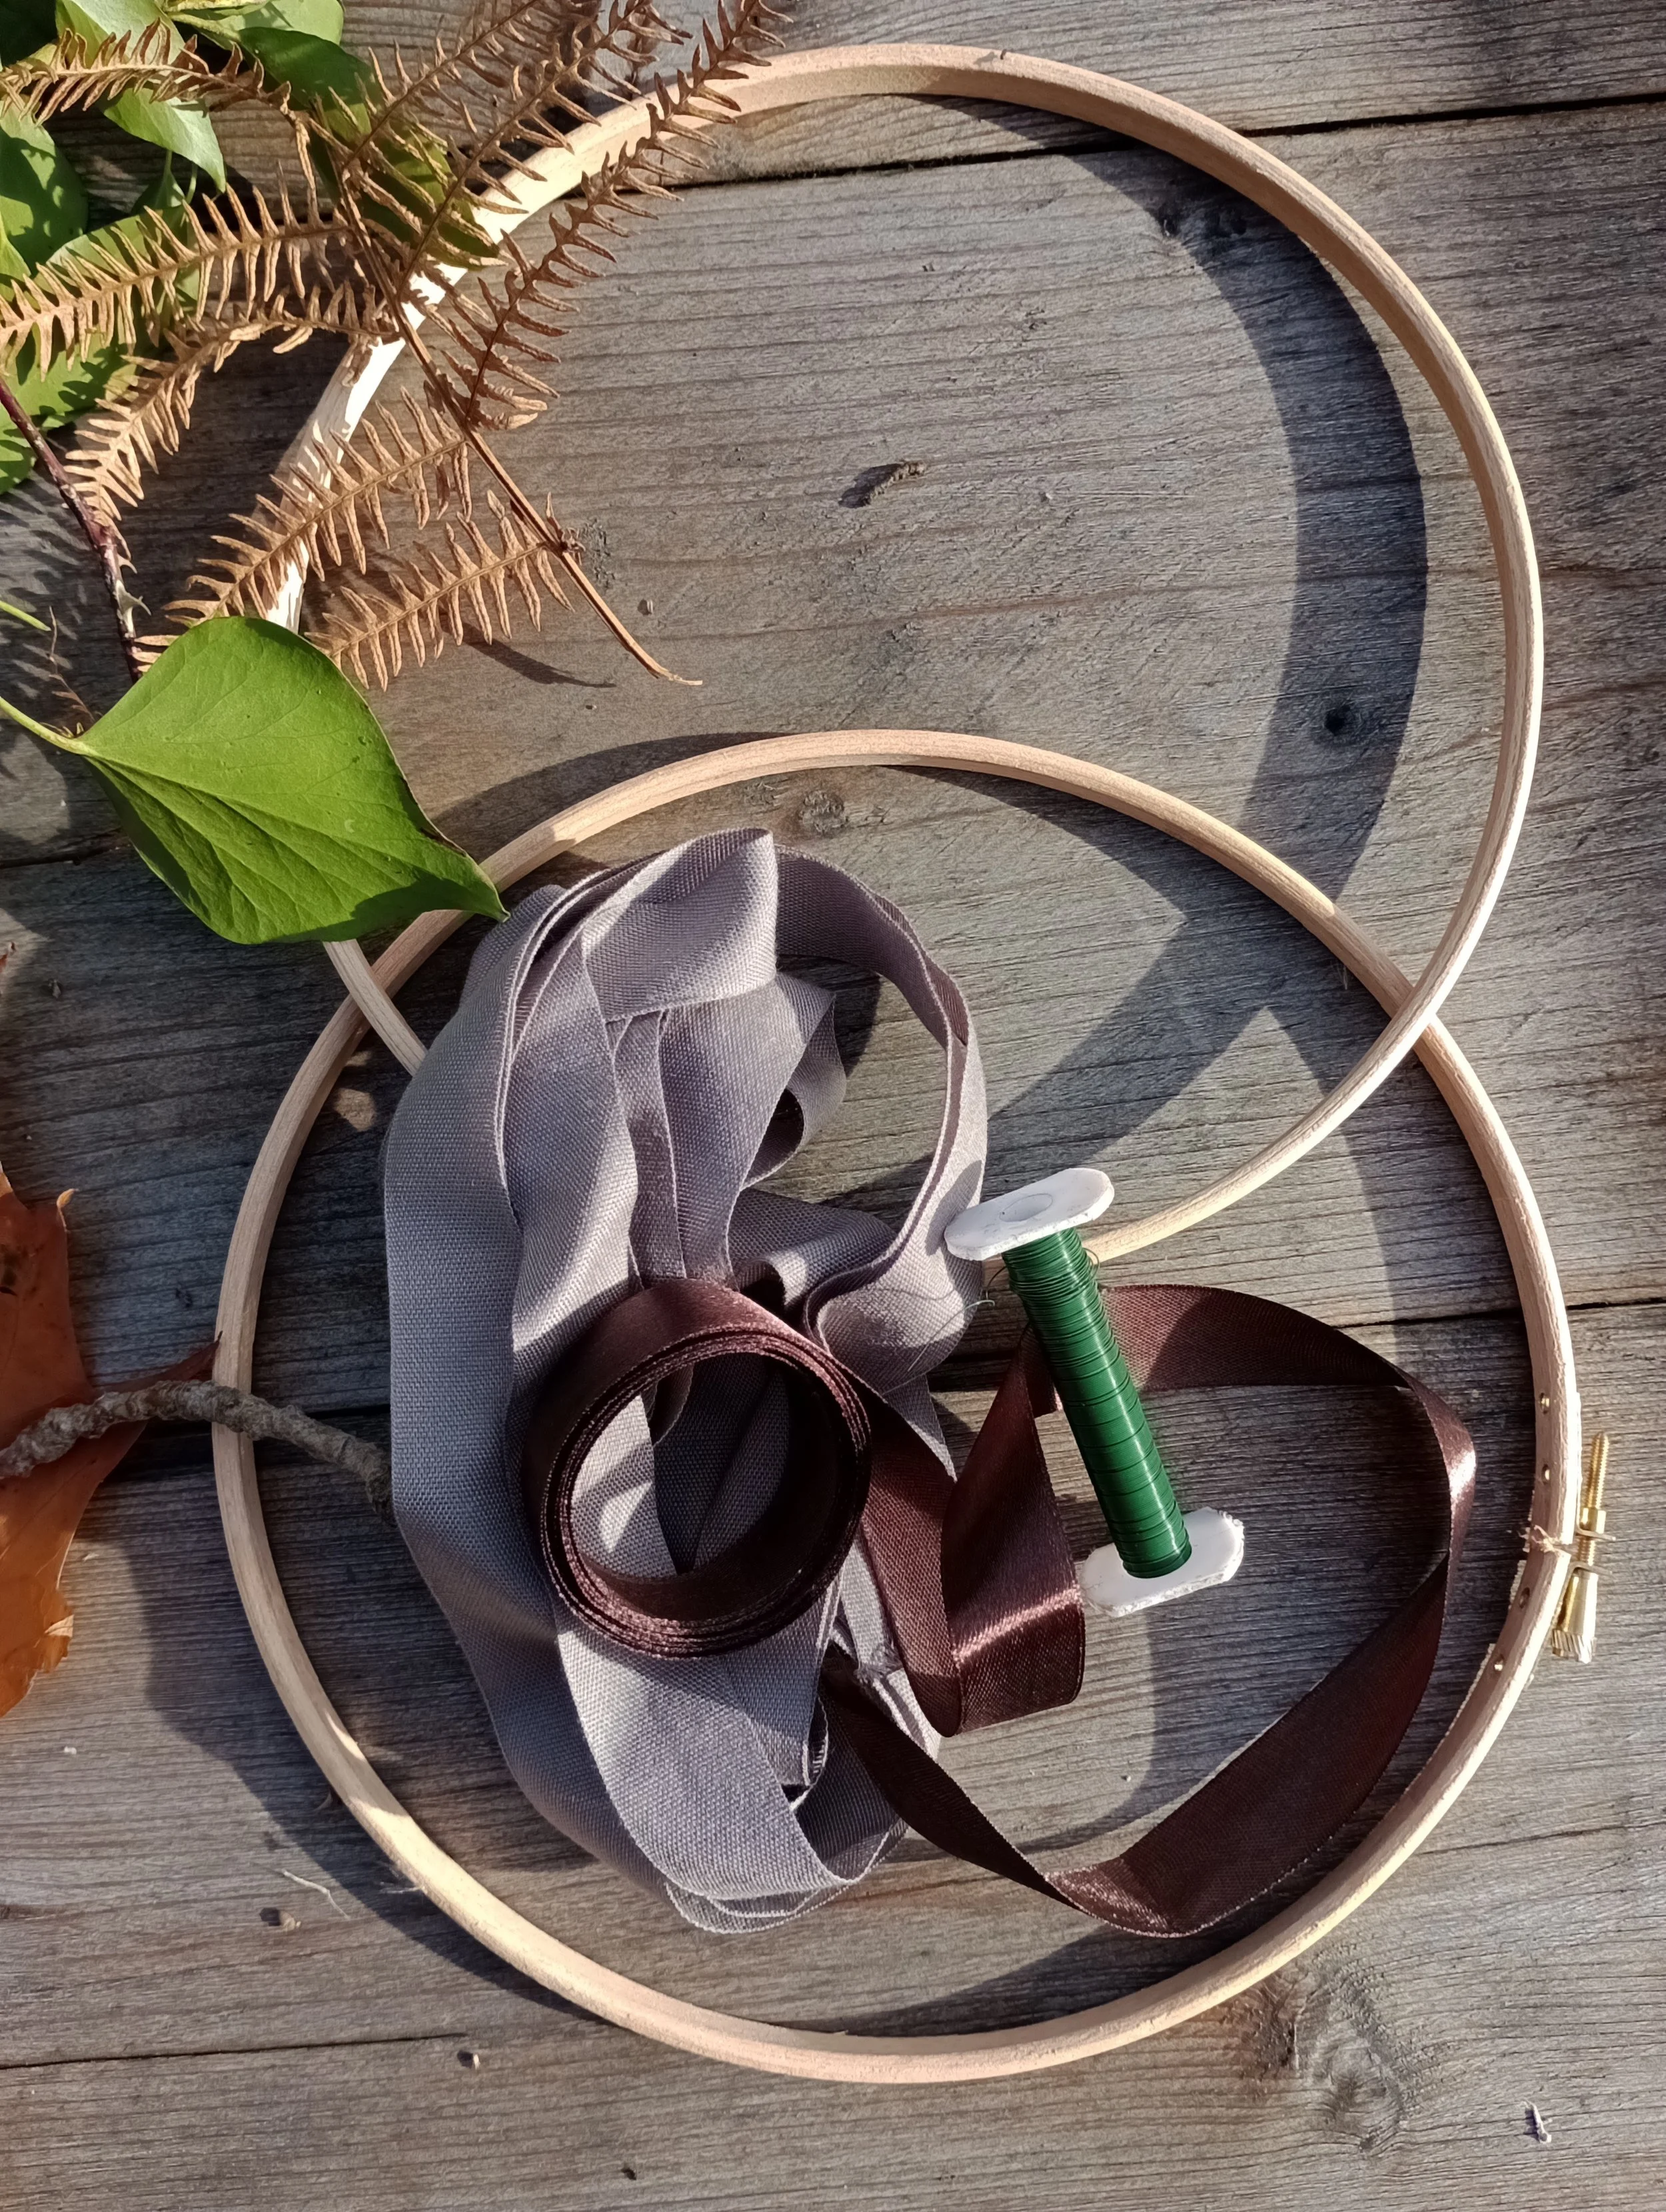
Embroidery hoops, ribbon and reel wire
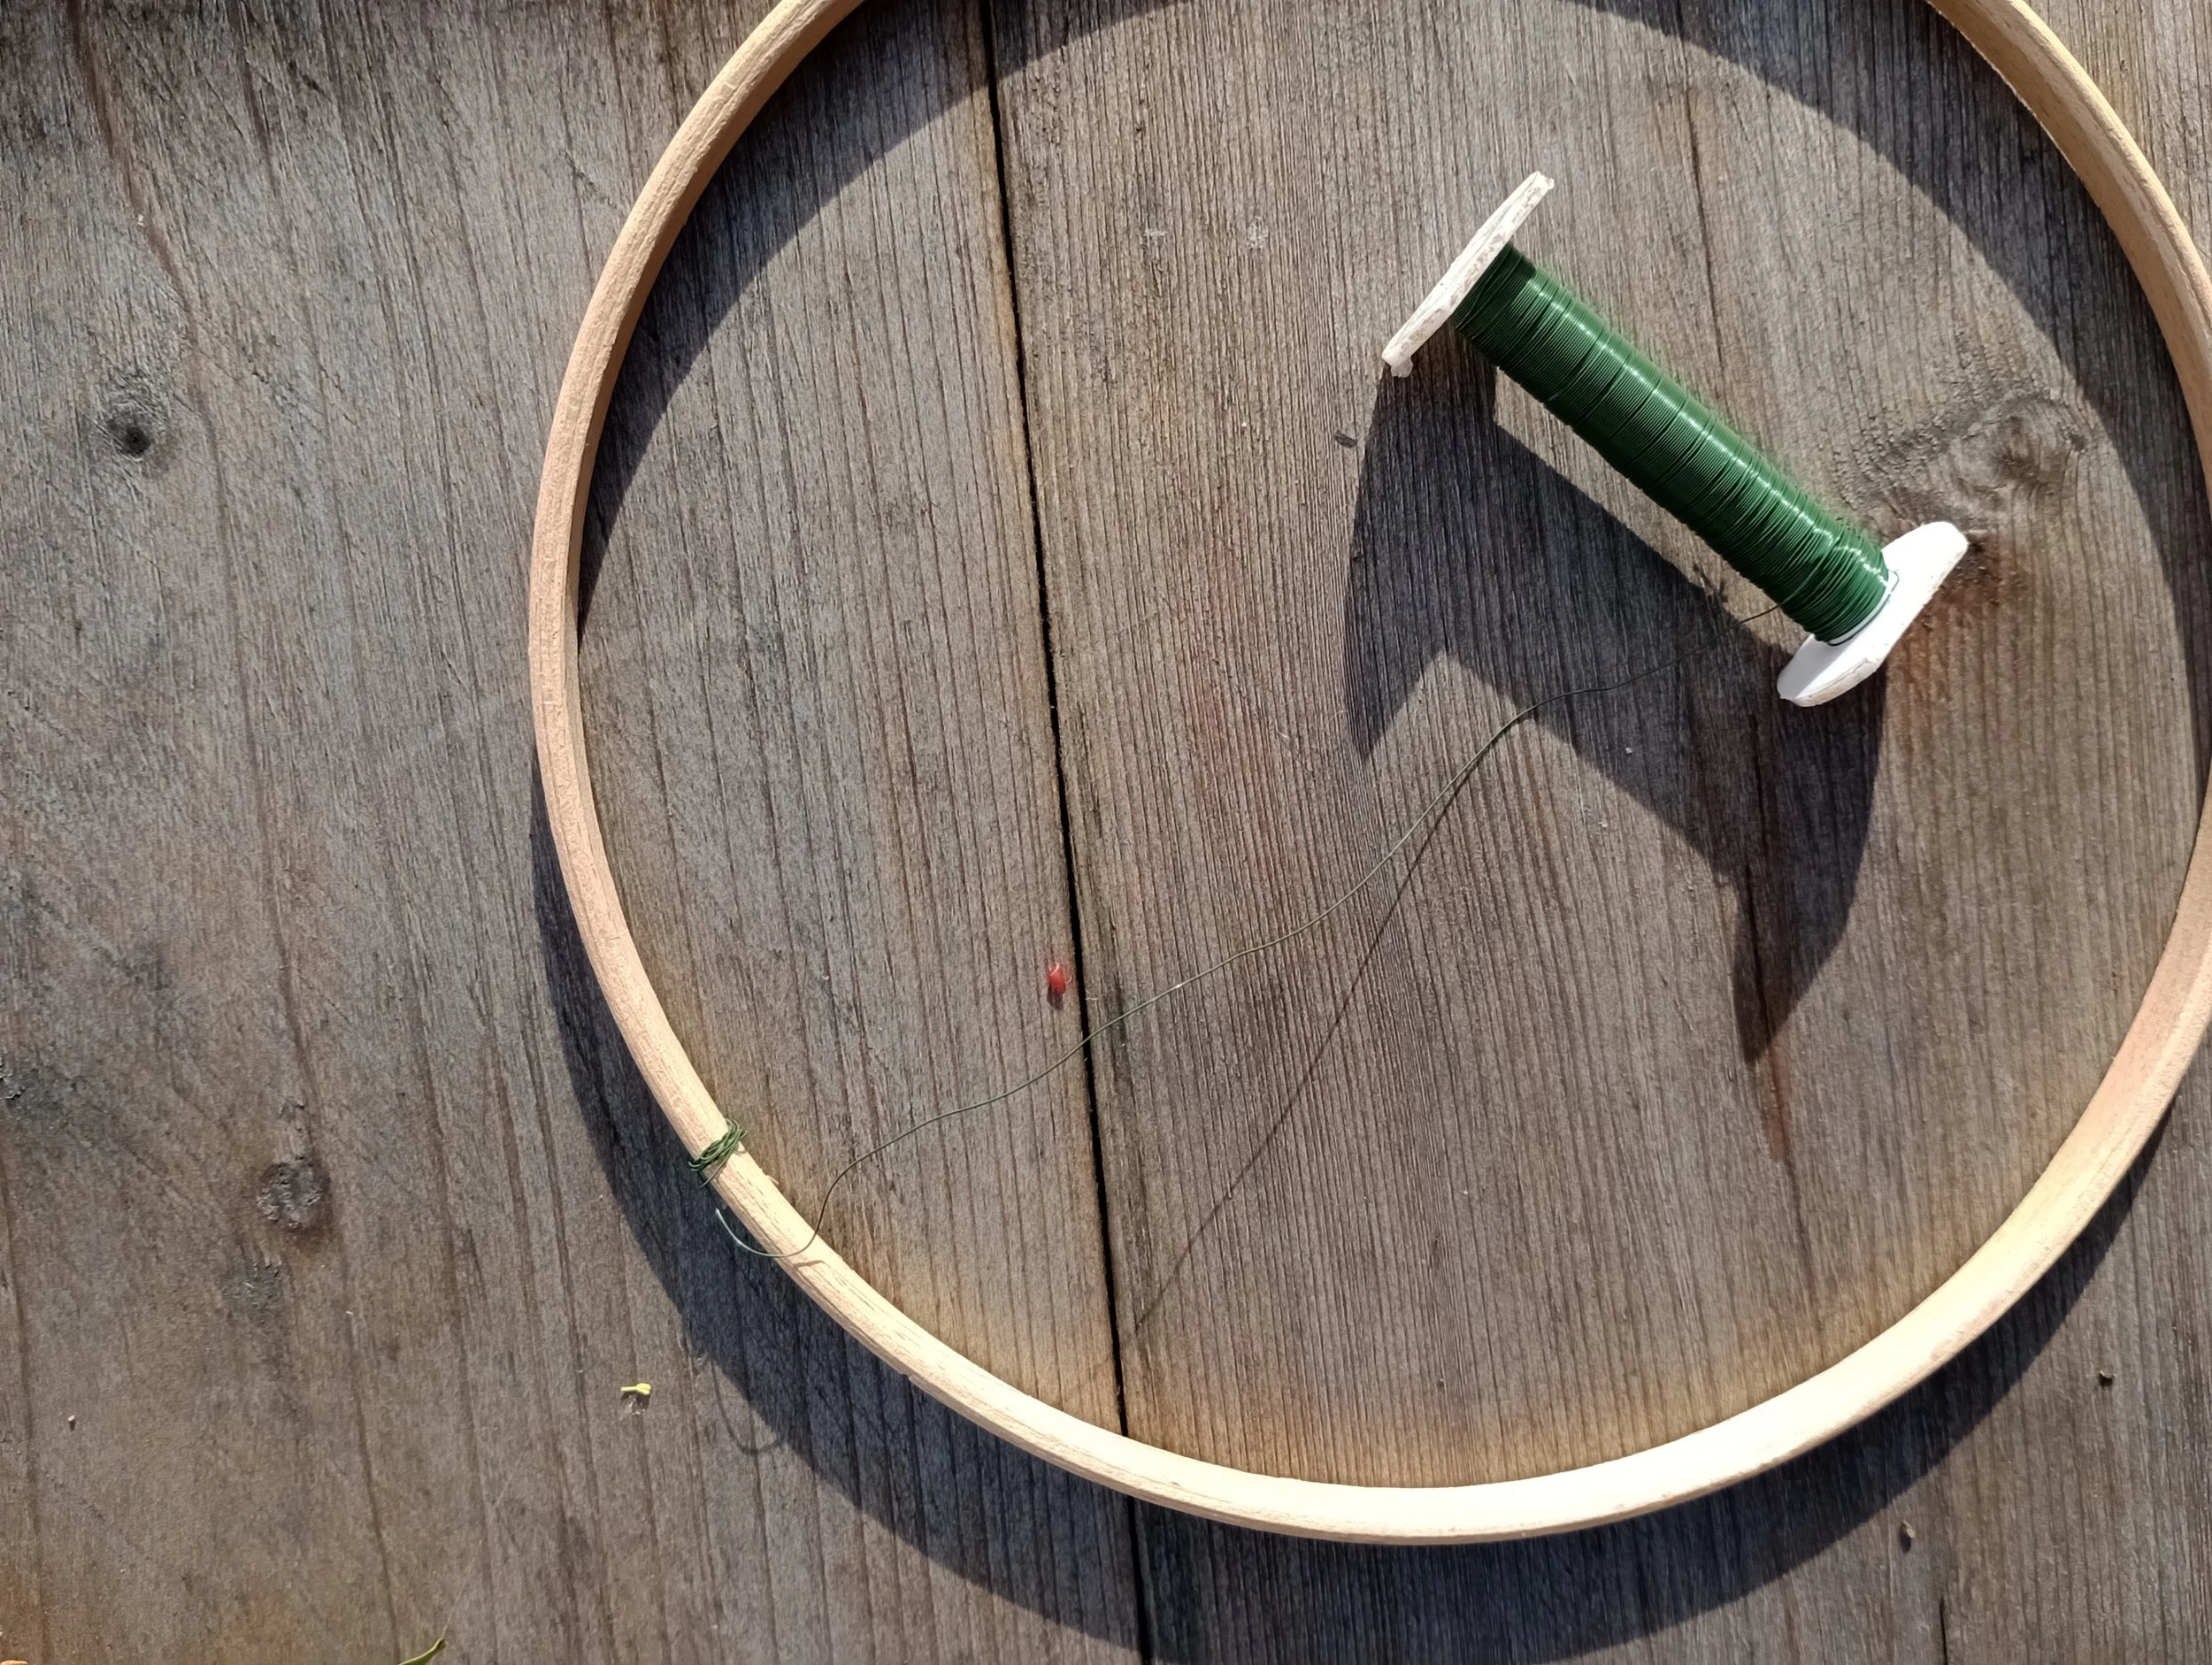
Step 3:
Attach the reel wire securely to the hoop. Do not detach the reel wire until the wreath is complete.
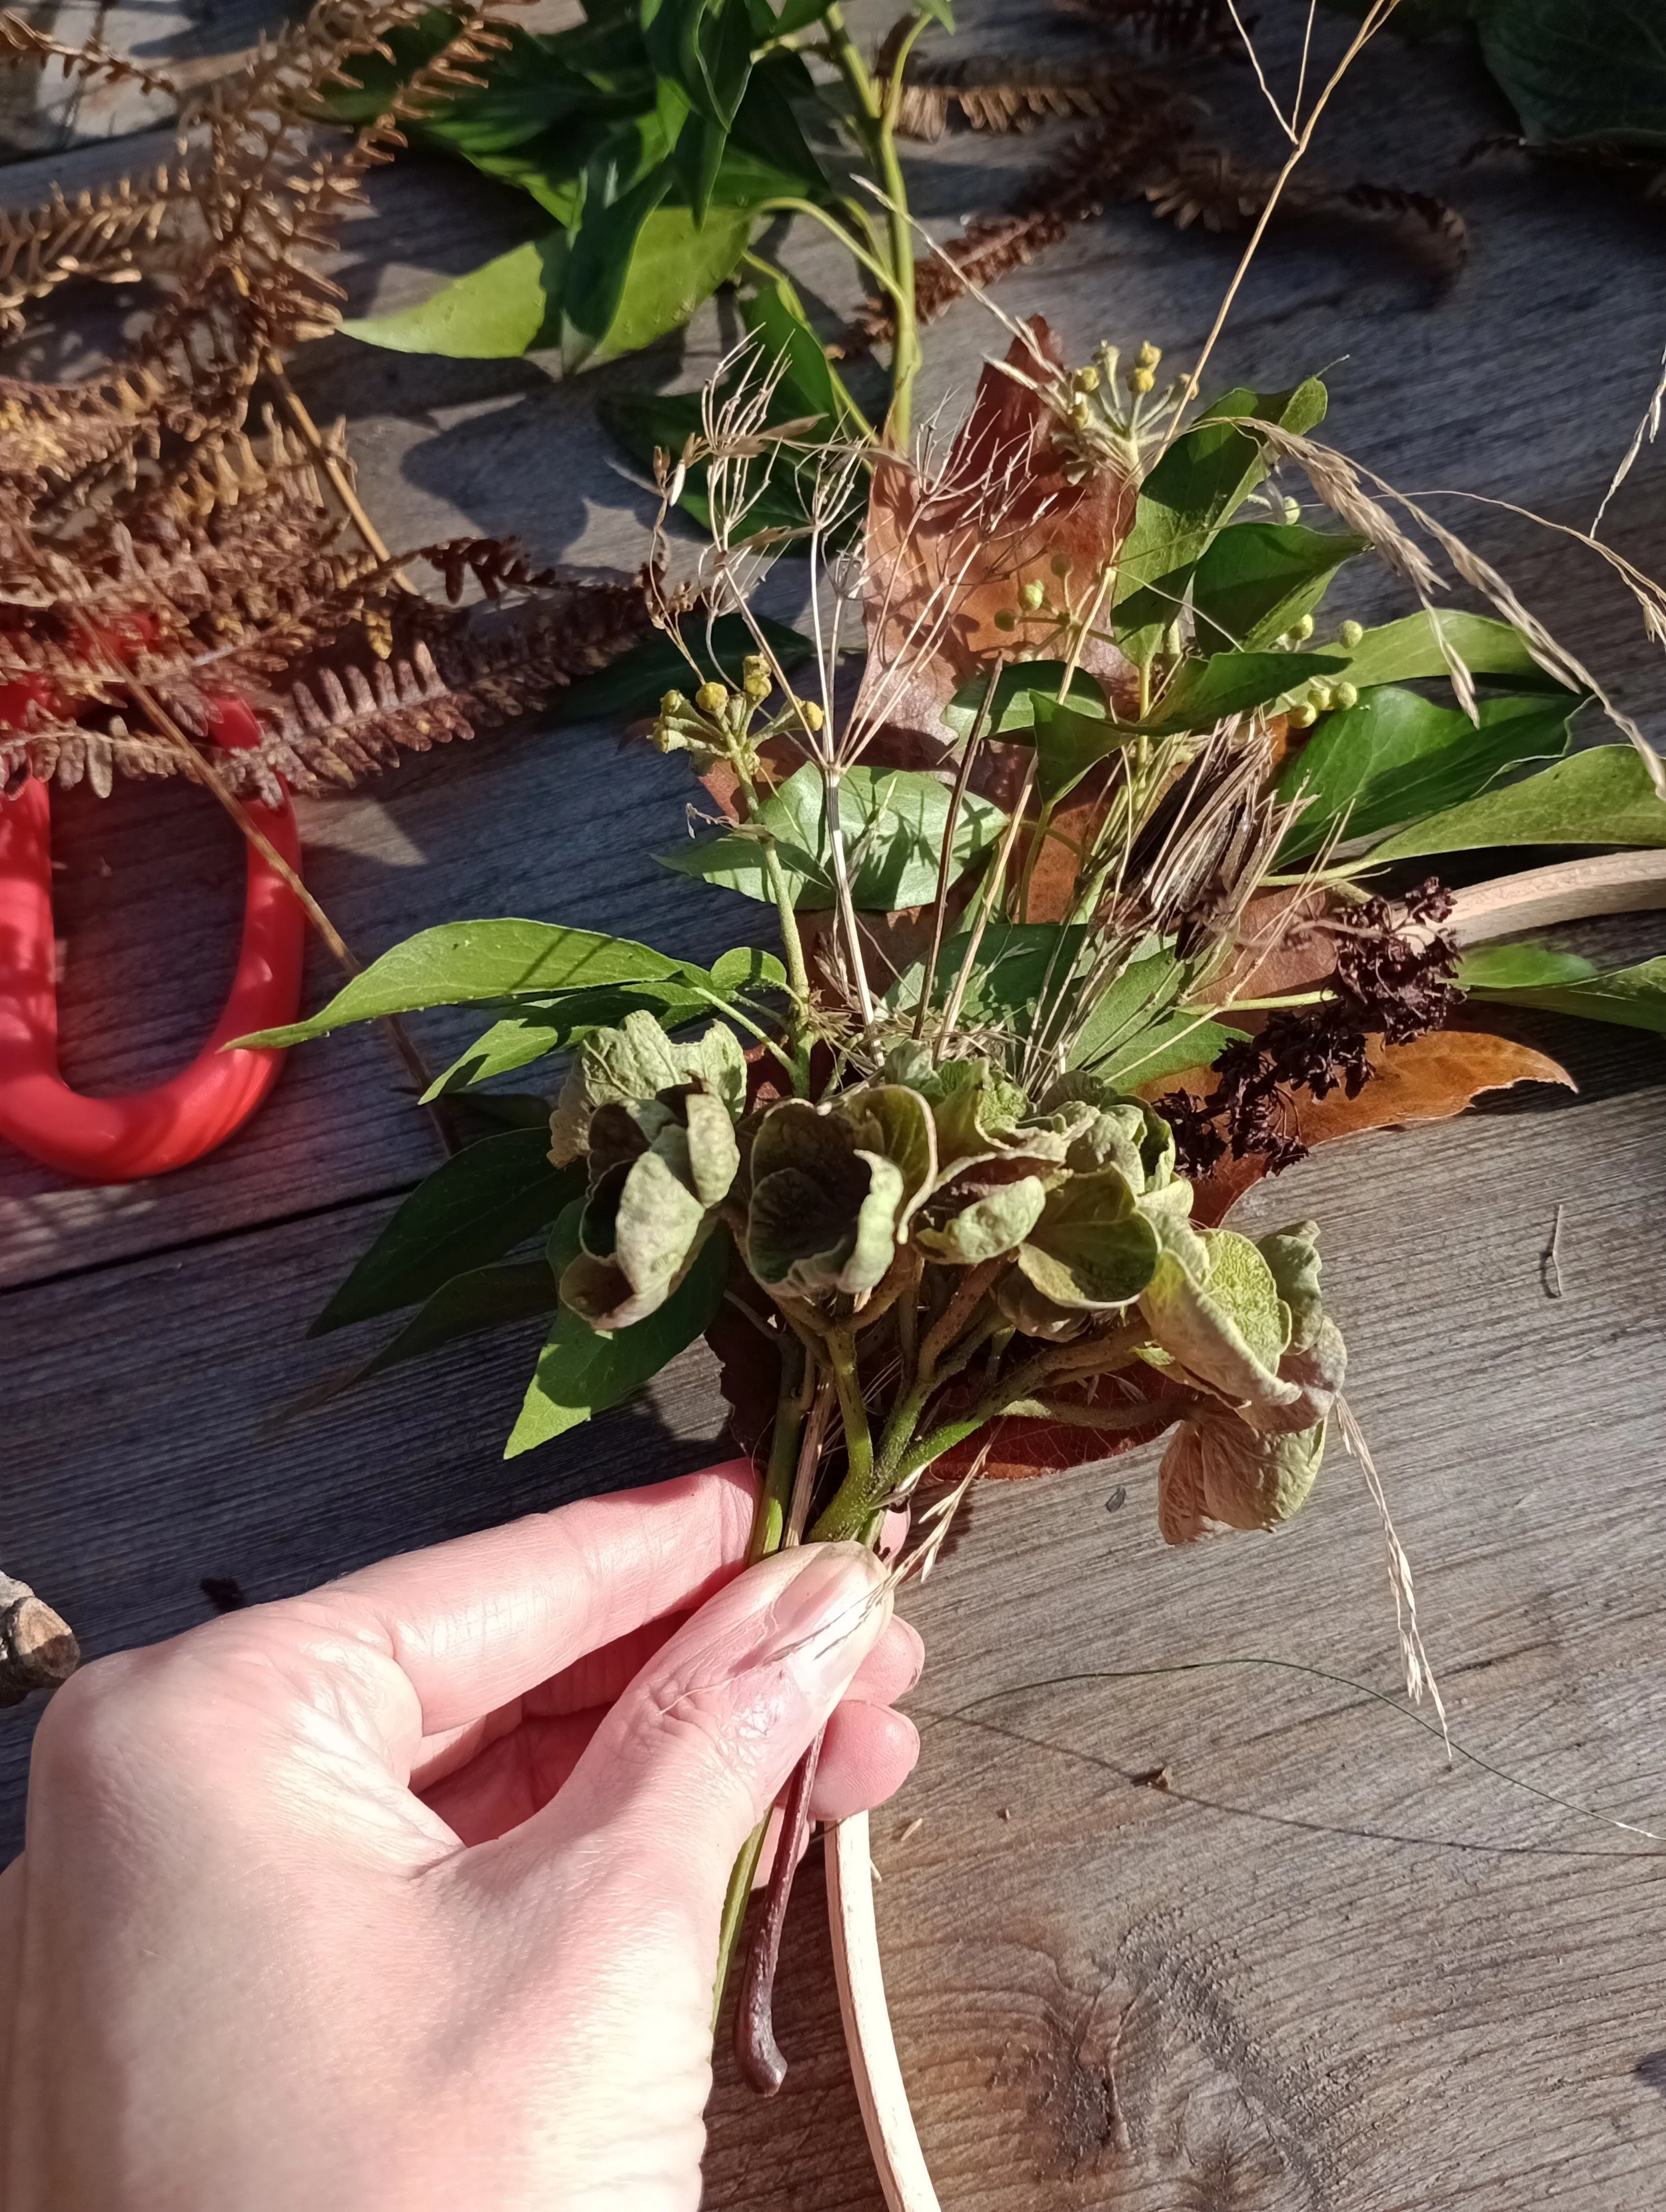
Step 4:
Start to gather small bunches of your foraged finds and attach to the hoop. Wrap the reel wire around the bunch a few times to ensure it is secure. Keep adding small bunches of foliage slightly over your last bunch until you are close to the centre of the hoop. Keep the reel wire attached to the hoop. Wind the reel wire round to the opposite side of the hoop and stop where you want to position the first bunch of foliage on the opposite side.
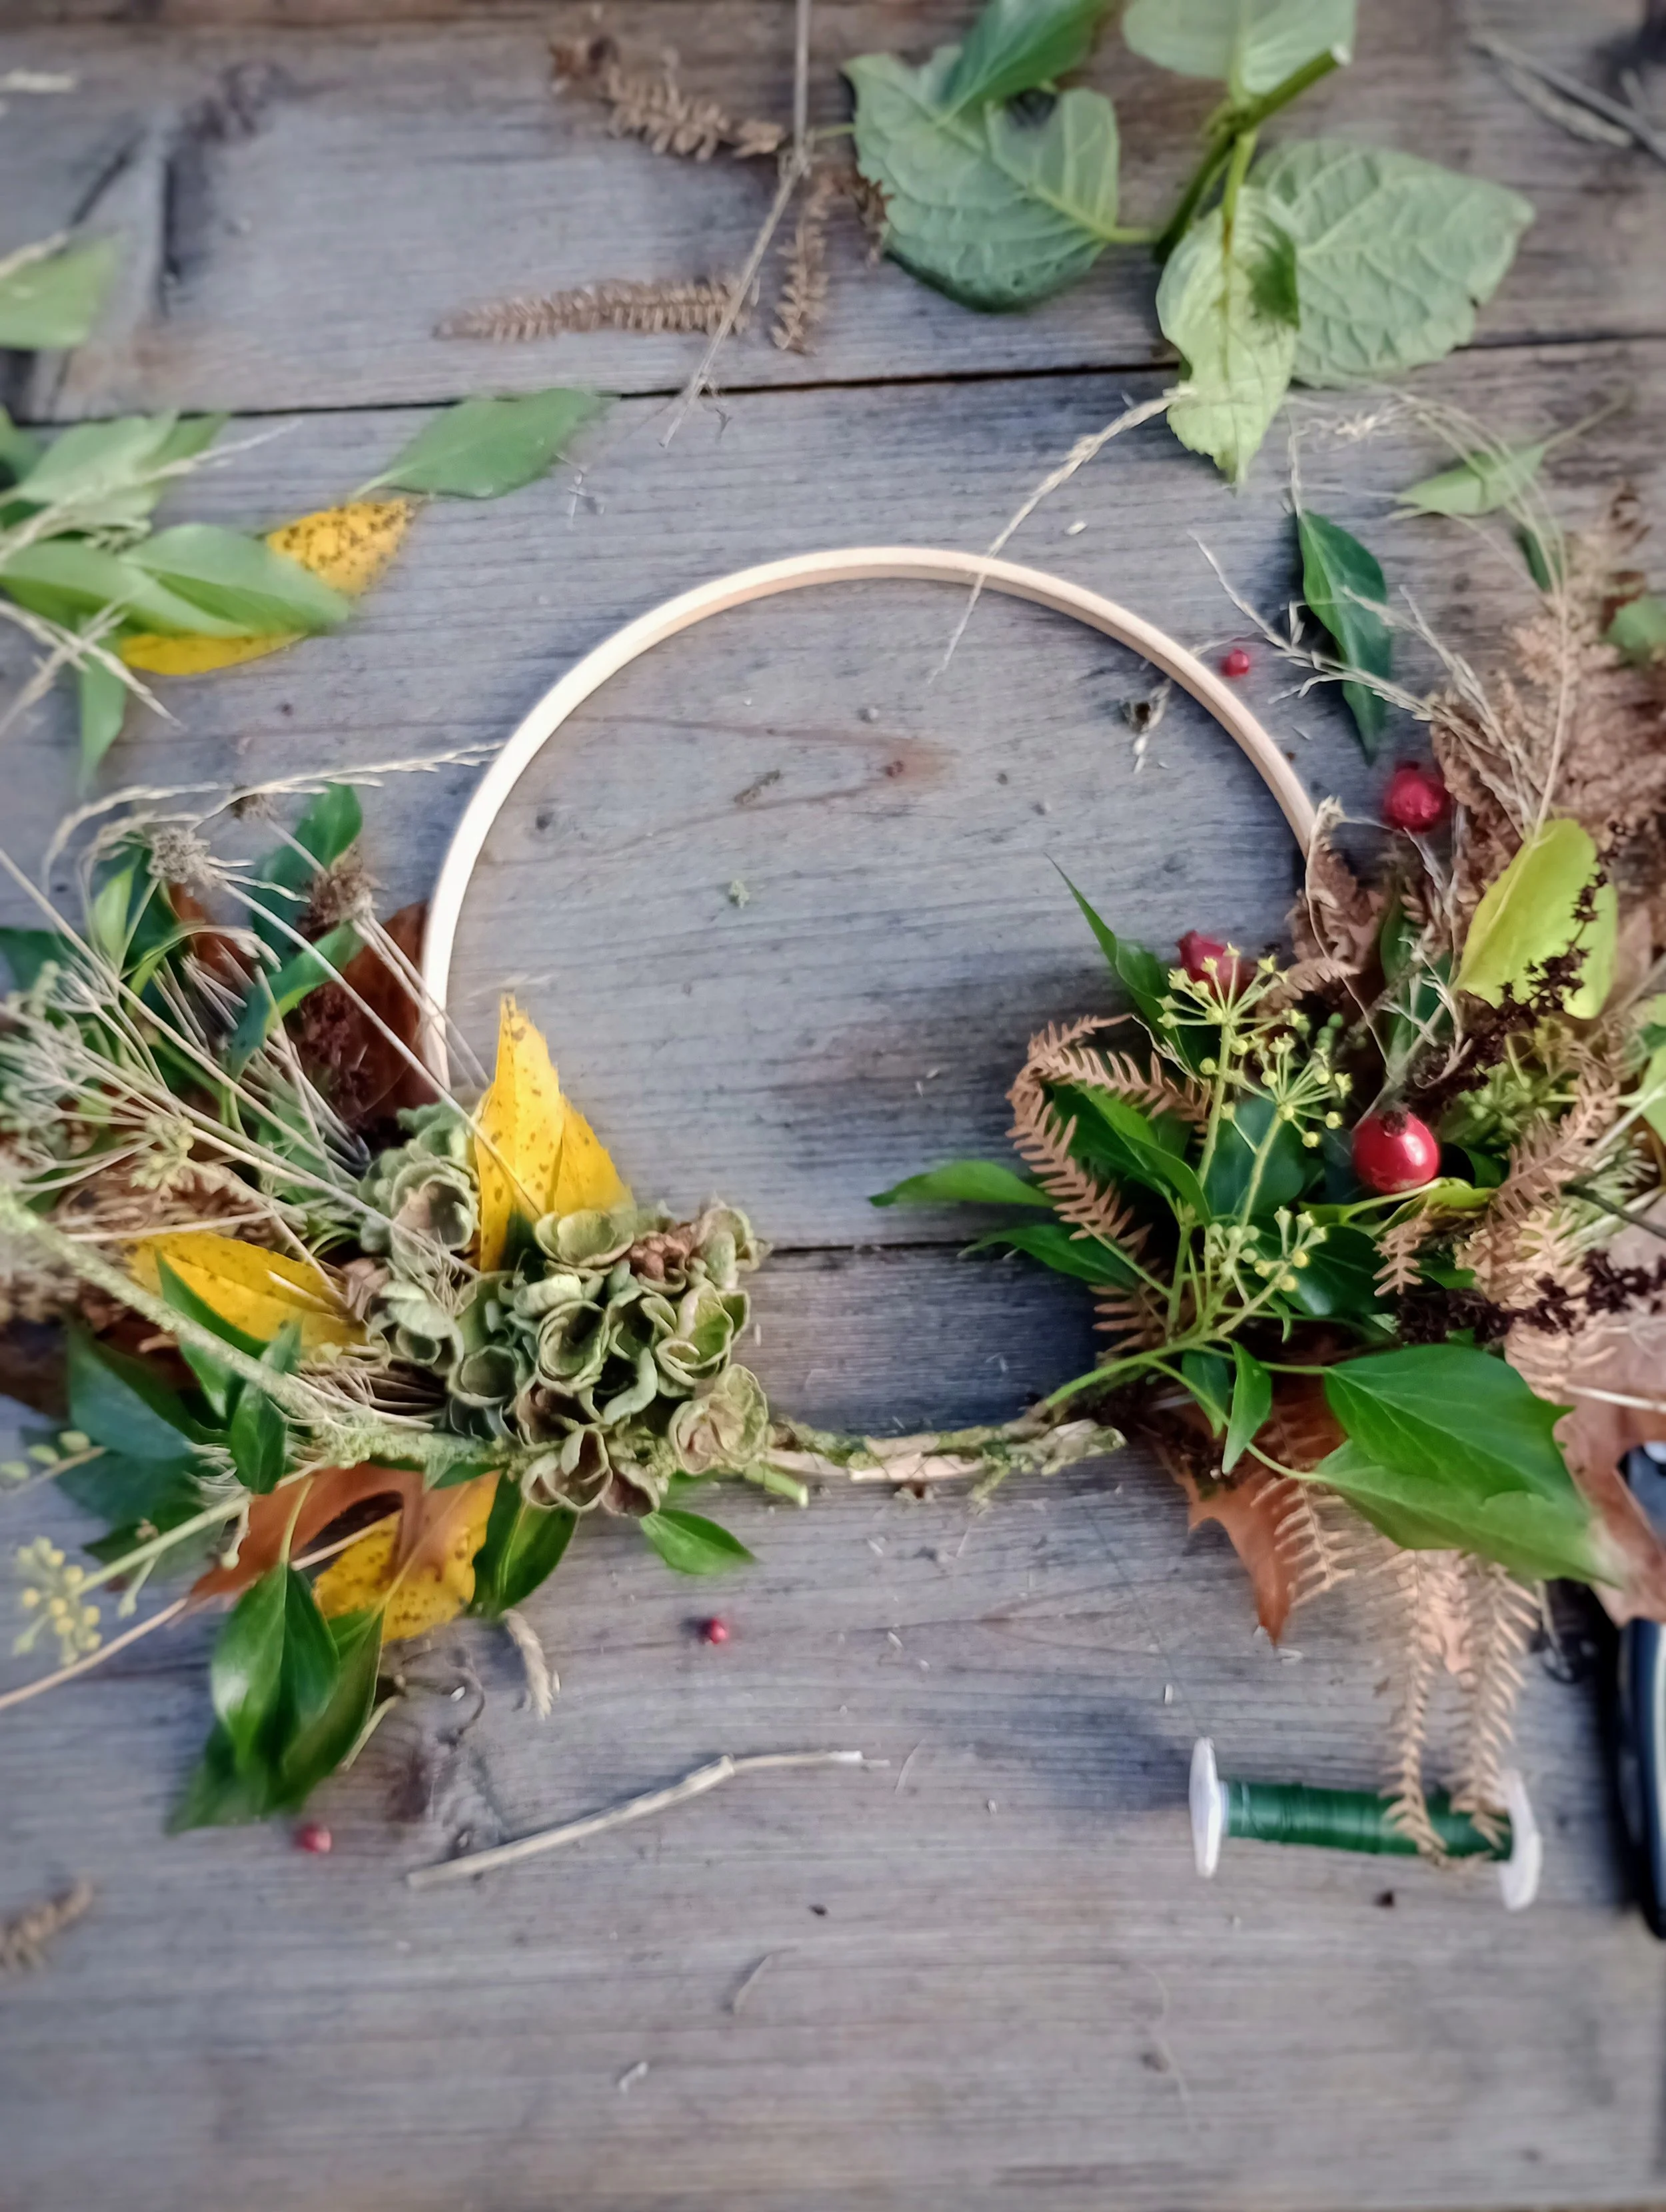
Step 5:
Start adding small bunches of foliage to the other side of the hoop. Work your way down to the centre of the hoop. You should end up with a structure similar to the image below. Keep adding small bunches until you are happy with the shape on both sides. Placing your wreath on the floor is a good way to check that you are happy with the overall shape.
Step 6:
Cut the reel wire and secure to the back of the hoop. Add the ribbon to the centre of the hoop - this will cover the mechanics and the join. I prefer to use multiple lengths of ribbon. Once complete add a piece of twine to the top of the hoop and place on a door or wall.
I enjoy using embroidery hoops as a wreath base - they are easy to work with and look very pretty if part of the hoop is left visible.
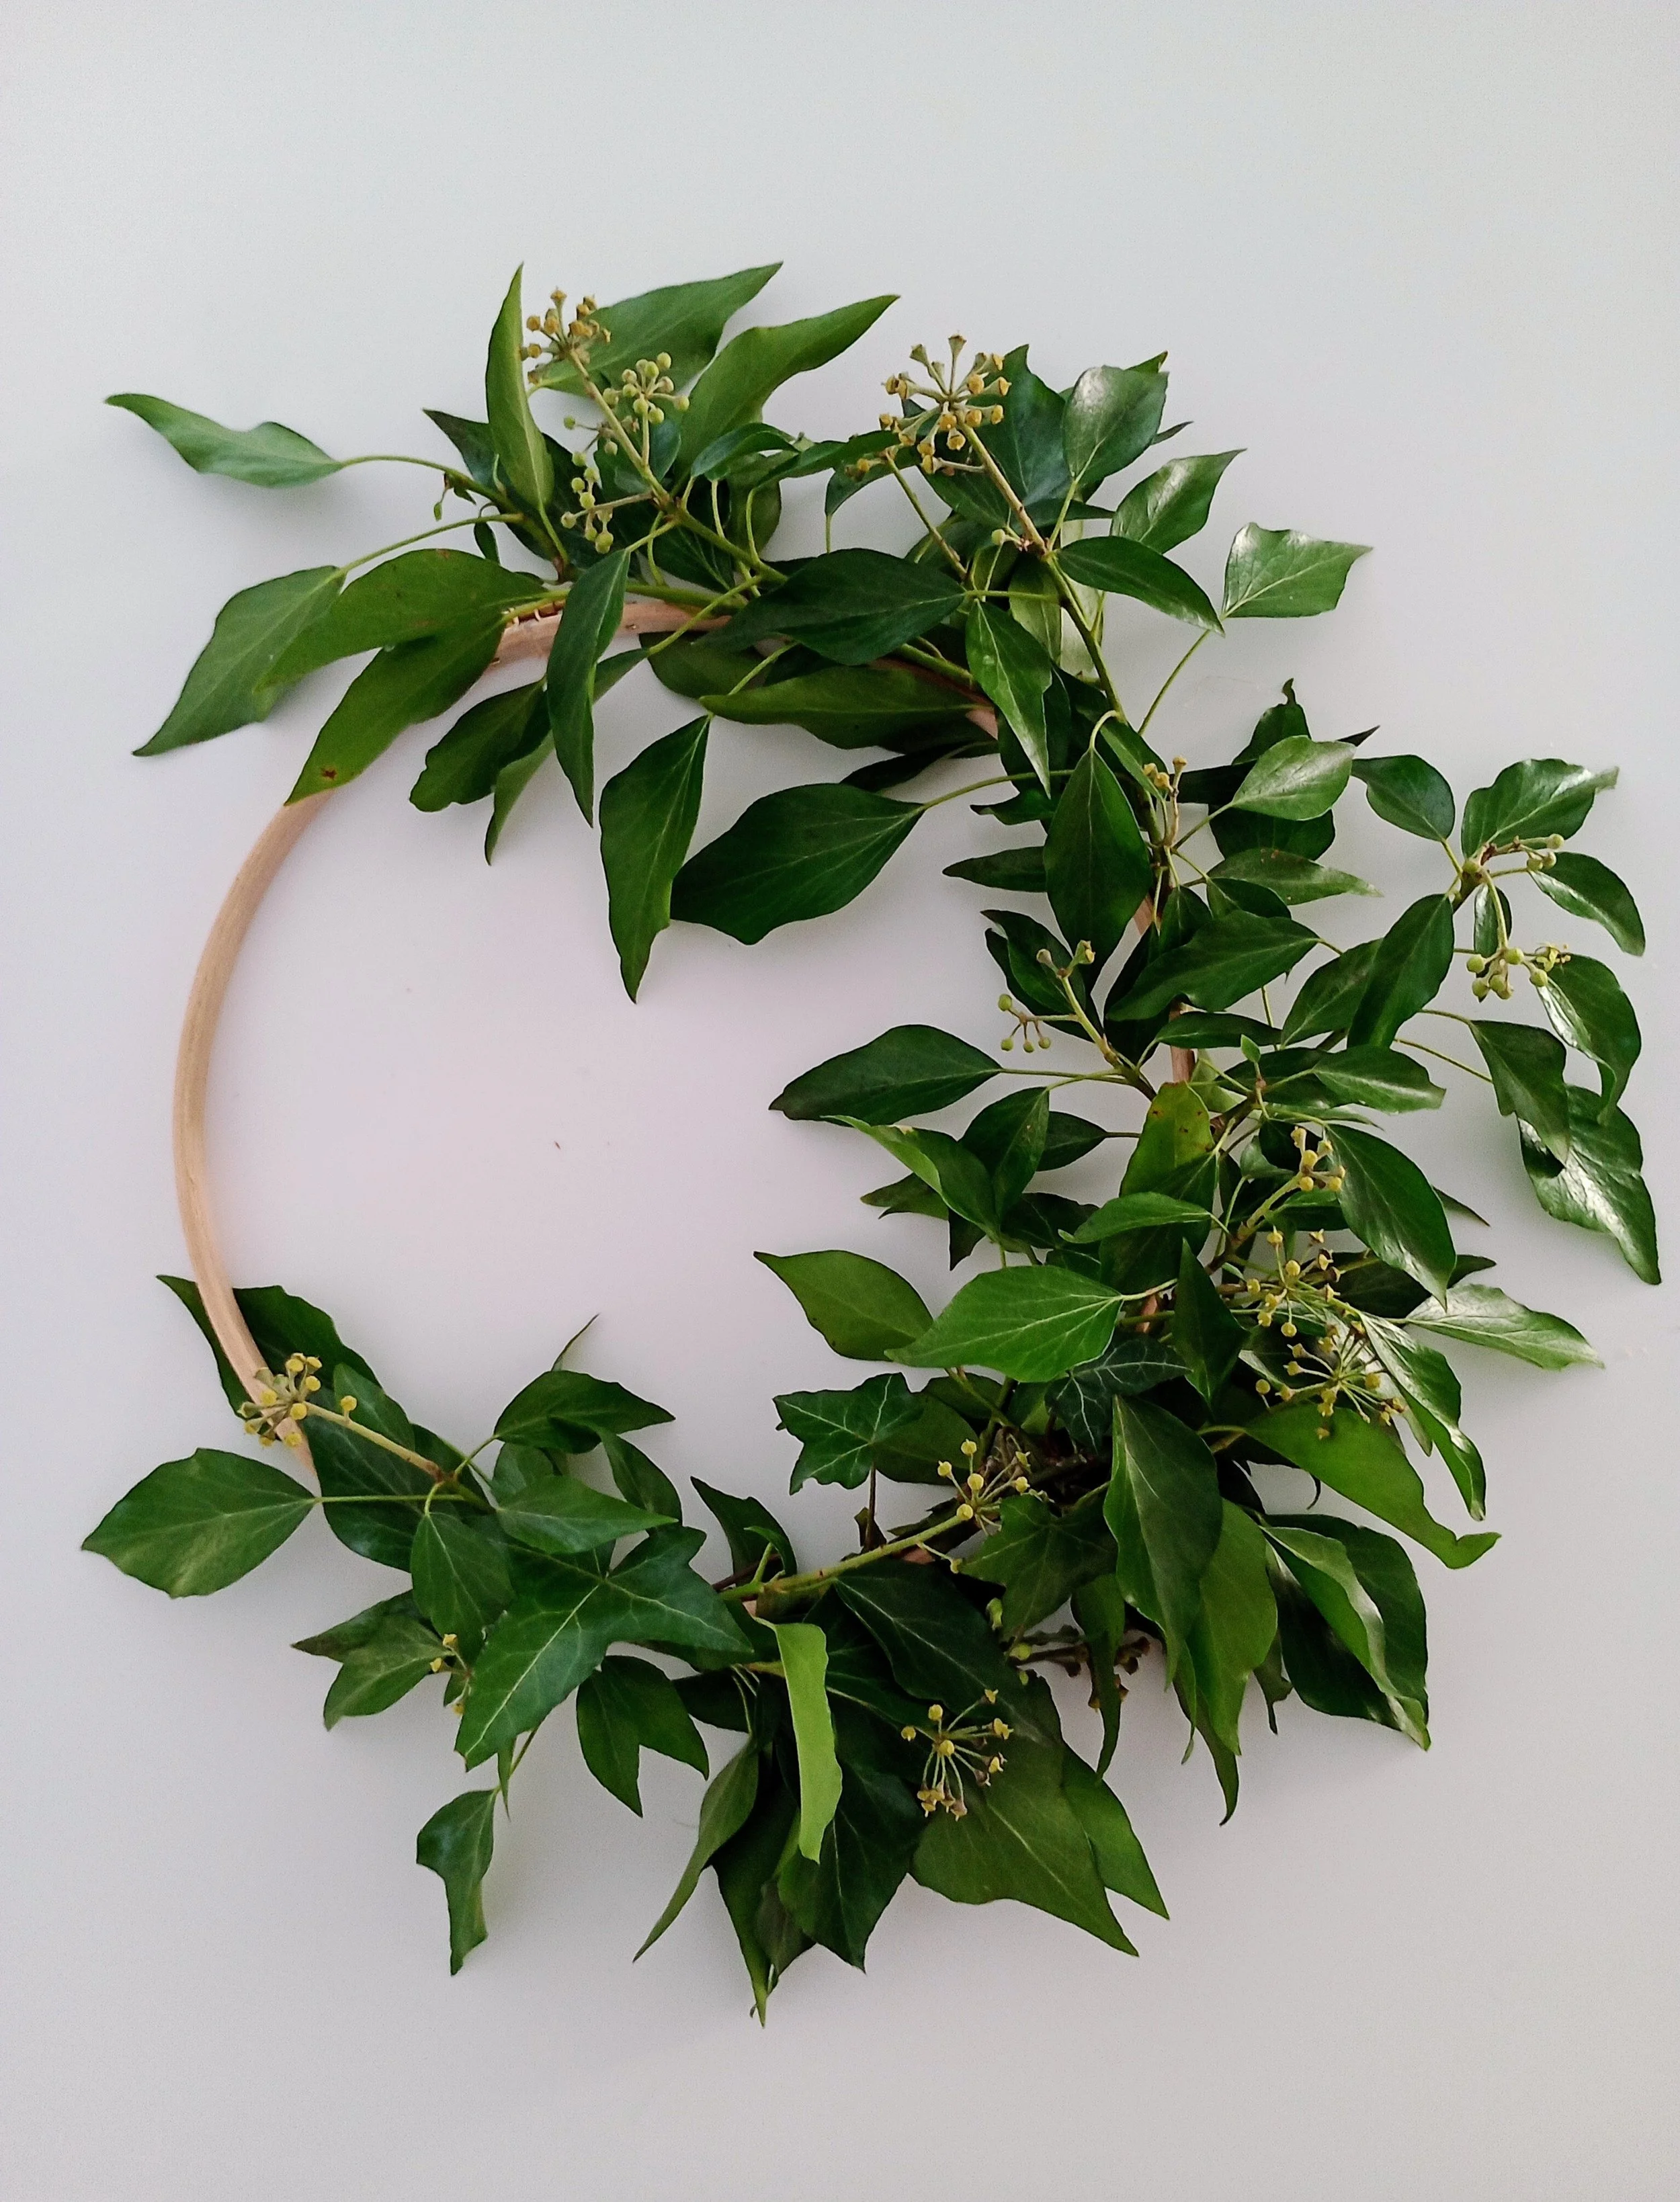
Sometimes simple is best - this wreath was made using one ingredient - Ivy
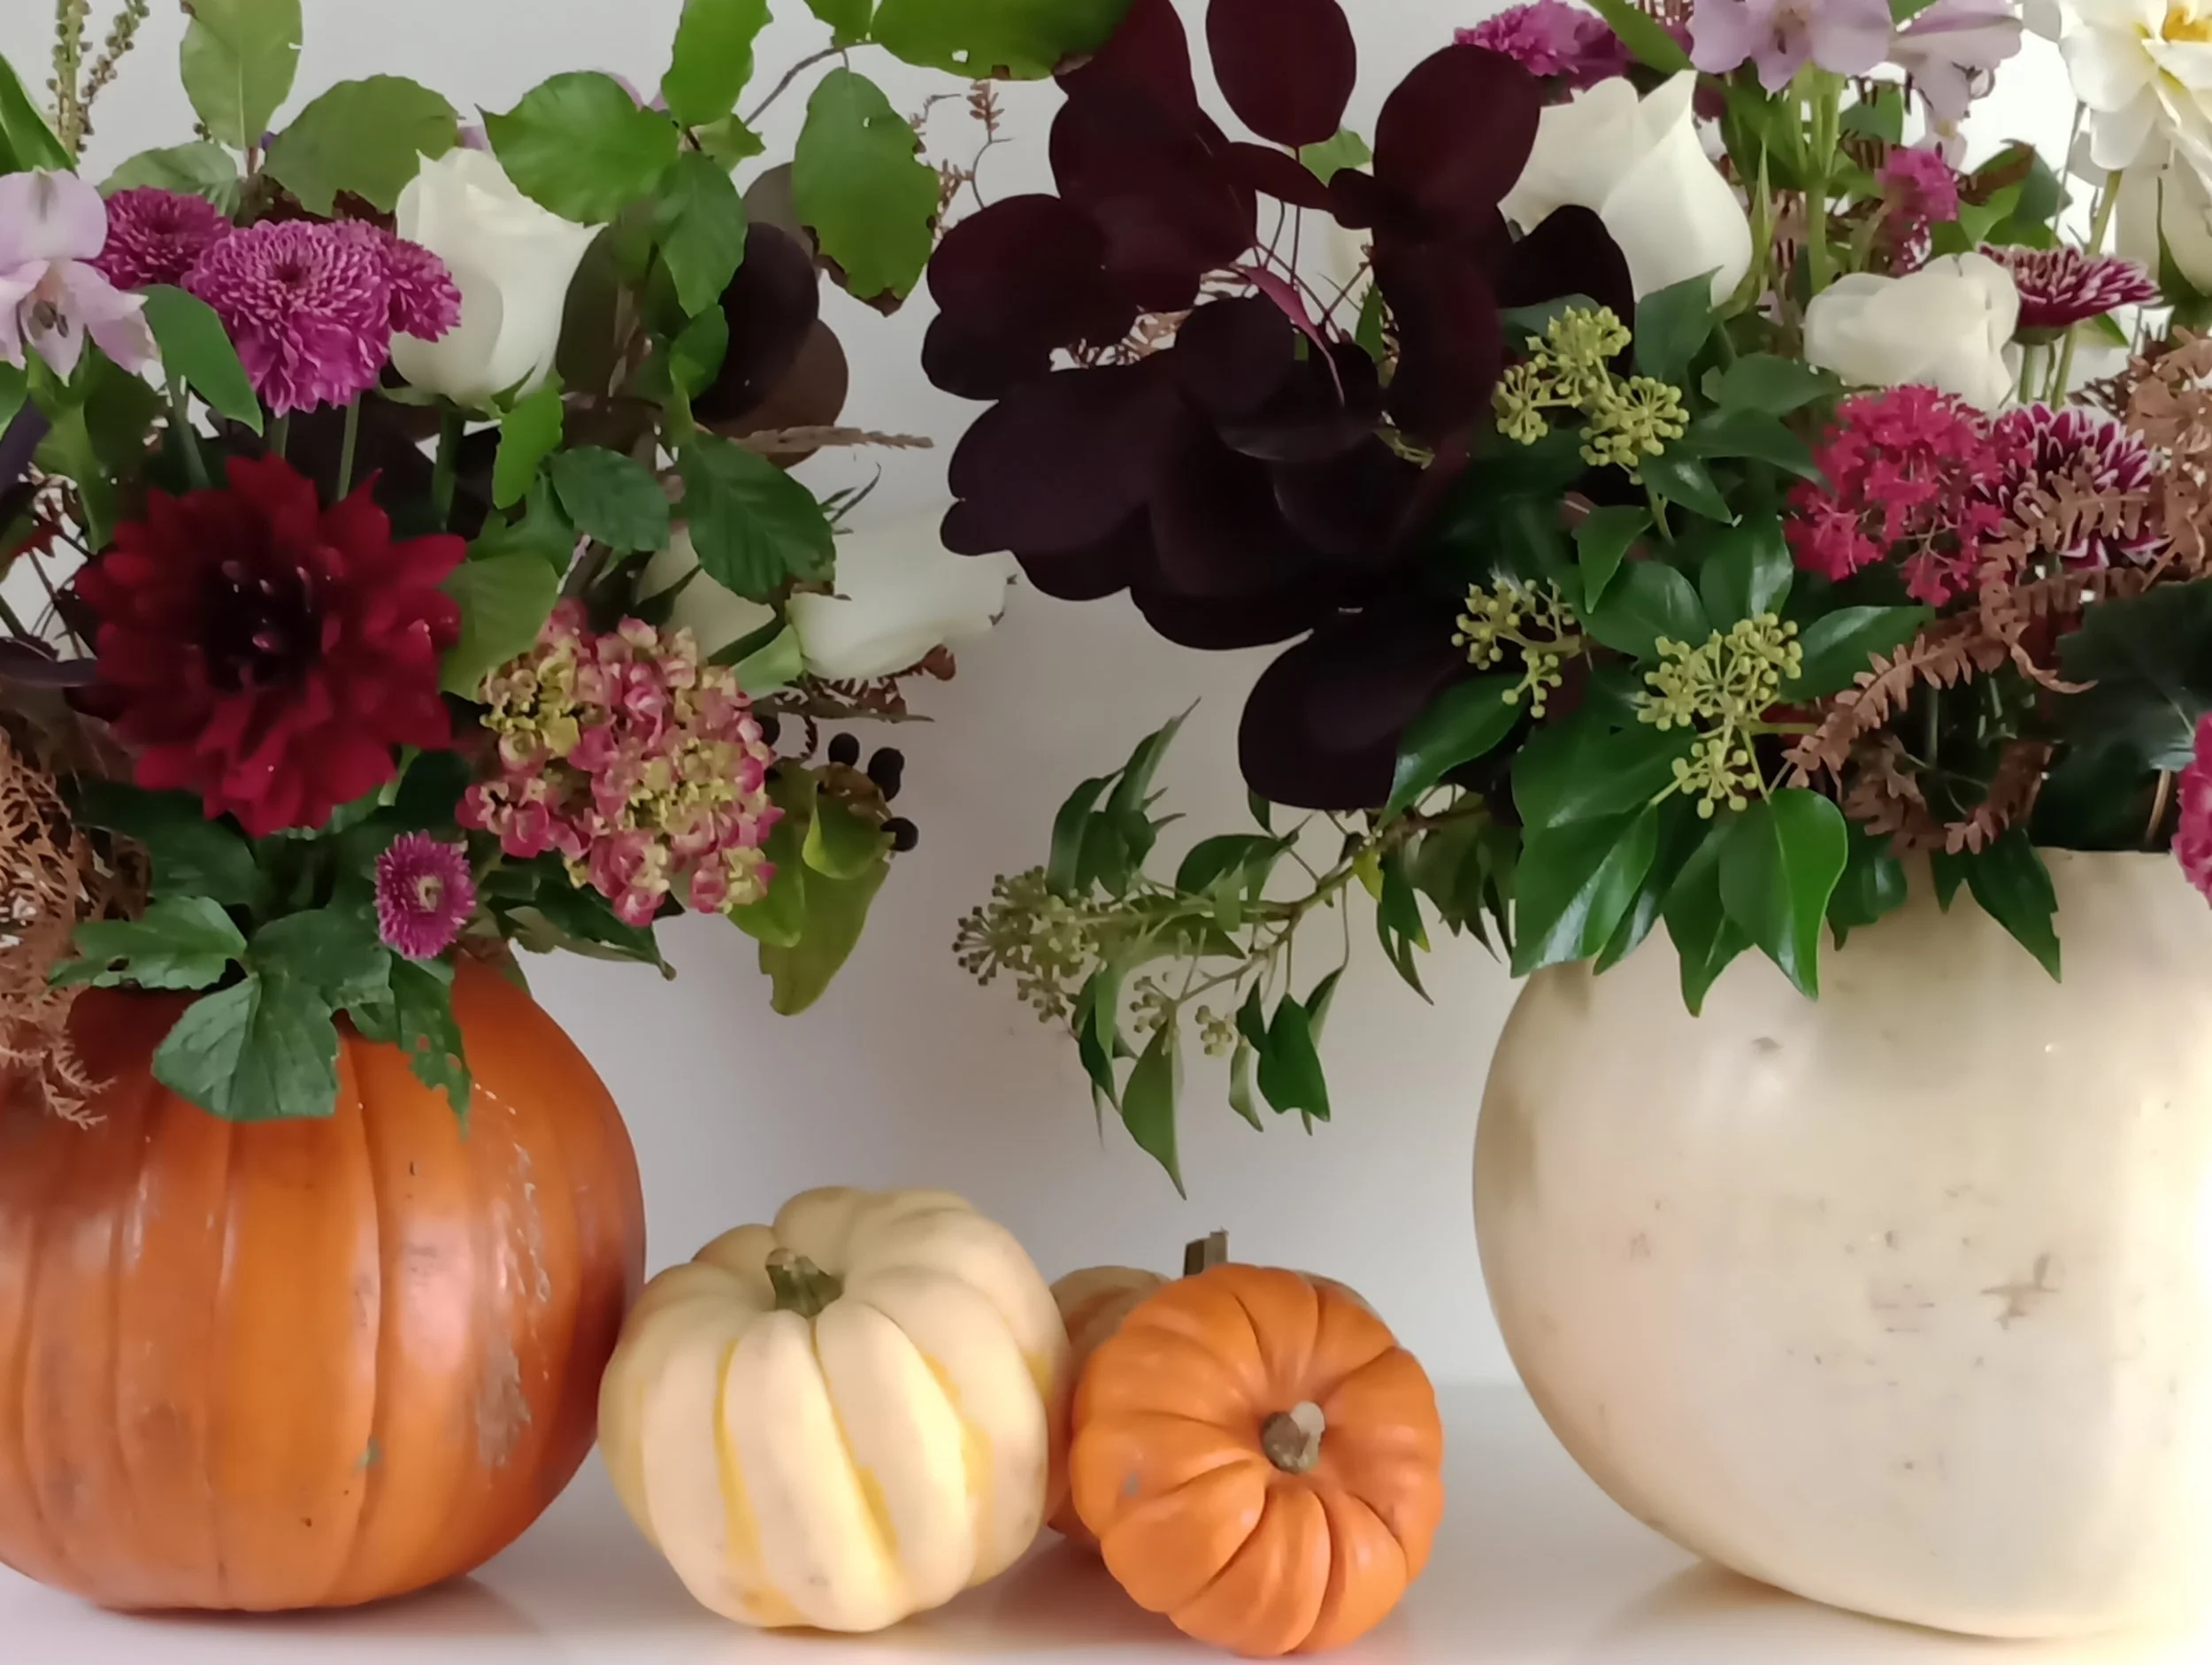
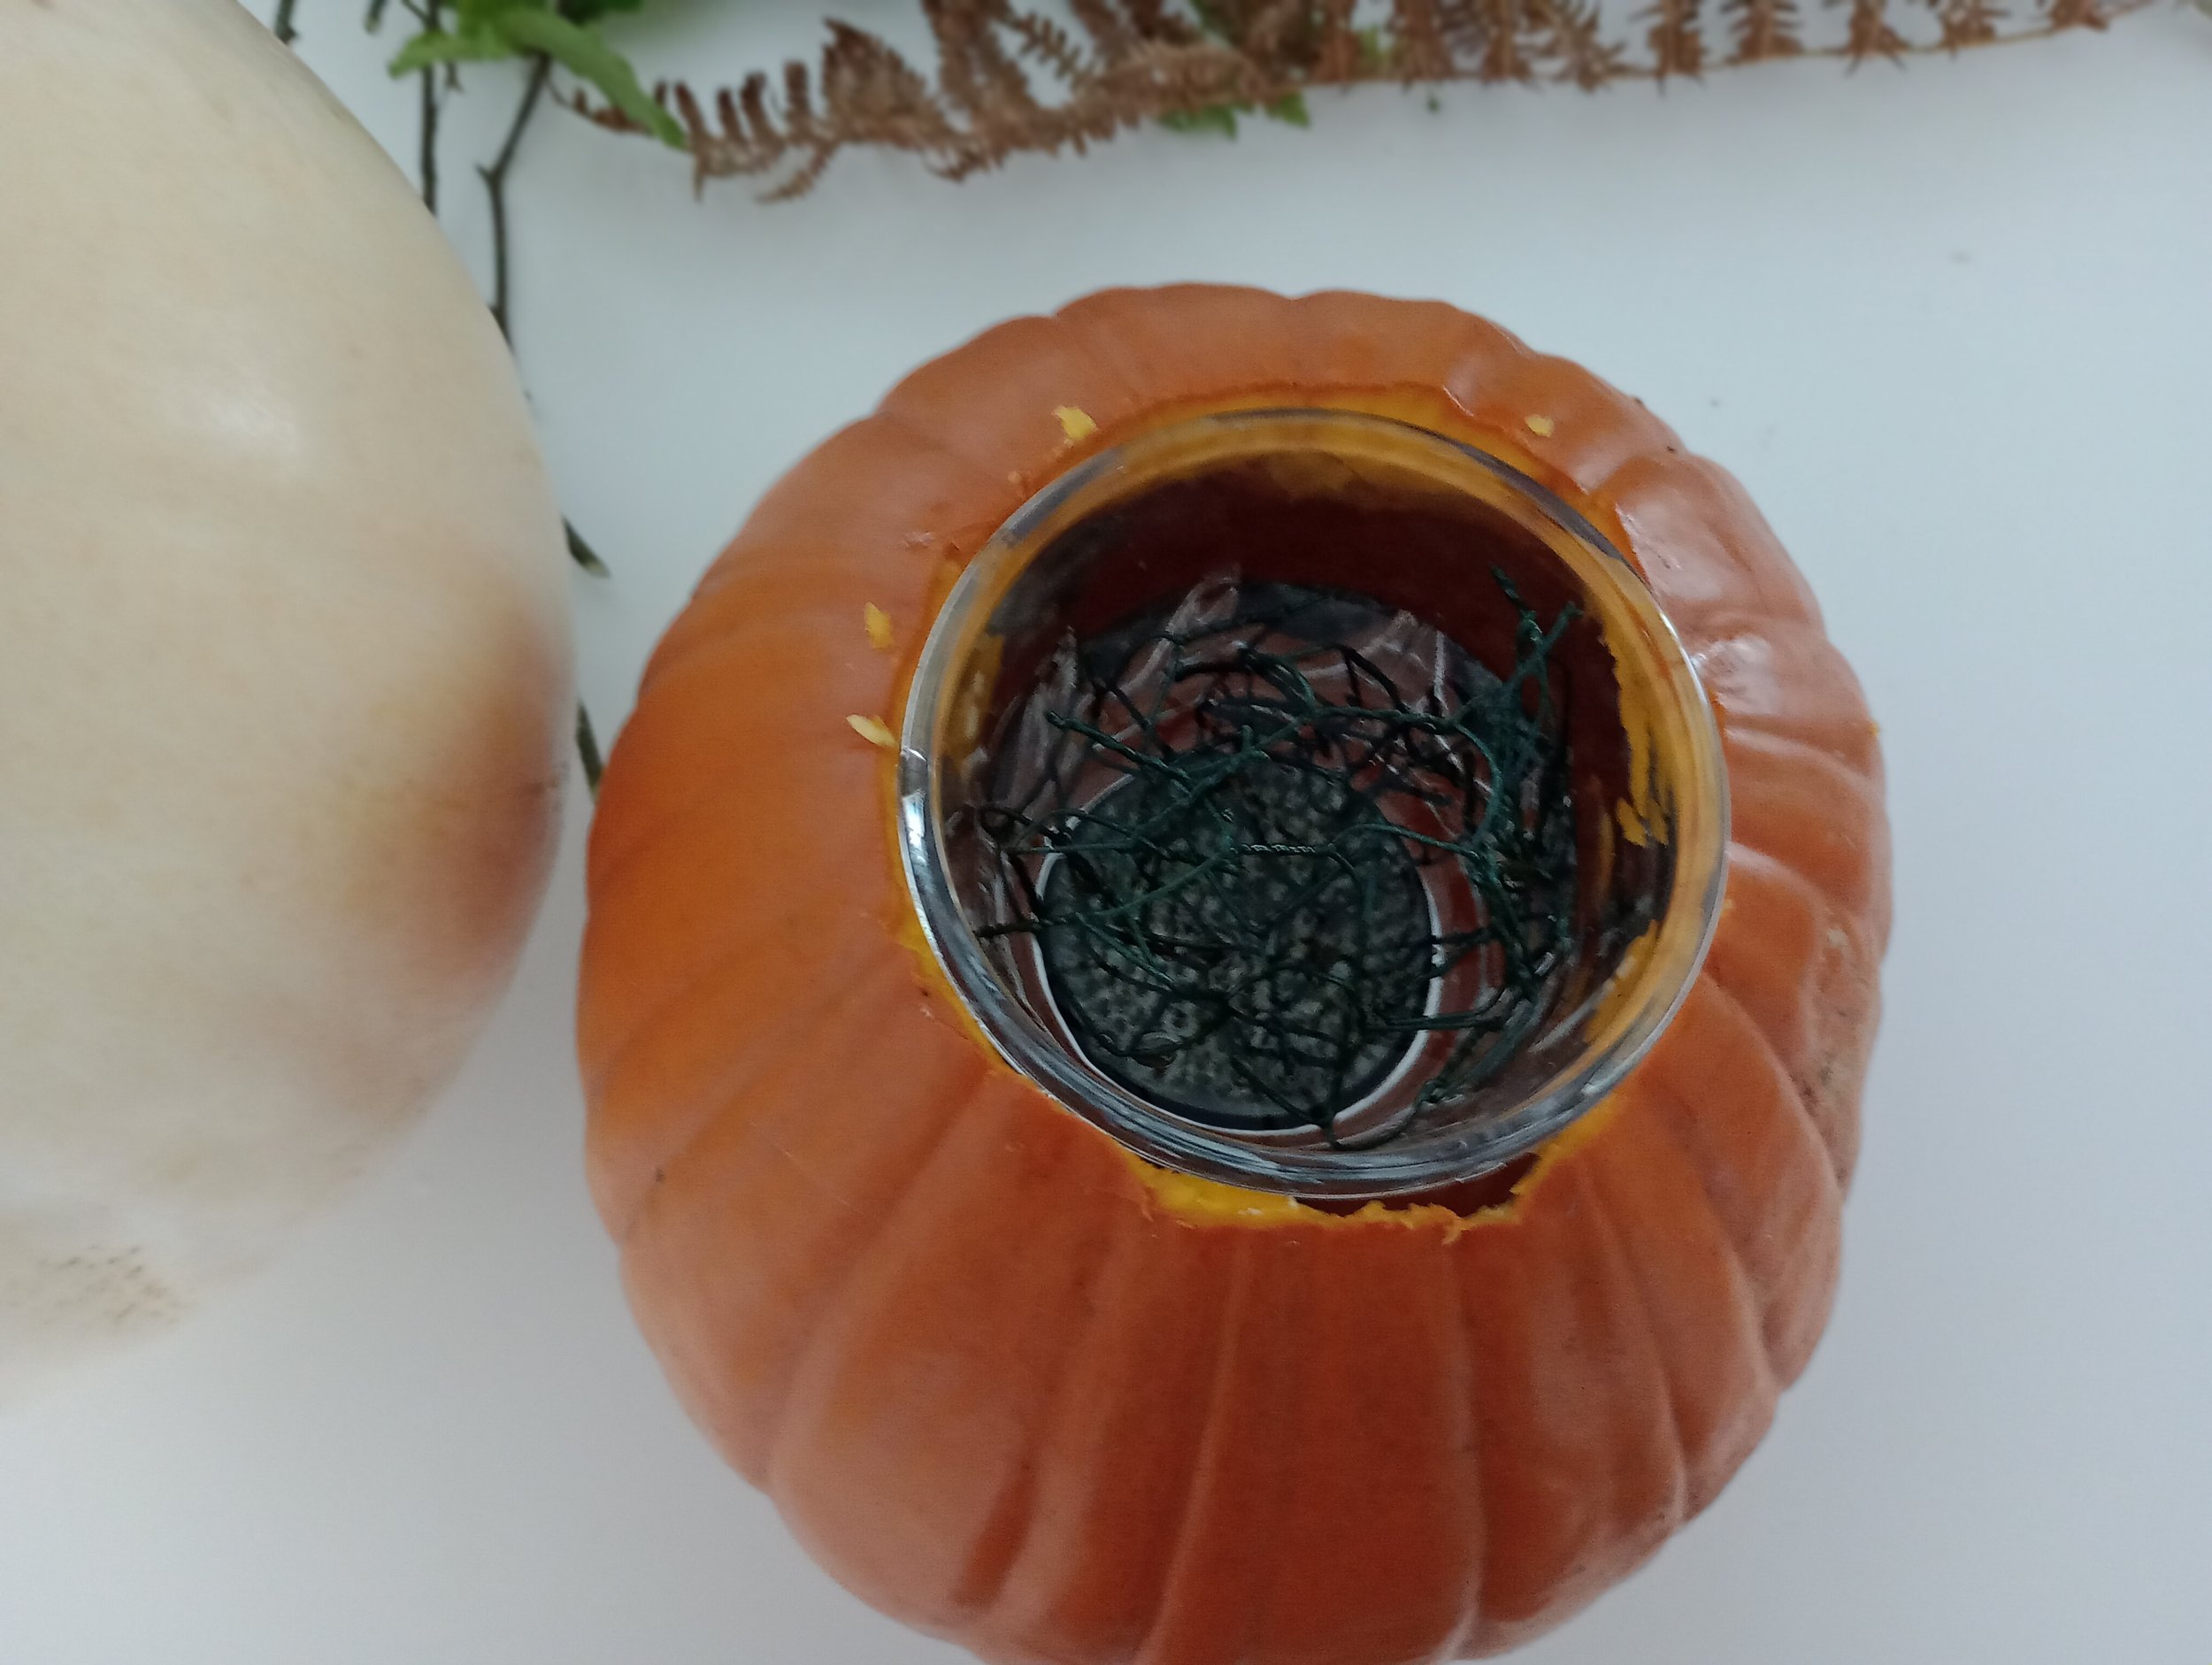
A Floral Pumpkin Arrangement for Halloween
This is a really simple and cost-effective arrangement for Halloween.

This is a really simple and cost-effective arrangement for Halloween.
You will need:
A few different sized pumpkins (I bought these from a local farm shop).
Some containers to insert inside the pumpkin (I used a large yogurt pot and a luminarc jar).
Chicken wire.
A kenzan (Flower Frog).
Some pot tape or twine.
Seasonal flowers and foliage (I used alstroemerias, chrysanthemums, dahlias, roses, hydrangeas, smoked bush, bracken, ivy, beech)

Step 1:
Buy different sized pumpkins. I bought the smaller pumpkins from M&S and the larger pumpkins from a local farm shop.
Step 2:
Cut a hole in the top of the pumpkin and scoop out the inside. For the larger pumpkin, I measured around the yogurt tub that I was using as a container.

Step 3:
Prepare the containers. As you can see from the image below, I used a large yogurt pot for the larger pumpkin and a luminarc jar for the smaller pumpkin. You can use any type of container that will fit inside the pumpkin, as long as it can hold water - milk cartons cut down to size, jam jars etc.
I then inserted chicken wire into both containers, instead of using floral foam. Floral foam is damaging to the environment whereas chicken wire can be reused. I also added a kenzan (flower frog) to the luminarc jar. I used pot tape to secure the chicken wire to the yogurt pot for extra stability (you can also use twine, reel wire or paper covered wire). The containers can also be reused time and time again.

Containers with chicken wire
Step 4:
Prepare your flowers and foliage. I used a mixture of bought and foraged finds. I found ivy, bracken, grasses and beech from a walk around my local area.
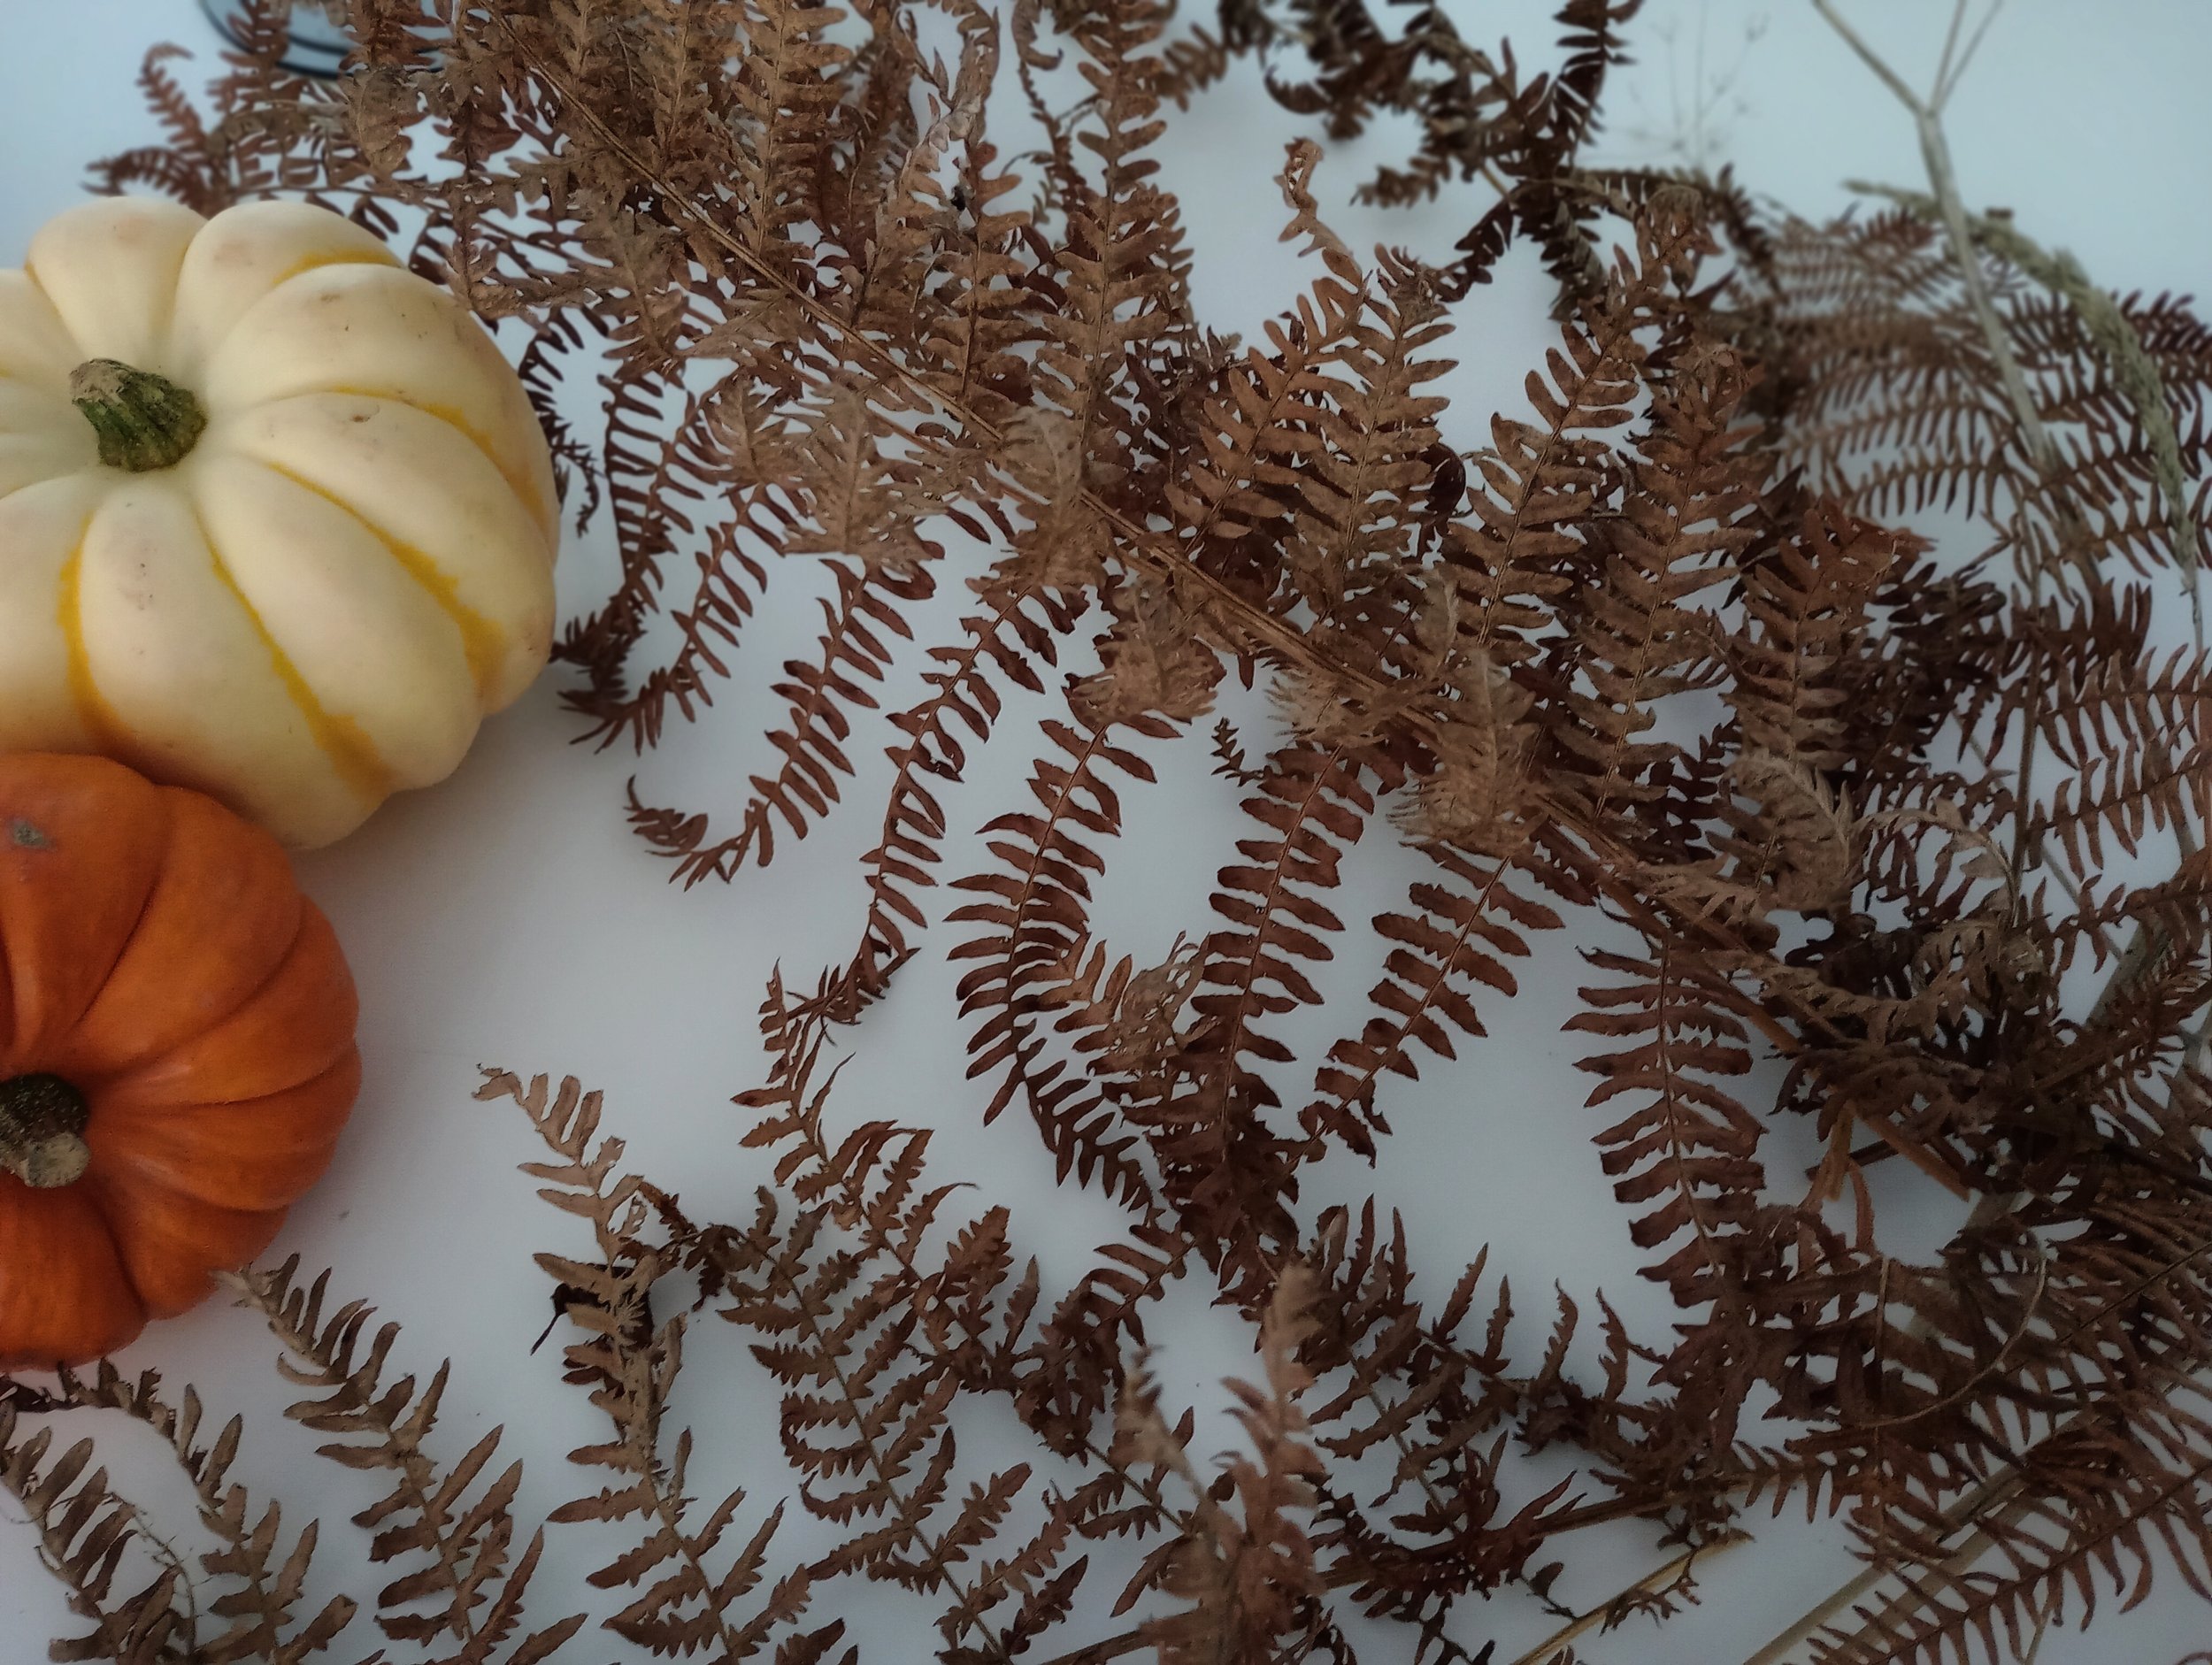
Foraged Bracken

Foraged Foliage

Flowers - condition overnight (see previous journal on conditioning flowers)
Step 5:
Insert the containers into the pumpkins and don’t forget to add water to the containers!
Larger pumpkin with large yogurt pot
Smaller pumpkin with luminarc jar
Step 6:
Add the foliage first to create a structure. Then add your flowers. Keep turning your pumpkin to insert the flowers. I added the larger blooms first and the smaller blooms last.
Start with the foliage to create an initial shape and structure

Add the larger blooms first
Step 7:
Add the remaining flowers. Turn the pumpkin to ensure you are happy with your arrangement from all angles. Make sure you can’t see the container or any of the mechanics.
Step 8:
Enjoy your arrangement!
This would look lovely as a table arrangement for a Halloween meal or celebration, or outside as part of a Halloween display.


Preserving a moment in time - how to press flowers
I remember pressing flowers within the pages of a heavy book when I was a child. However, with a busy career in education, I didn’t start pressing flowers again until recently. Flowers are things of beauty. Unfortunately, once cut, they are with us for only a short period of time.
By pressing a flower, we can preserve its shape and form - an everlasting memory of a moment in time. Pressed flowers do fade over time, but they never lose their beauty and form.

I remember pressing flowers, within the pages of a heavy book, when I was a child. However, with a busy career in education, I didn’t start pressing flowers again until recently.
Flowers are things of beauty. Unfortunately, once cut, they are with us for only a short period of time. By pressing a flower, we can preserve its shape and form - an everlasting memory of a moment in time.
When I started to rediscover the pleasure of pressing flowers, I did quite a bit of research into the best techniques. It’s really rather simple and it’s relatively inexpensive to get started.
What you will need:
Freshly picked flowers or foliage.
A flower press or some heavy books.
Blotting paper (this can be reused time and time again).
Card (this can be reused time and time again).
A cloth.
I started off with an A4 flower press that I purchased online (you can use some heavy books if you don’t have a flower press). When the flower press arrived, I realised that it would be easy to make. I now have a number of handmade large flower presses made out of two pieces of wood.
If you decide to make your own flower press you will need:
Two pieces of wood (I use MDF or plywood).
Bolts.
Wing Nuts.
Washers.
Making a Flower Press:
Cut both pieces of wood to size.
If using smaller pieces of wood drill four holes. The press in the image below has six holes due to its larger size.
Add the bolts, washers and wing nuts. It’s that simple!
Pressing Flowers:
Step 1:
It is best to pick your flowers in the morning and press them on the same day. If you press flowers that are past their best, they will continue to deteriorate when pressed and they are more likely to lose their colour. Make sure you keep the flowers in water until you are ready to press them. I avoid flowers with large heads, such as roses, as they often end up mouldy in the press due to the amount of moisture. I tend to select flowers with interesting shapes. I have found the most success with flowers such as Violas, Nigella, Poppies, Buttercups, Sweet Peas, Larkspur, Jasmine, Nasturtiums and Ferns.
I love pressing large Ferns - they look lovely in A3 black matt aluminium frames. I have a number displayed in my house and I am in the process of creating some framed pressed Ferns to sell on my web shop (coming very soon!).
Before placing the flower in the press, wipe the moisture off the stem with a cloth.

Pressed Poppy
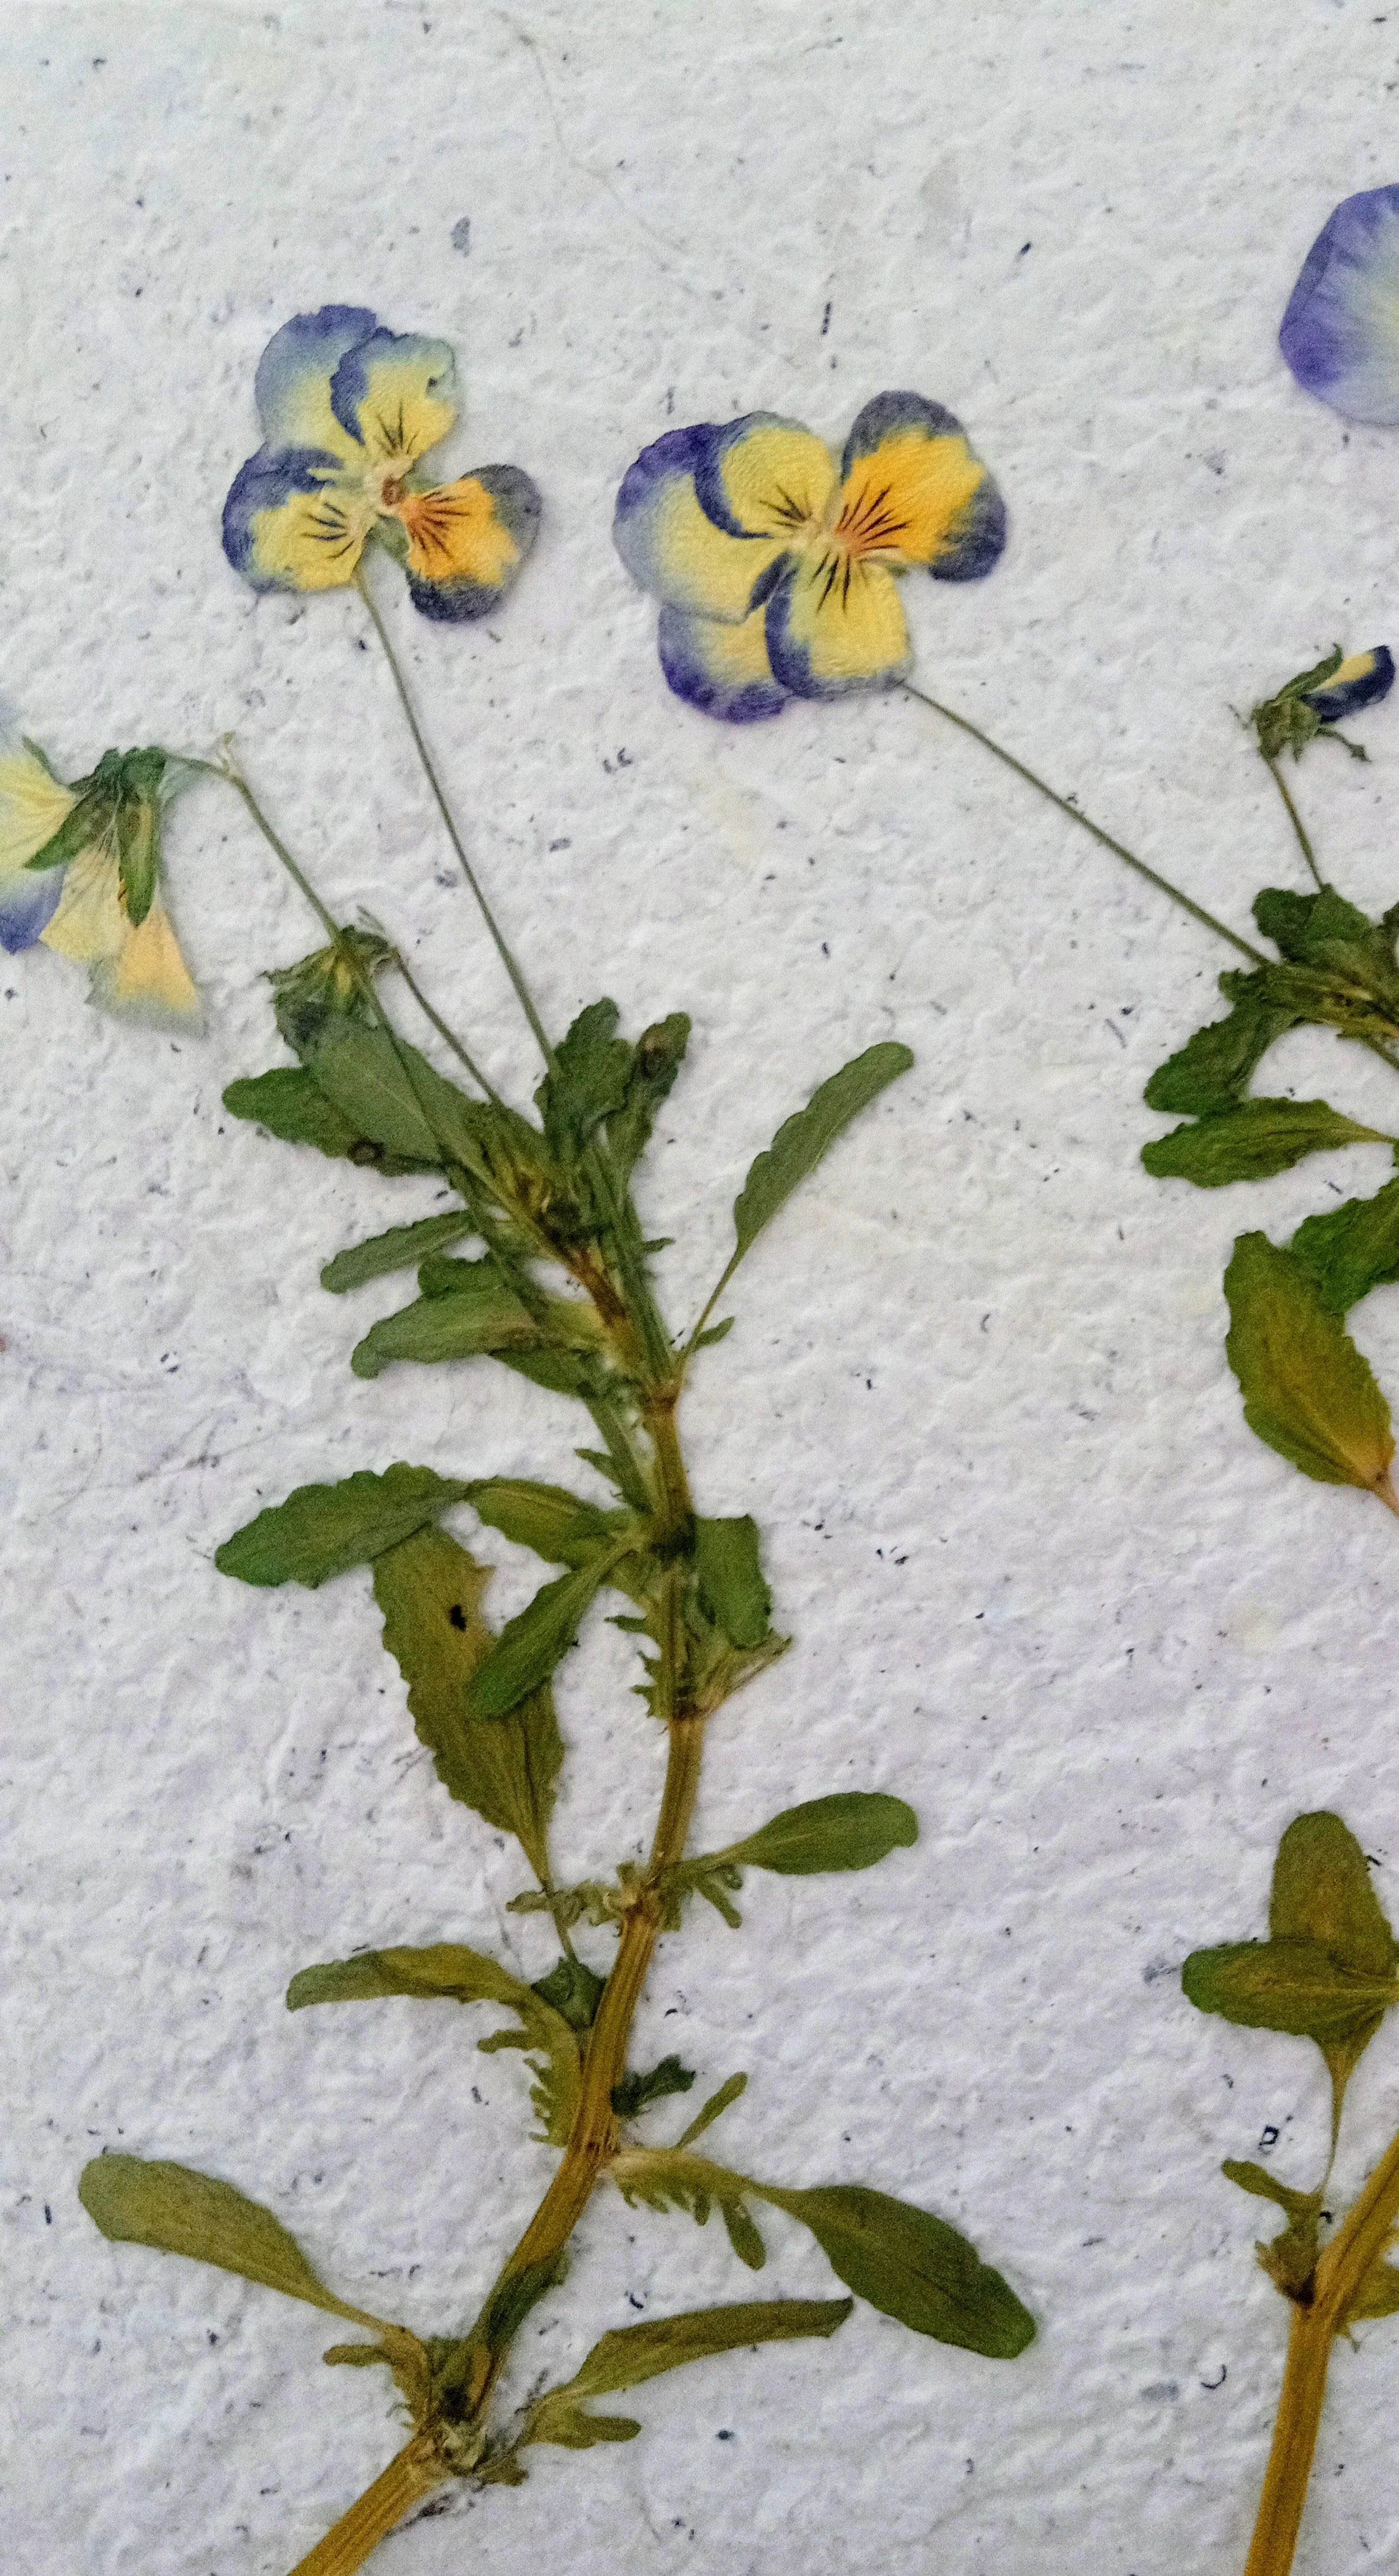
Pressed Violas
Step 2:
Place a sheet of card in the press and place a piece of blotting paper on top of the card. Lay your flower on top of the blotting paper. You can carefully manipulate the flower into a position that you are happy with.

Pressing Nigella. Make sure the stems are inside the blotting paper. In the image above, I had to cut one of the stems with a pair of secateurs to ensure the stem was inside the paper.
Step 3:
Place another piece of blotting paper over the flower and press down. Peel back the paper slightly to check the flower has remained in the position that you have placed it in. Check all stems and leaves are inside the paper and press down on the blotting paper.
Step 4:
Add another layer of card and position the blotting paper on top. Then add another flower, a piece of blotting paper on top and another piece of card Continue this process until your press is full.
Step 5:
Close your flower press and tighten the wing nuts to ensure that the press is shut securely. Place your flower press somewhere free of moisture and away from the cold.
Depending on the flowers you select, it takes between two to four weeks to press a flower.

A large handmade flower press
Step 6:
After approximately one week, open your press and check the flowers. Reposition the flowers if you find that the blotting paper is damp underneath. Remove any flowers that are mouldy. I normally check the press again after another week.
Step 7:
Once your flowers are ready (they will feel papery) remove them from the press. You can store them in your press if you are not using it to press more flowers. I place my pressed flowers on some card within a plastic wallet. I then store them in a cupboard until I am ready to use them for a project. Make sure to keep your pressed flowers free from moisture.
There are lots of projects you can do using pressed flowers - I am currently using my pressed flowers to create gift tags!

Pressed flower gift tags
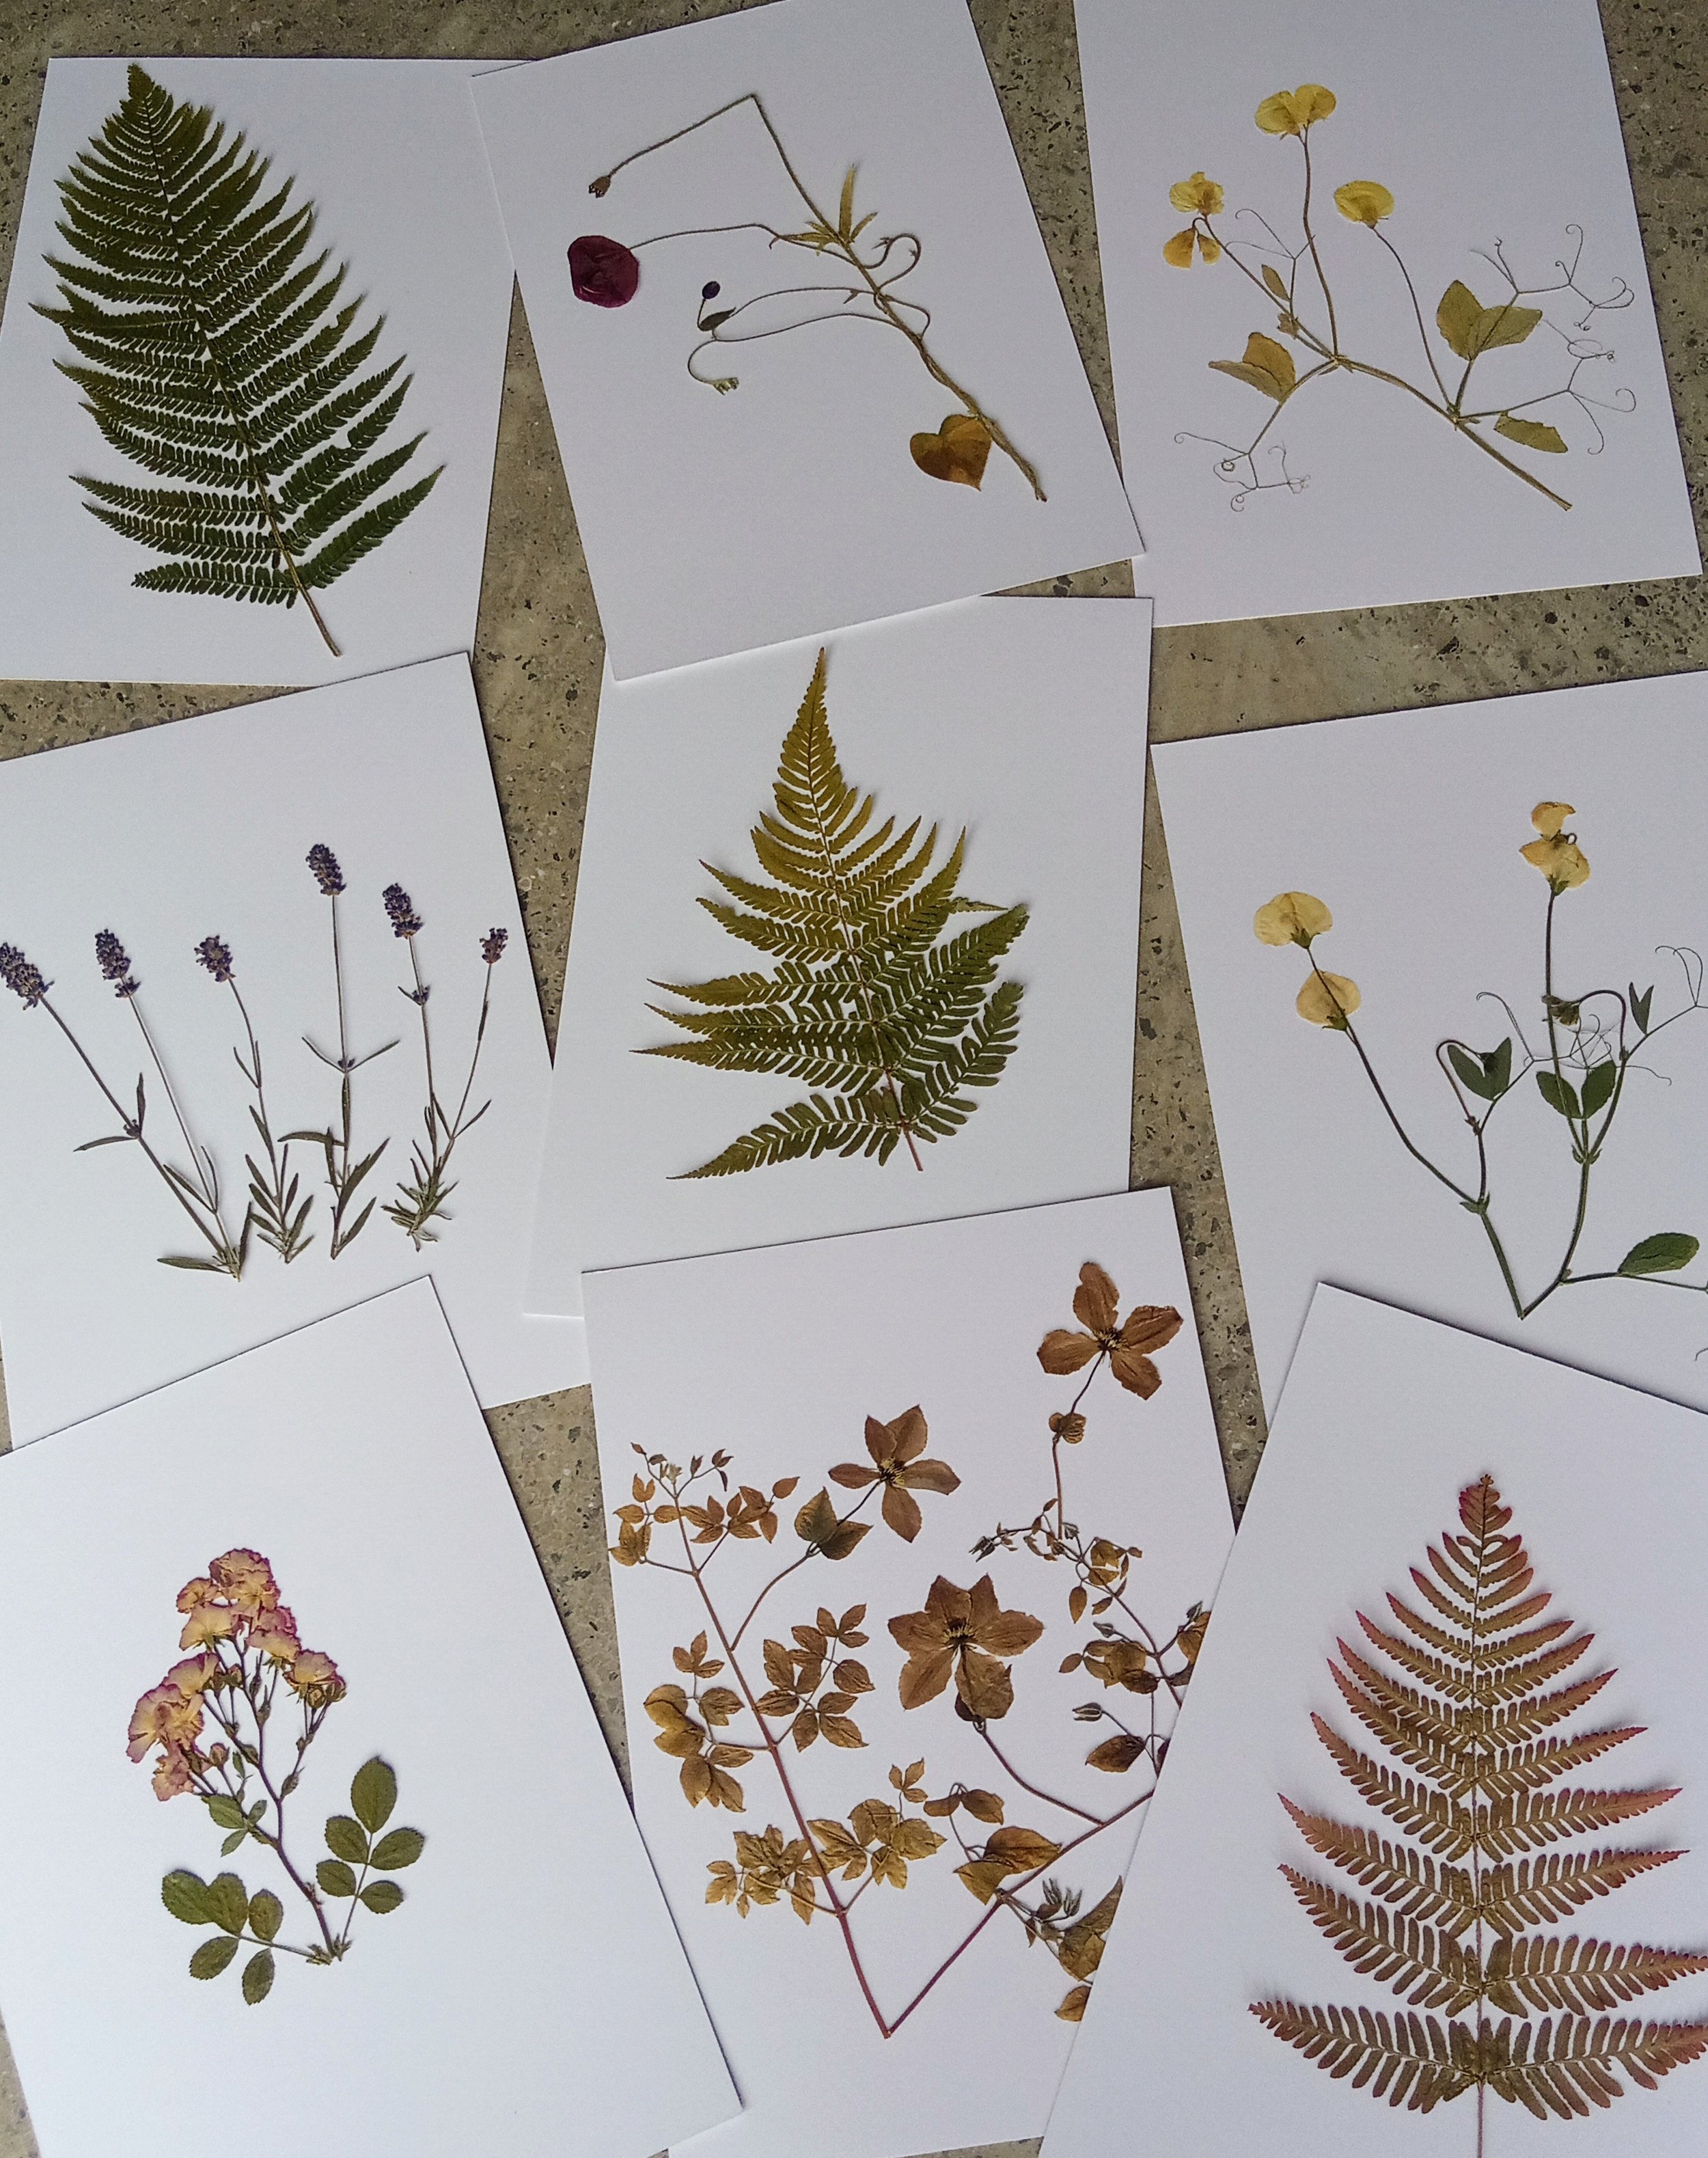
A selection of pressed flowers and Ferns, ready for mounting on A3 mount boards

Asparagus Fern Kokedama
The art of kokedama originated in Japan. The word kokedama translates to ‘moss ball’. I made the asparagus fern kokedama (above) in April 2021 and it is still going strong in the August 2022!
You can make kokedamas with a number of house plants including, fern, ivy, orchids, succulents, peace lilies and jasmine.
What you will need:
Bonsai soil
Compost
Moss
Twine
A bowl
If you are making indoors, make sure you cover your table in newspaper as this is a messy project!
Firstly, remove your plant of choice from its pot. Then remove as much of the soil as possible, without damaging the roots. Mix two parts compost to one part bonsai soil in a bowl. Add water gradually to the mix until the consistency is like a wet cake mix. Form the wet mix into a ball (squeezing out any excess water). Twist the ball to divide into two halves - this is the messy part! Place the plant between the two halves, creating a ball around the roots. Once you are happy with the shape, lay out your moss and place the moss around the ball and secure with twine. This is a little tricky and you may need some help with this. Over time, the twine will disintegrate and you will be left with the moss securely in place. The twine has disintegrated in the asparagus fern kokedama, pictured above, and the moss stays perfectly in place!
To care for your kokedama simply place in a sink of water for around 20 minutes. I typically do this once per week and spritz with water in between if needed. Make sure you squeeze out the excess water and drain well before placing back in position. You will know when to water your kokedama as it feels light when you lift it.
Use a small vintage plate or piece of slate to display your kokedama. You can also hang your kokedama indoors or outdoors. Kokedamas are a lovely addition to any indoor plant collection and a great way to bring nature into your home.
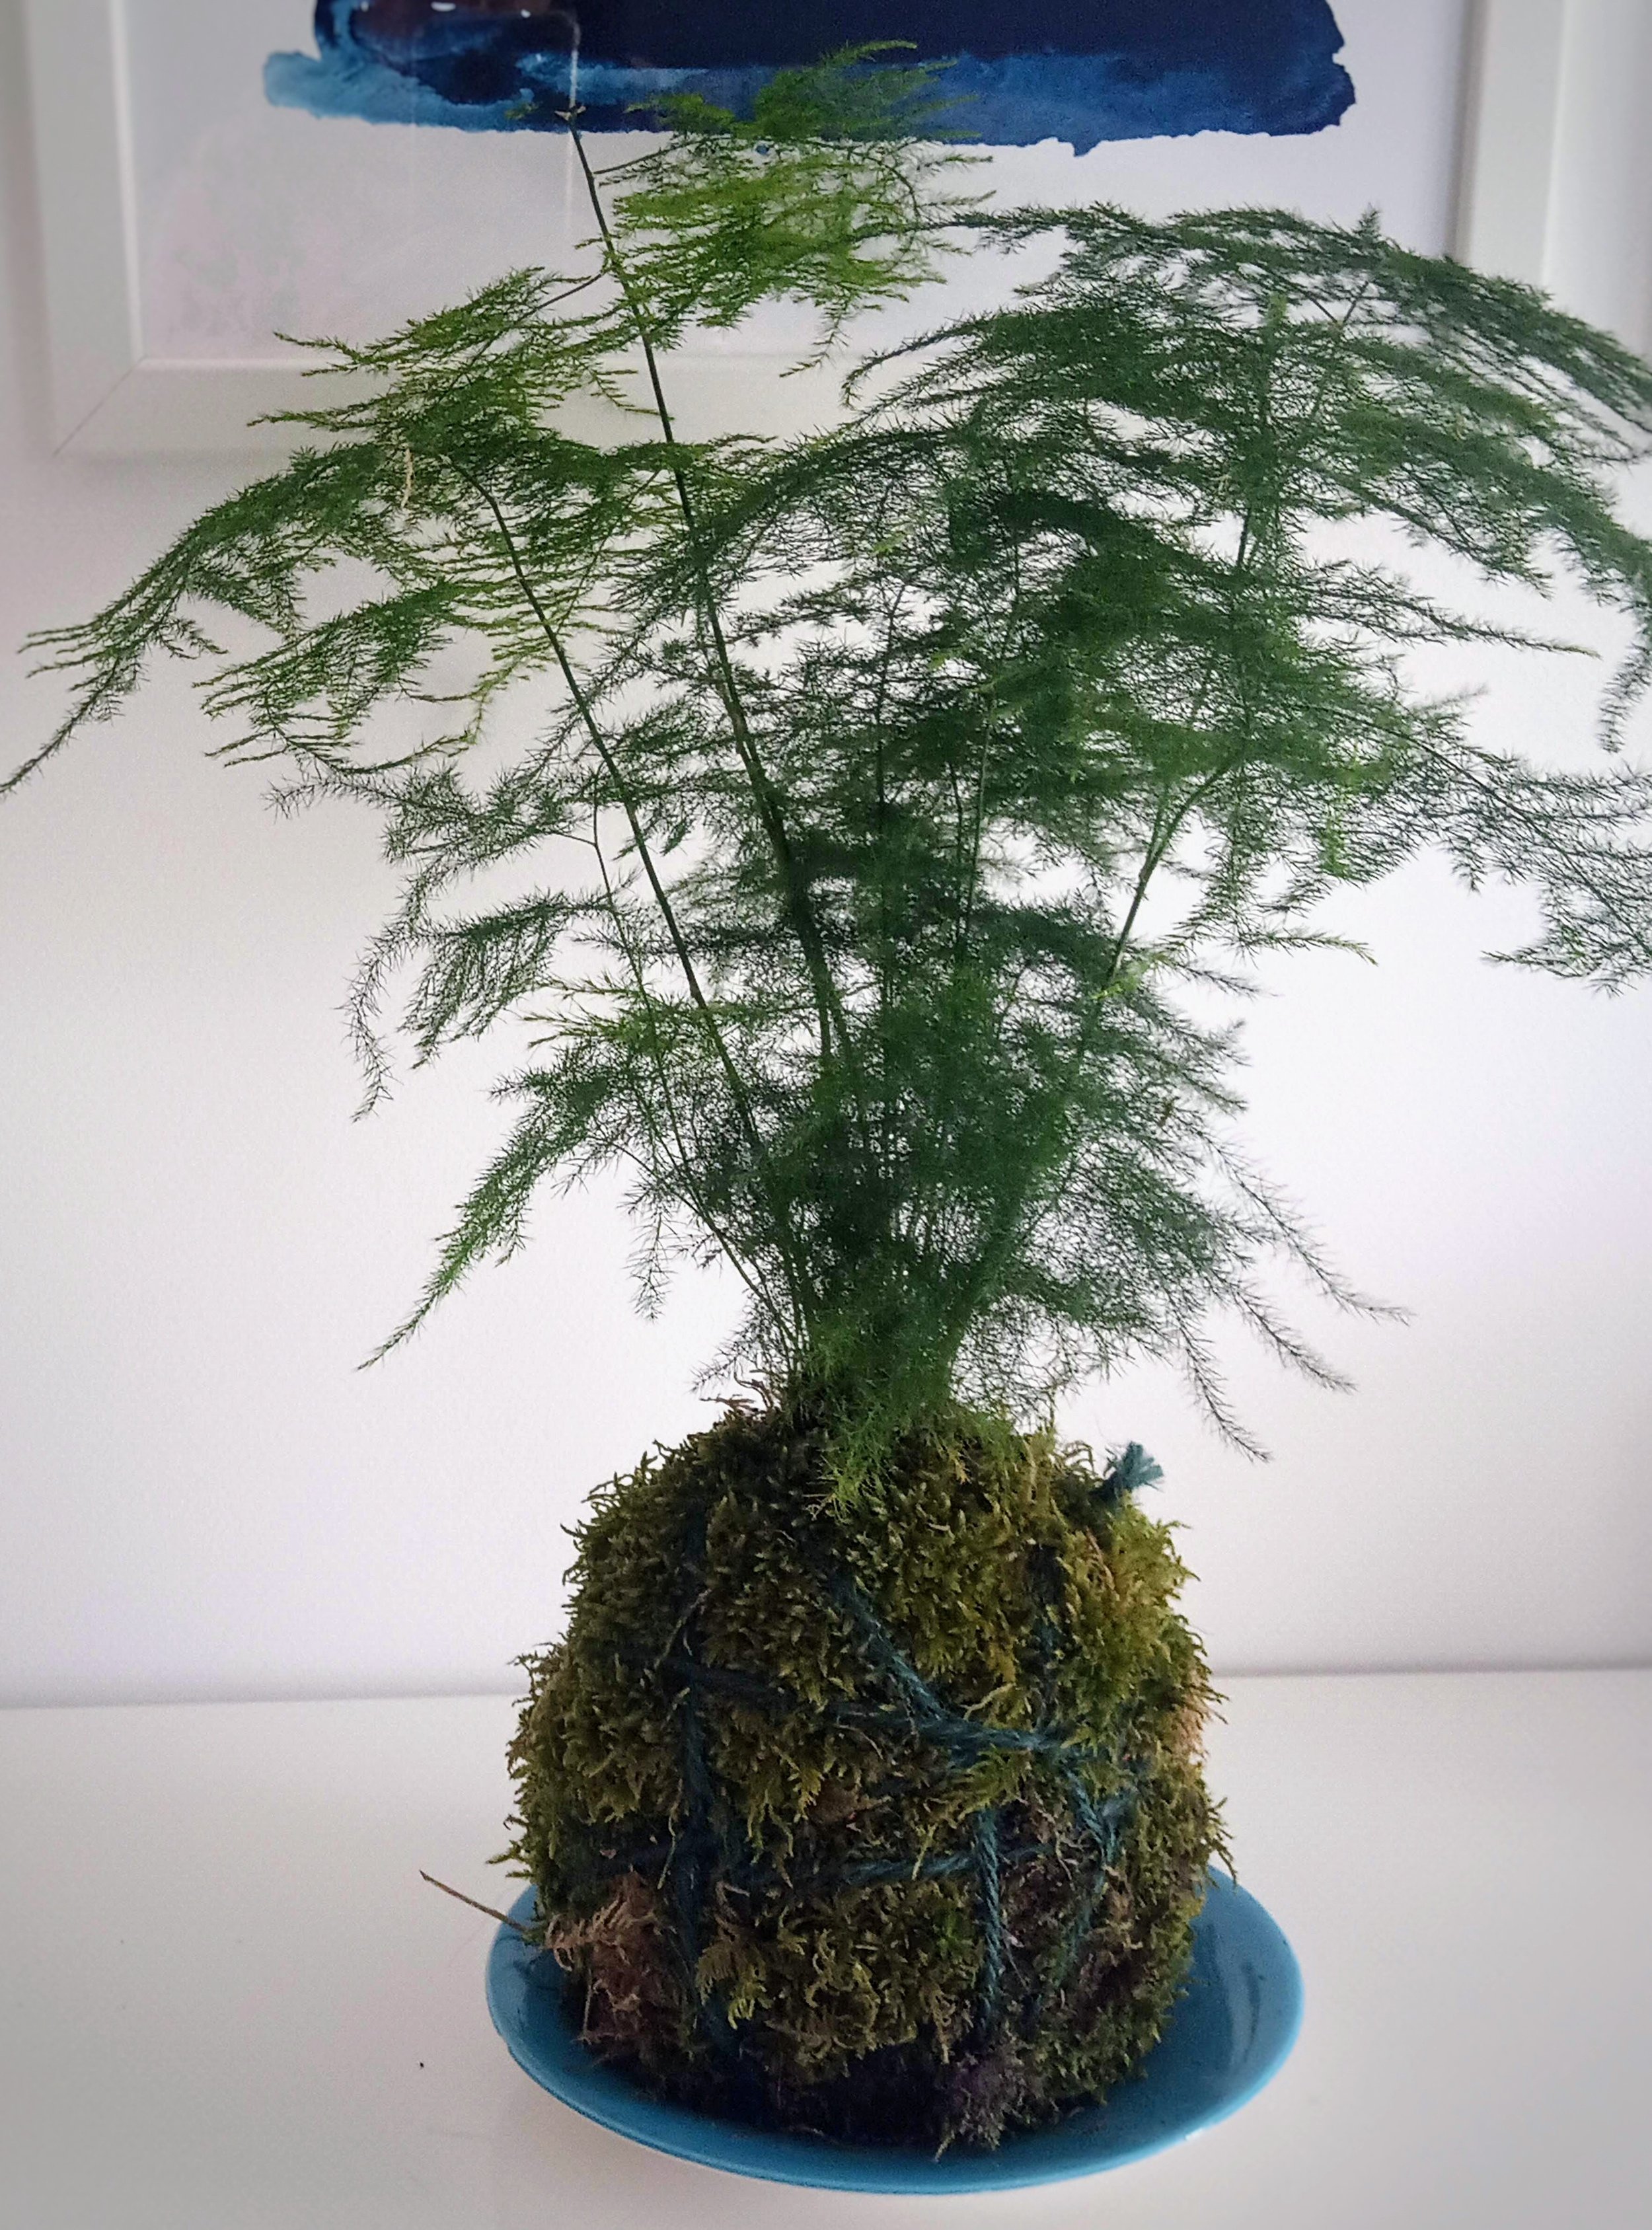
This is the asparagus fern kokedama when I first made it in April 2021, you can see the green twine which has now disintegrated (it has also grown a lot!)
Summer Wreath Making
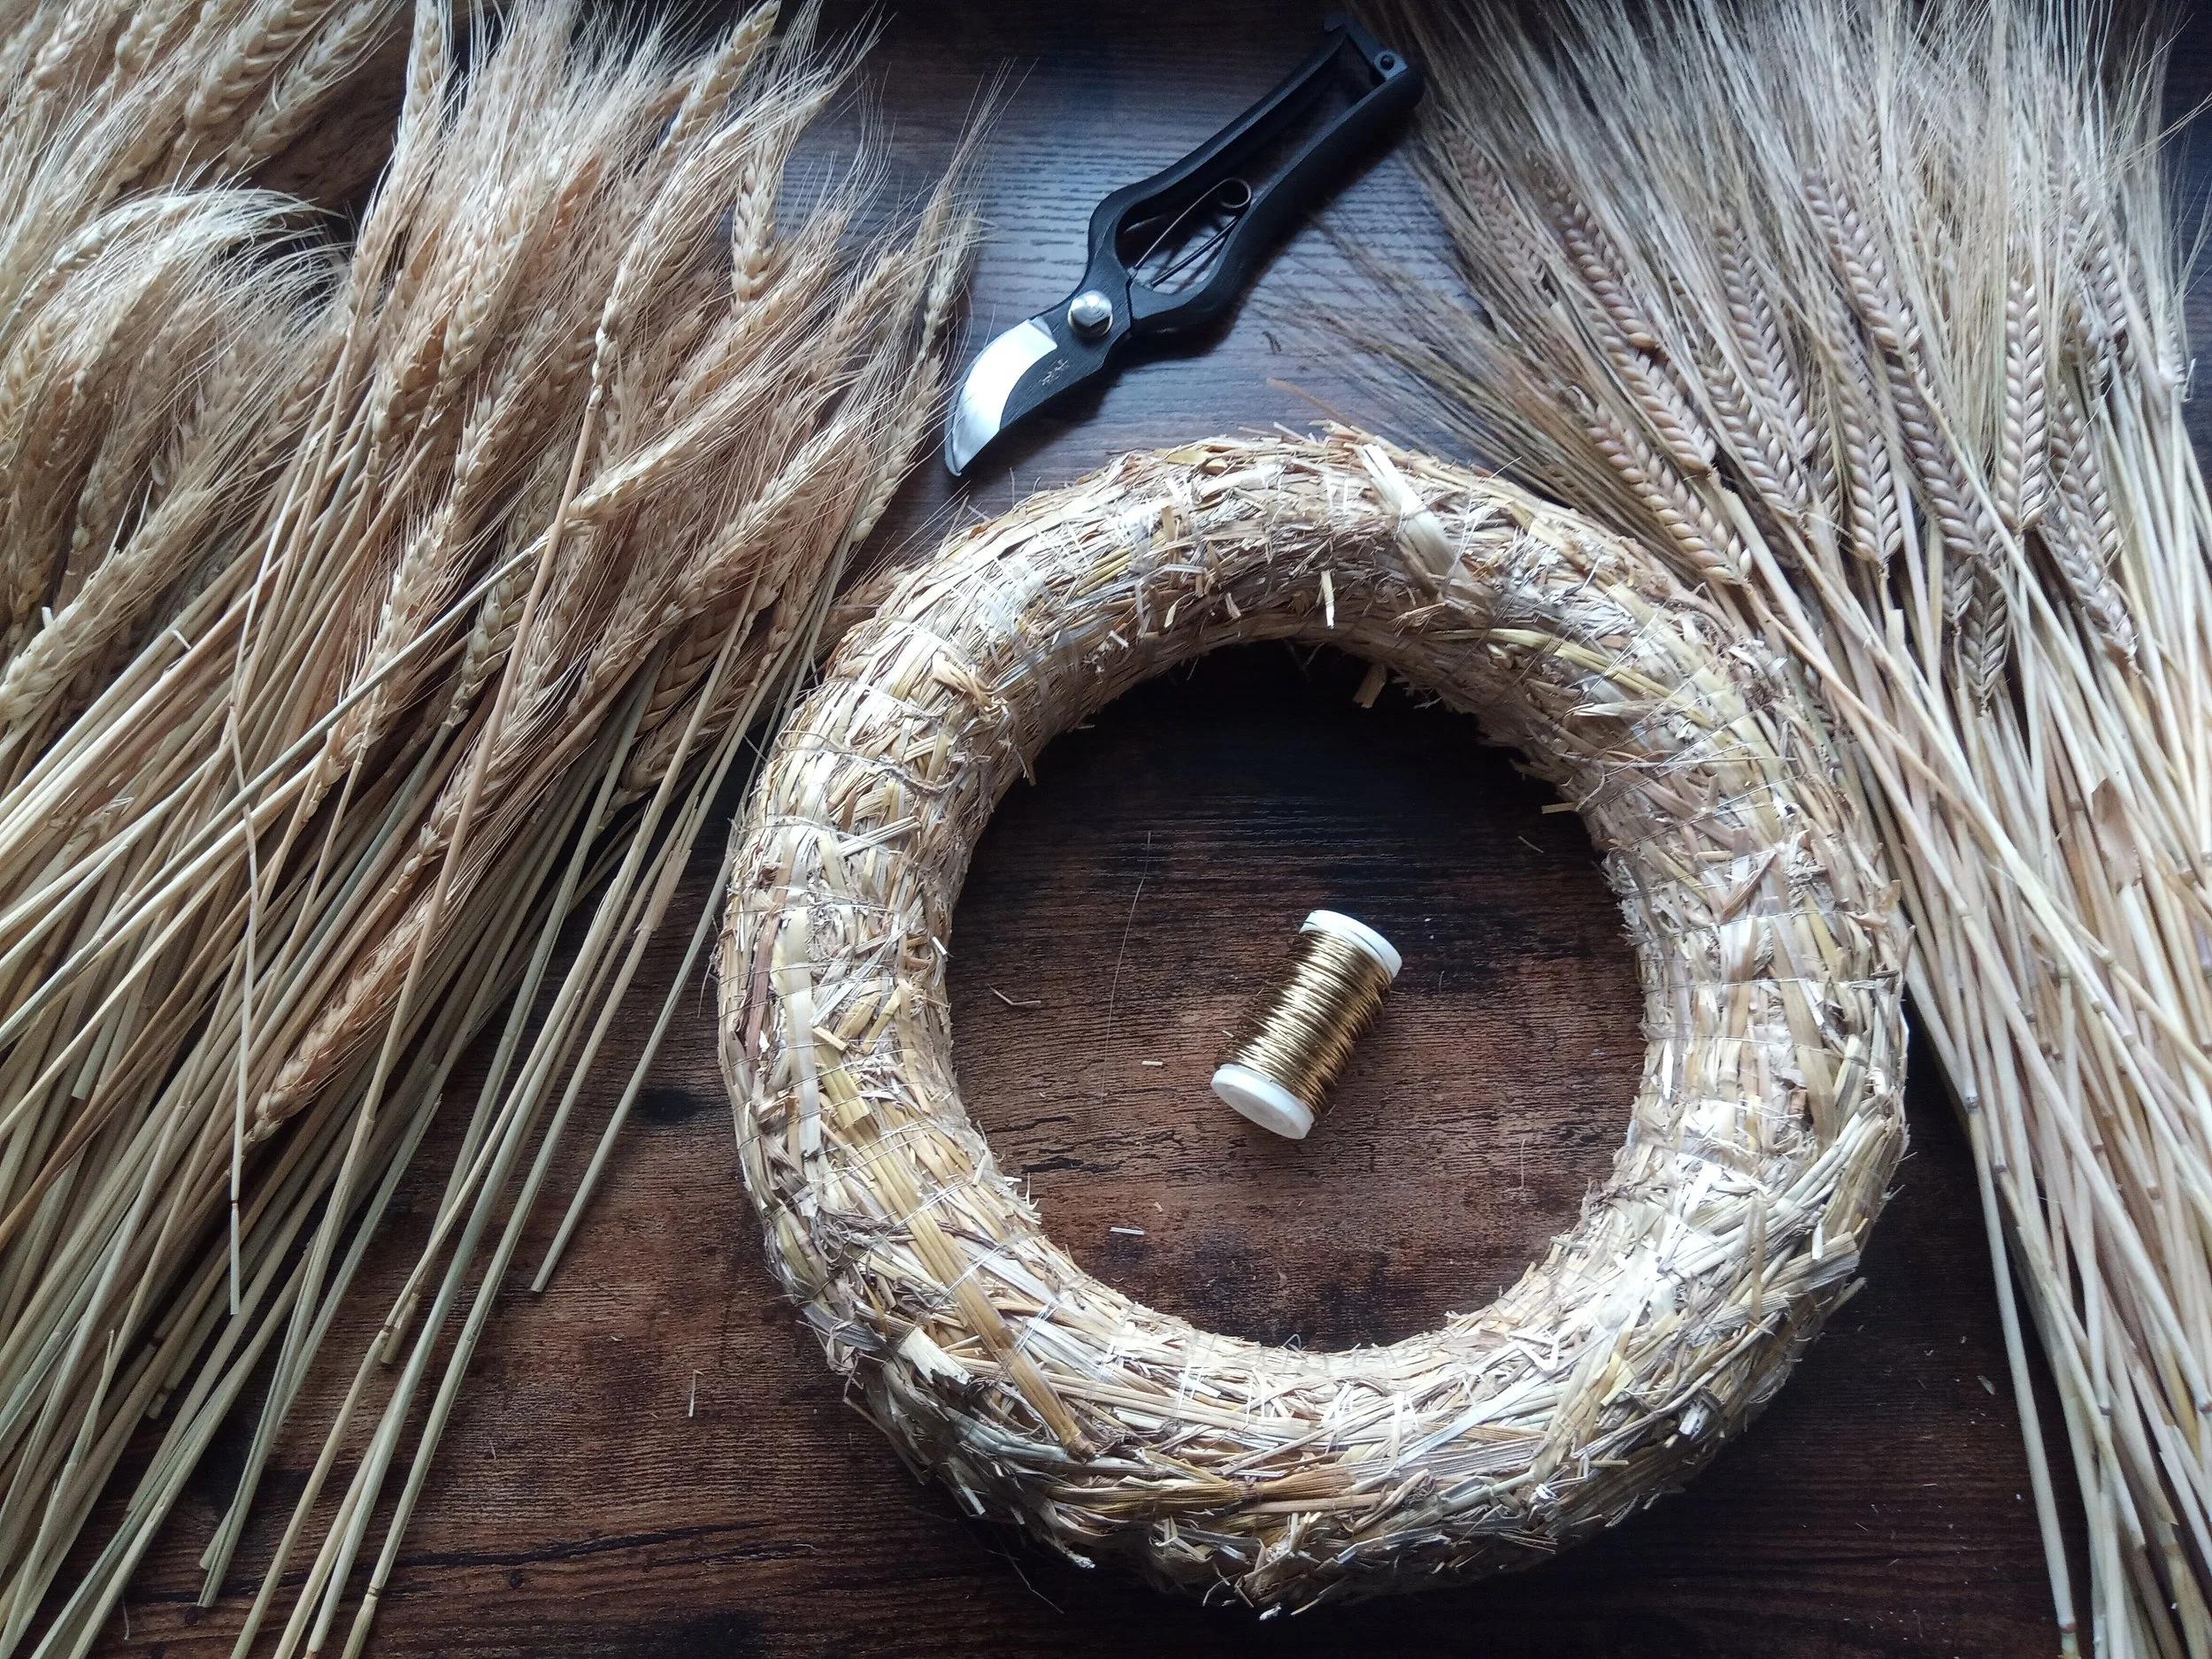
In August in the UK, wheat and barley are in abundance in the fields. After visiting a lovely farm, and getting permission from the landowner to pick some barley, I decided to make a barley wreath.

In August in the UK, wheat and barley are in abundance in the fields. After visiting a lovely farm, and getting permission from the landowner to pick some barley, I decided to make a barley wreath. I had already got some wheat and thought I would also make a wheat wreath to compare the style and textures of both wreaths. Working with dried products is a little different from making a wreath with foliage and flowers.
What you will need:
Reel wire
Secateurs (the ones in the image above are Niwaki secateurs)
Wreath ring
Wheat/barely bundles
I decided to use a straw wreath ring and gold wire. I firstly attached some twine to hang the wreath (I often forget this stage!) and then attached the gold wire securely around the wreath ring.

I started off by making small bundles. I then attached them around the wreath ring at a slight angle, alternating as I go round - small bundle inwards and then a small bundle facing outwards - repeating this all the way around the wreath. I always keep the wire attached until the wreath is complete, wrapping the wire around the small bundles two or three times to secure (make sure you pull tight, but not too tight as you don’t want to snap the wire or cut through the stems!). I then snipped off the excess stems using my secateurs.

It is very therapeutic and relaxing making wreaths. However, placing and securing the last few bundles is quite tricky and often involves a little patience!

Half-way through

The finished article - barley wreath

The finished article - wheat wreath
I think I prefer the more wispy and whimsical look of the barley wreath. Both wreaths will last a good few years if they are kept out of direct sunlight and damp and humid conditions.

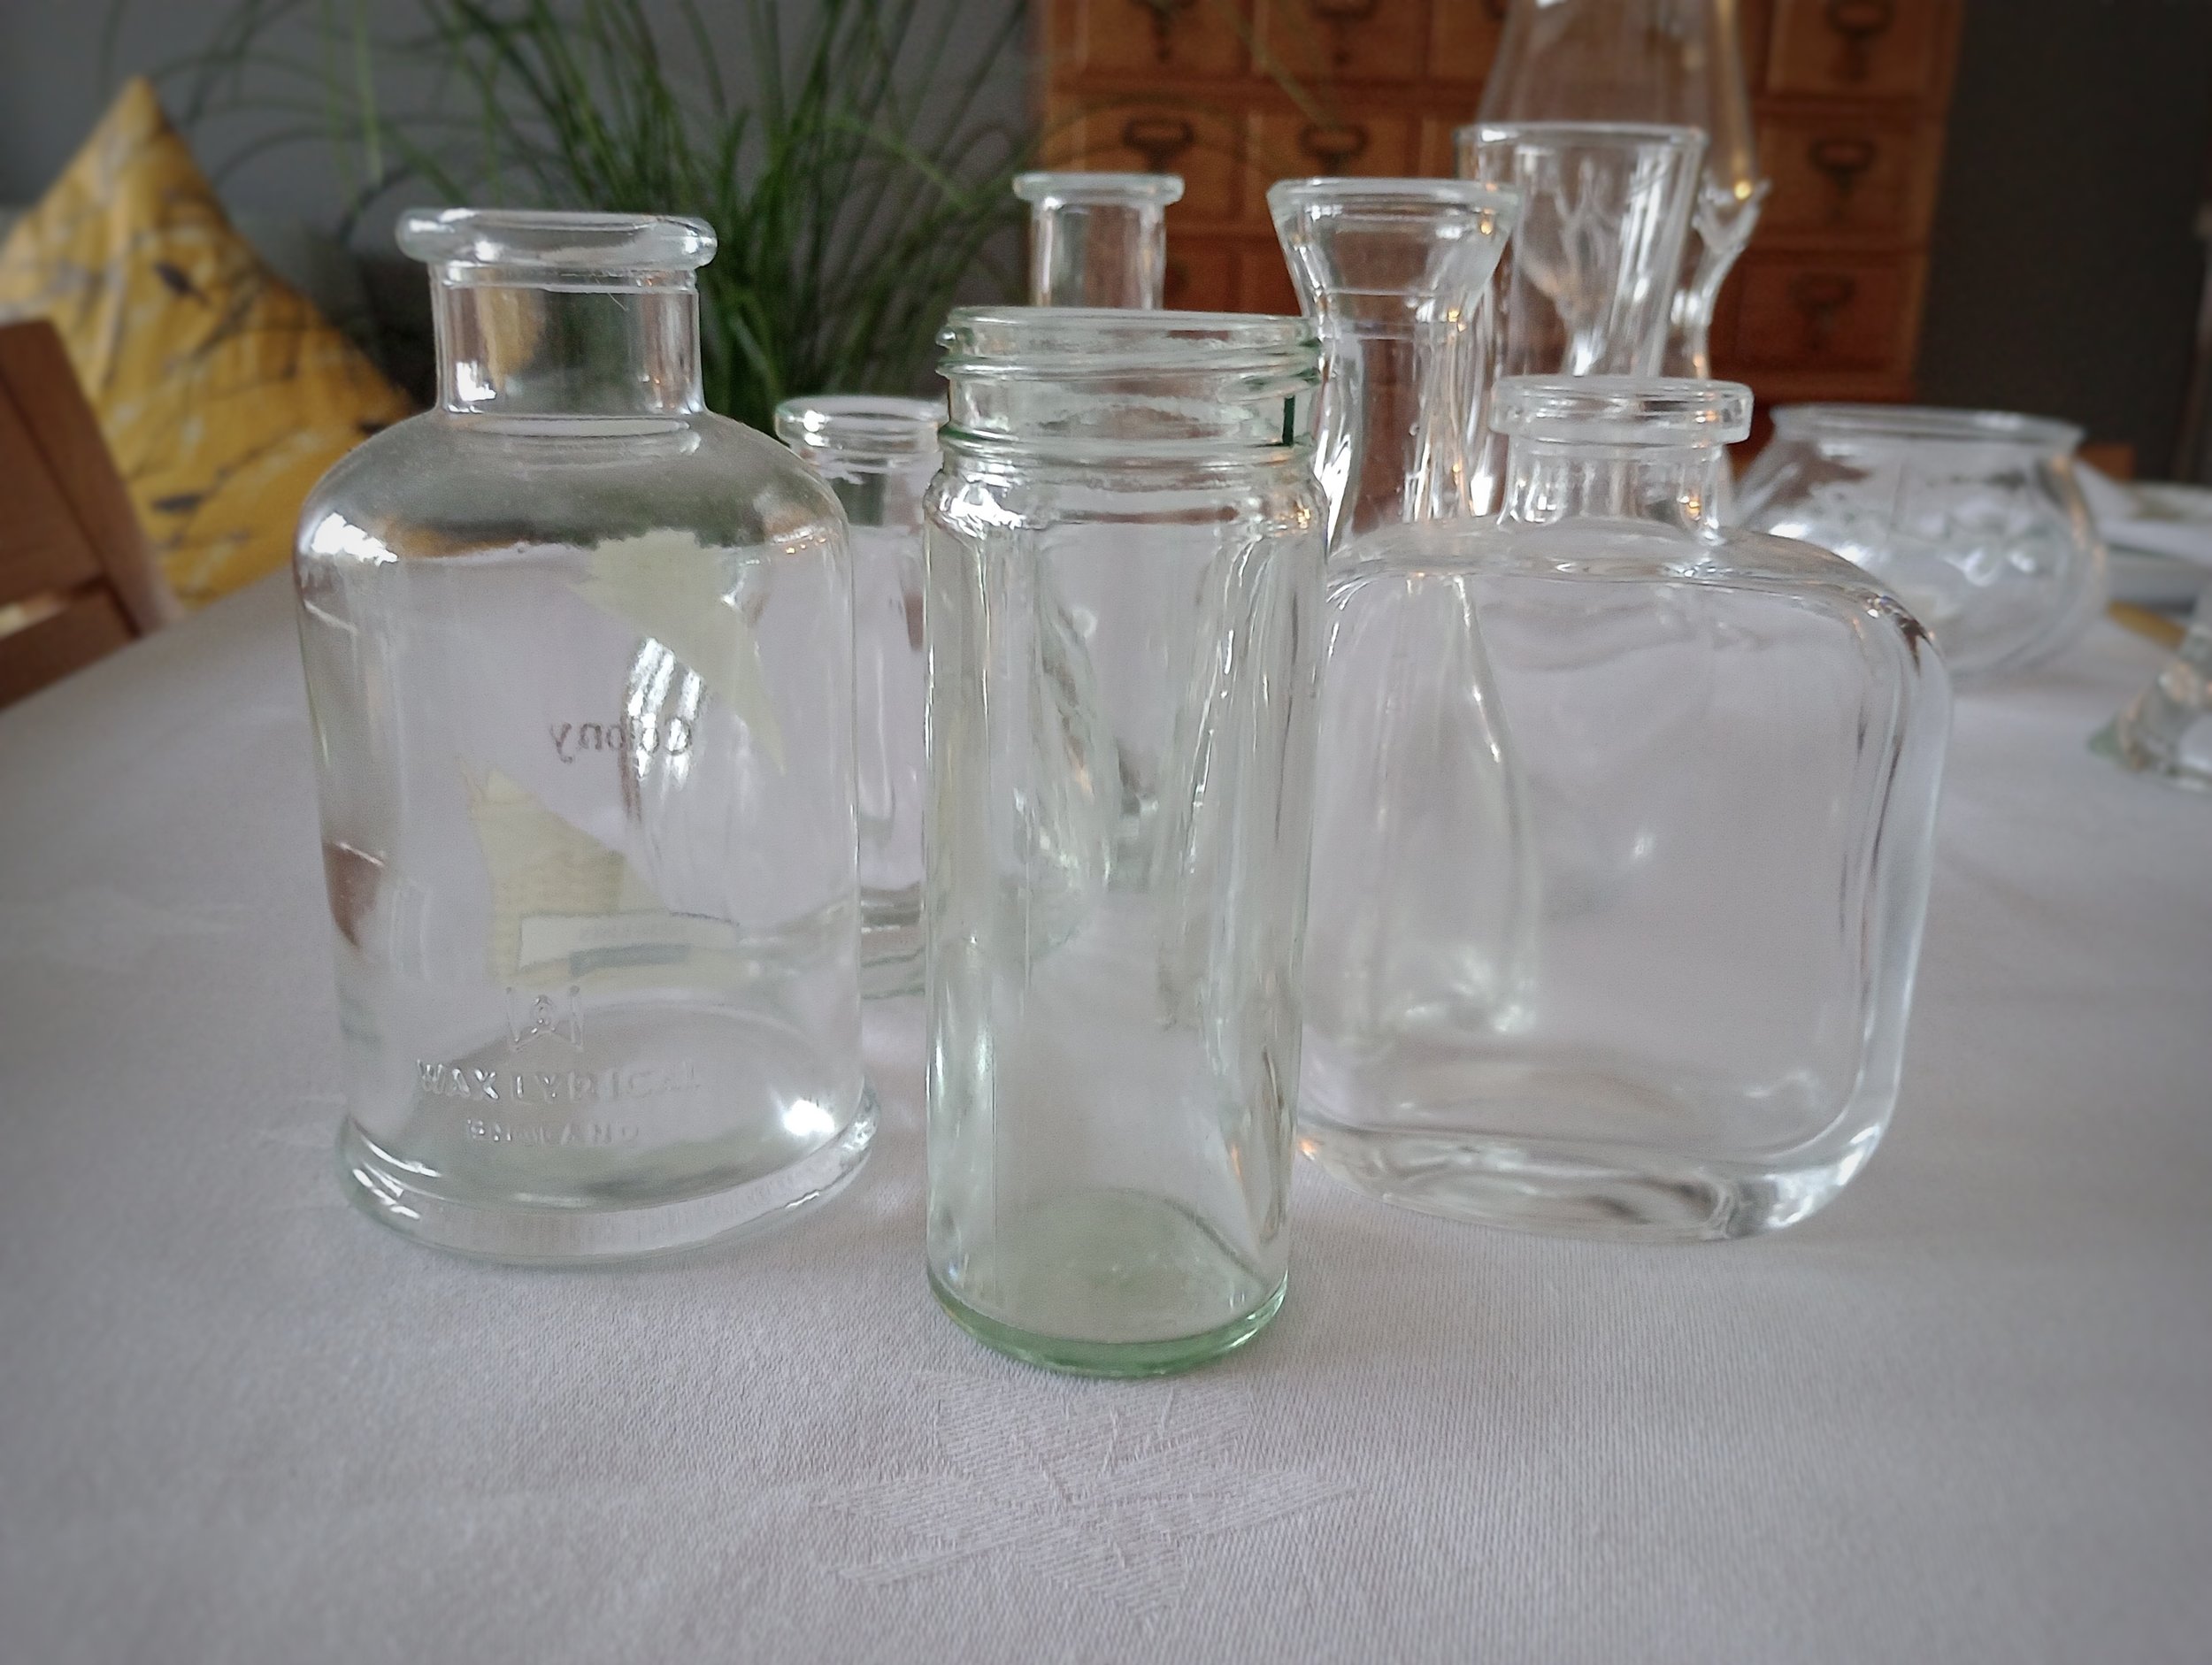
Vases and Containers for Flower Arranging
Flowers are beautiful. Selecting the right vase or container simply adds to the design. I tend to choose simple containers and vases, so they don’t detract from the beauty of the flowers. I enjoy browsing around second-hand shops and antique shops searching for vases, containers and urns. I get very excited when I find Wedgwood vases in charity shops!

Flowers are beautiful. Selecting the right vase or container simply adds to the design. I tend to choose simple containers and vases, so they don’t detract from the beauty of the flowers. I enjoy browsing around second-hand shops and antique shops searching for vases, containers and urns. I get very excited when I find Wedgwood vases in charity shops!
Any container can be used to display flowers. If the container is not waterproof, you can add yogurt pots or margarine pots (if the container is not transparent of course!). When using an open neck container, such as a Wedgwood mantle vase, use chicken wire secured with pot tape, or a flower frog to hold the stems. Jam jars and condiment jars are great to use as bud vases dotted down a kitchen or dining table. I often search the shelves in supermarkets for different shapes and sizes of jars (a good way to recycle and reuse). I love Luminarc jars ( the jam jar in the picture above) – they look lovely with small posies of flowers – great as gifts for friends or family, finished off with a ribbon or some twine around the rim of the jar.

Wedgwood mantel vase with chicken wire secured with clear pot tape
Antique celery vases look very elegant. As they tend to have a wider neck, I use the taped grid technique to provide some structure when arranging the flowers. If you only have a few flowers, vintage bottles or glass perfume and reed diffuser bottles are good to use. Footed bowls display trailing flowers and foliage such as Clematis, Jasmine and Ivy beautifully.

Celery vase - the taped grid technique
Any type of bowl can be used to display flowers. The bowls pictured below are cereal bowls. I added some chicken wire and pot tape to create a colourful outside table display.

When arranging flowers in containers and vases I normally ensure the part of the flower visible above the container is around 1.5 times the height of the container or vase. This is just a general rule and wouldn’t necessarily be applicable to lower table designs such as table runners.

Wedding Flowers - from design consultation to the big day
Step 1 - Design Consultation
Your wedding is one of the most important moments in your life. Flowers are often found everywhere at a wedding - they form a special part of the wedding celebration and help to create the mood. Flowers become part of the imagery of the wedding - often seen in every wedding photograph taken for posterity. Bearing in mind the importance of every floral design, my aim is to ensure that you receive beautiful bespoke floral designs that play a vital part in the aesthetics of this magical and memorable day.
Design consultations are all about working together to understand your requirements then translating this into a design proposal. The venue is discussed, the flowers and foliage selected and your preferred colour palette and style of arrangements. A personalised design proposal is created and includes the primary and secondary colour palette, the floral and foliage selections, inspirations for bouquets and other designs, choice of vessels and candleholders, as well as an estimate of the overall cost.
Flower & Colour Palette Selection:
I try to use British seasonal flowers. They smell beautiful and tend to be a little more interesting and unique compared to mass produced imported flowers. Using British seasonal flowers is also better for the environment. During the consultation process, we will spend time talking about your preferred colour palette and theme. The wedding design proposal will bring your theme and colour palette visually to life.
Some Flower & Foliage Favourites:
Spring:
Anemone
Peonies

A focal bloom - the peony
Tulips

So many varieties - tulips from the garden (parrot tulip)
Hyacinths
Larkspur
Lilac
Ranunculus

From the buttercup family - ranunculus
Sweet Rocket
Alchemilla Mollis
Lilly of the Valley

So exquisite - lilly of the valley
Spirea

Beautiful in bouquets - spirea from the garden
Muscari
Solomon’s Seal
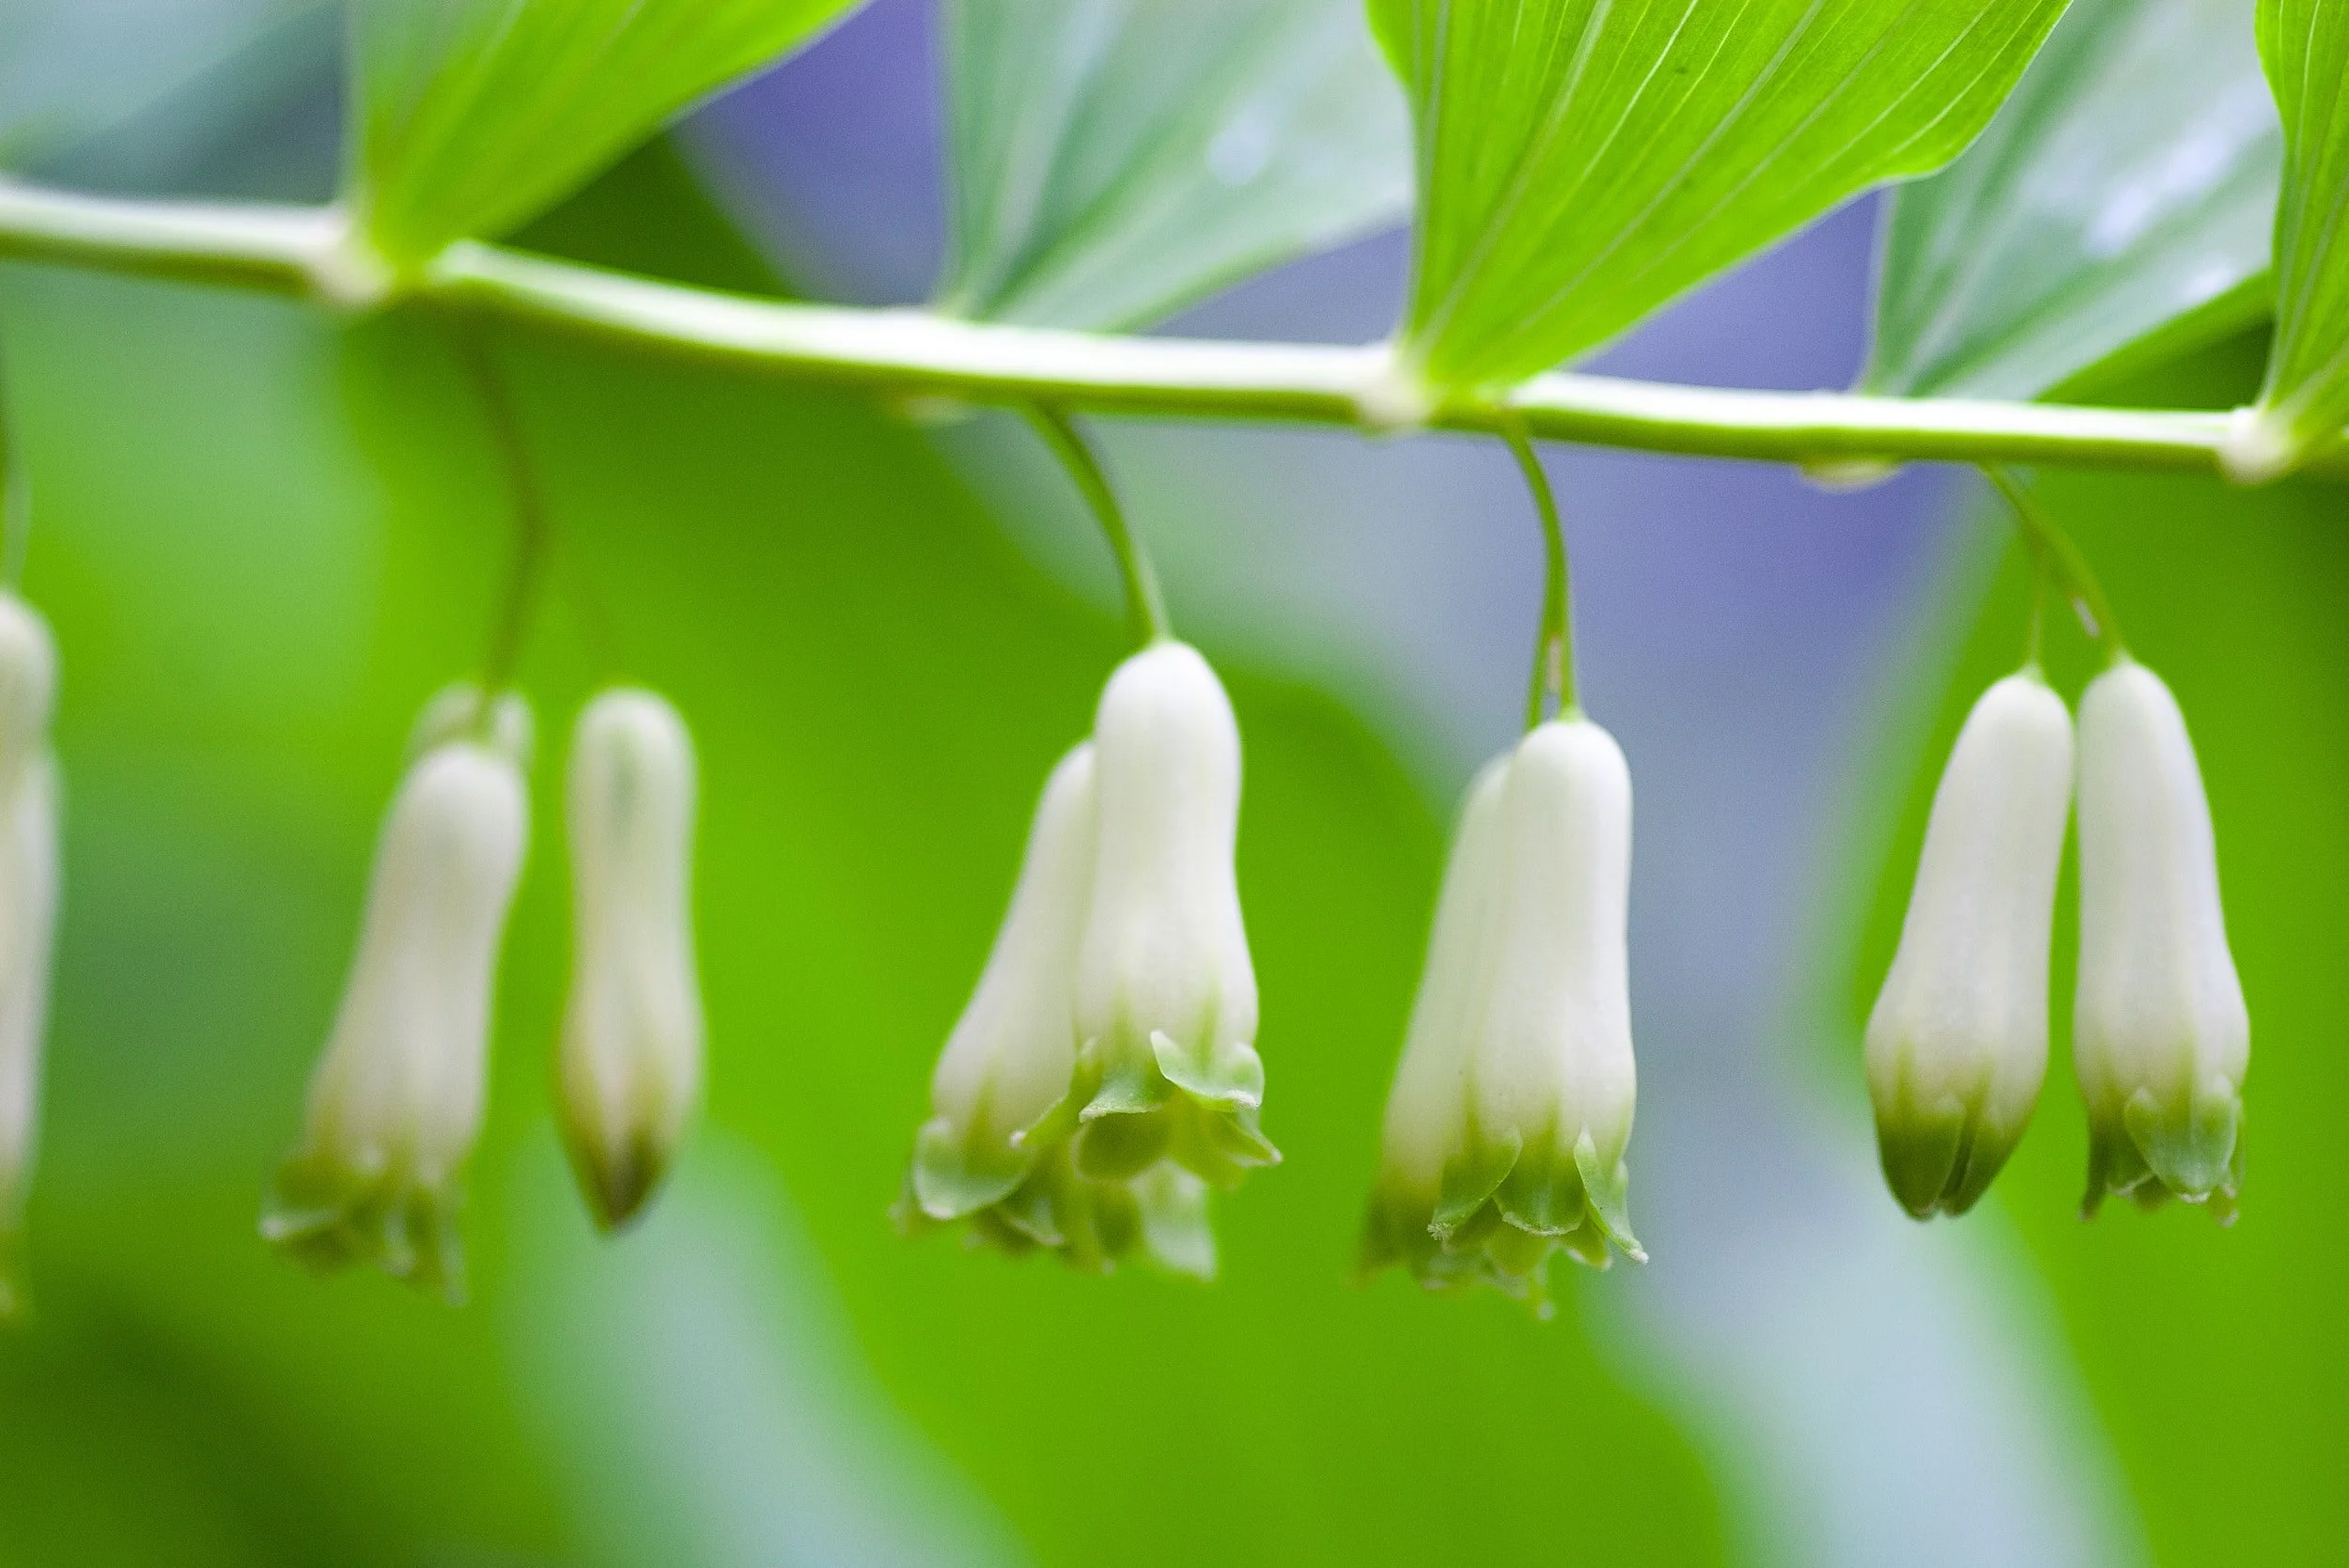
They are not around for long - solomon’s seal
Cherry Blossom
Snakes Head Fritillaria
Mint
Clematis
Virburum
Summer:
Cosmos

An easy garden flower to grow - cosmos
Achillea
Phlox
Roses

The classic rose
Spray Roses
Veronica
Larkspur
Astilbe
Delphiniums

Beautiful in blue - delphiniums
Gypsophila (used in the flower crown above)
Scabiosa
Stocks
Limonium
Long-lasting and lovely in buttonholes - limonium
Nigella
Sweet Peas

Light and airy in any design - the sweet pea
Corn flowers
Foxgloves
Dahlias
Clematis
Queen Anne’s Lace
Alchemilla Mollis
Beech
Jasmine
Mint
Sage
Pittosporum
Autumn:
Hydrangea
They drink from their petals - hydrangeas
Dahlia
Chrysanthemum
Rudbekia
Geranium
A hardy flower/foliage - geranium
Winter:
Anemone
Hellebores
Narcissus
Wax Flowers

Lasts long out of water - waxflower
Eucalyptus

A winter favourite - eucalyptus
Ivy
Skimmia
Willow
Step 2- Flower delivery
Different flowers and foliage last for different lengths of time. Some flowers take longer to bloom than others. The ordering process is different dependent upon the flowers selected.
Flowers that take longer to open arrive at the workshop at least four days before the wedding e.g. peonies. Roses will typically arrive four days before the wedding to given them time to fully bloom. The foliage will also arrive around four days before the wedding. The more delicate stems will typically arrive two days before the wedding e.g. sweet peas.
Step 3- Conditioning
I always make sure that the buckets are crystal clean. This is really important to ensure there is no bacterial build up. After their journey, the flowers need time to rest and hydrate for at least 24-hours before arranging. The buckets are filled with fresh clean water. All of the lower leaves are removed. The stems are cut at a 45-degree angle. This helps to increase the surface area so that the flowers can drink more easily. Some of the stems are seared (placing around 10% of the stem in boiling water). For woody stems, I cut a vertical slit up the end of the stem. This helps the flowers to drink more water.
Step 4- Creating the designs
The bridal bouquet, bridesmaids posies, flower crowns and buttonholes are created very early on the morning of the wedding. Some buttonholes and flower crowns, depending on flower selection, can be created the evening before. The beautiful bouquets, buttonholes and flower crowns are delivered straight to the bridal party at the venue. Installations and table designs are created on site. Some of the design work is carried out off-site beforehand.
Step 5- Pack down
The designs are cleared away on the evening of the wedding, or the day after. Flowers can be created into small hand tied bouquets for wedding guests. Any waste is composted. Some flowers from the bouquet can be pressed and framed as a memory of the day.
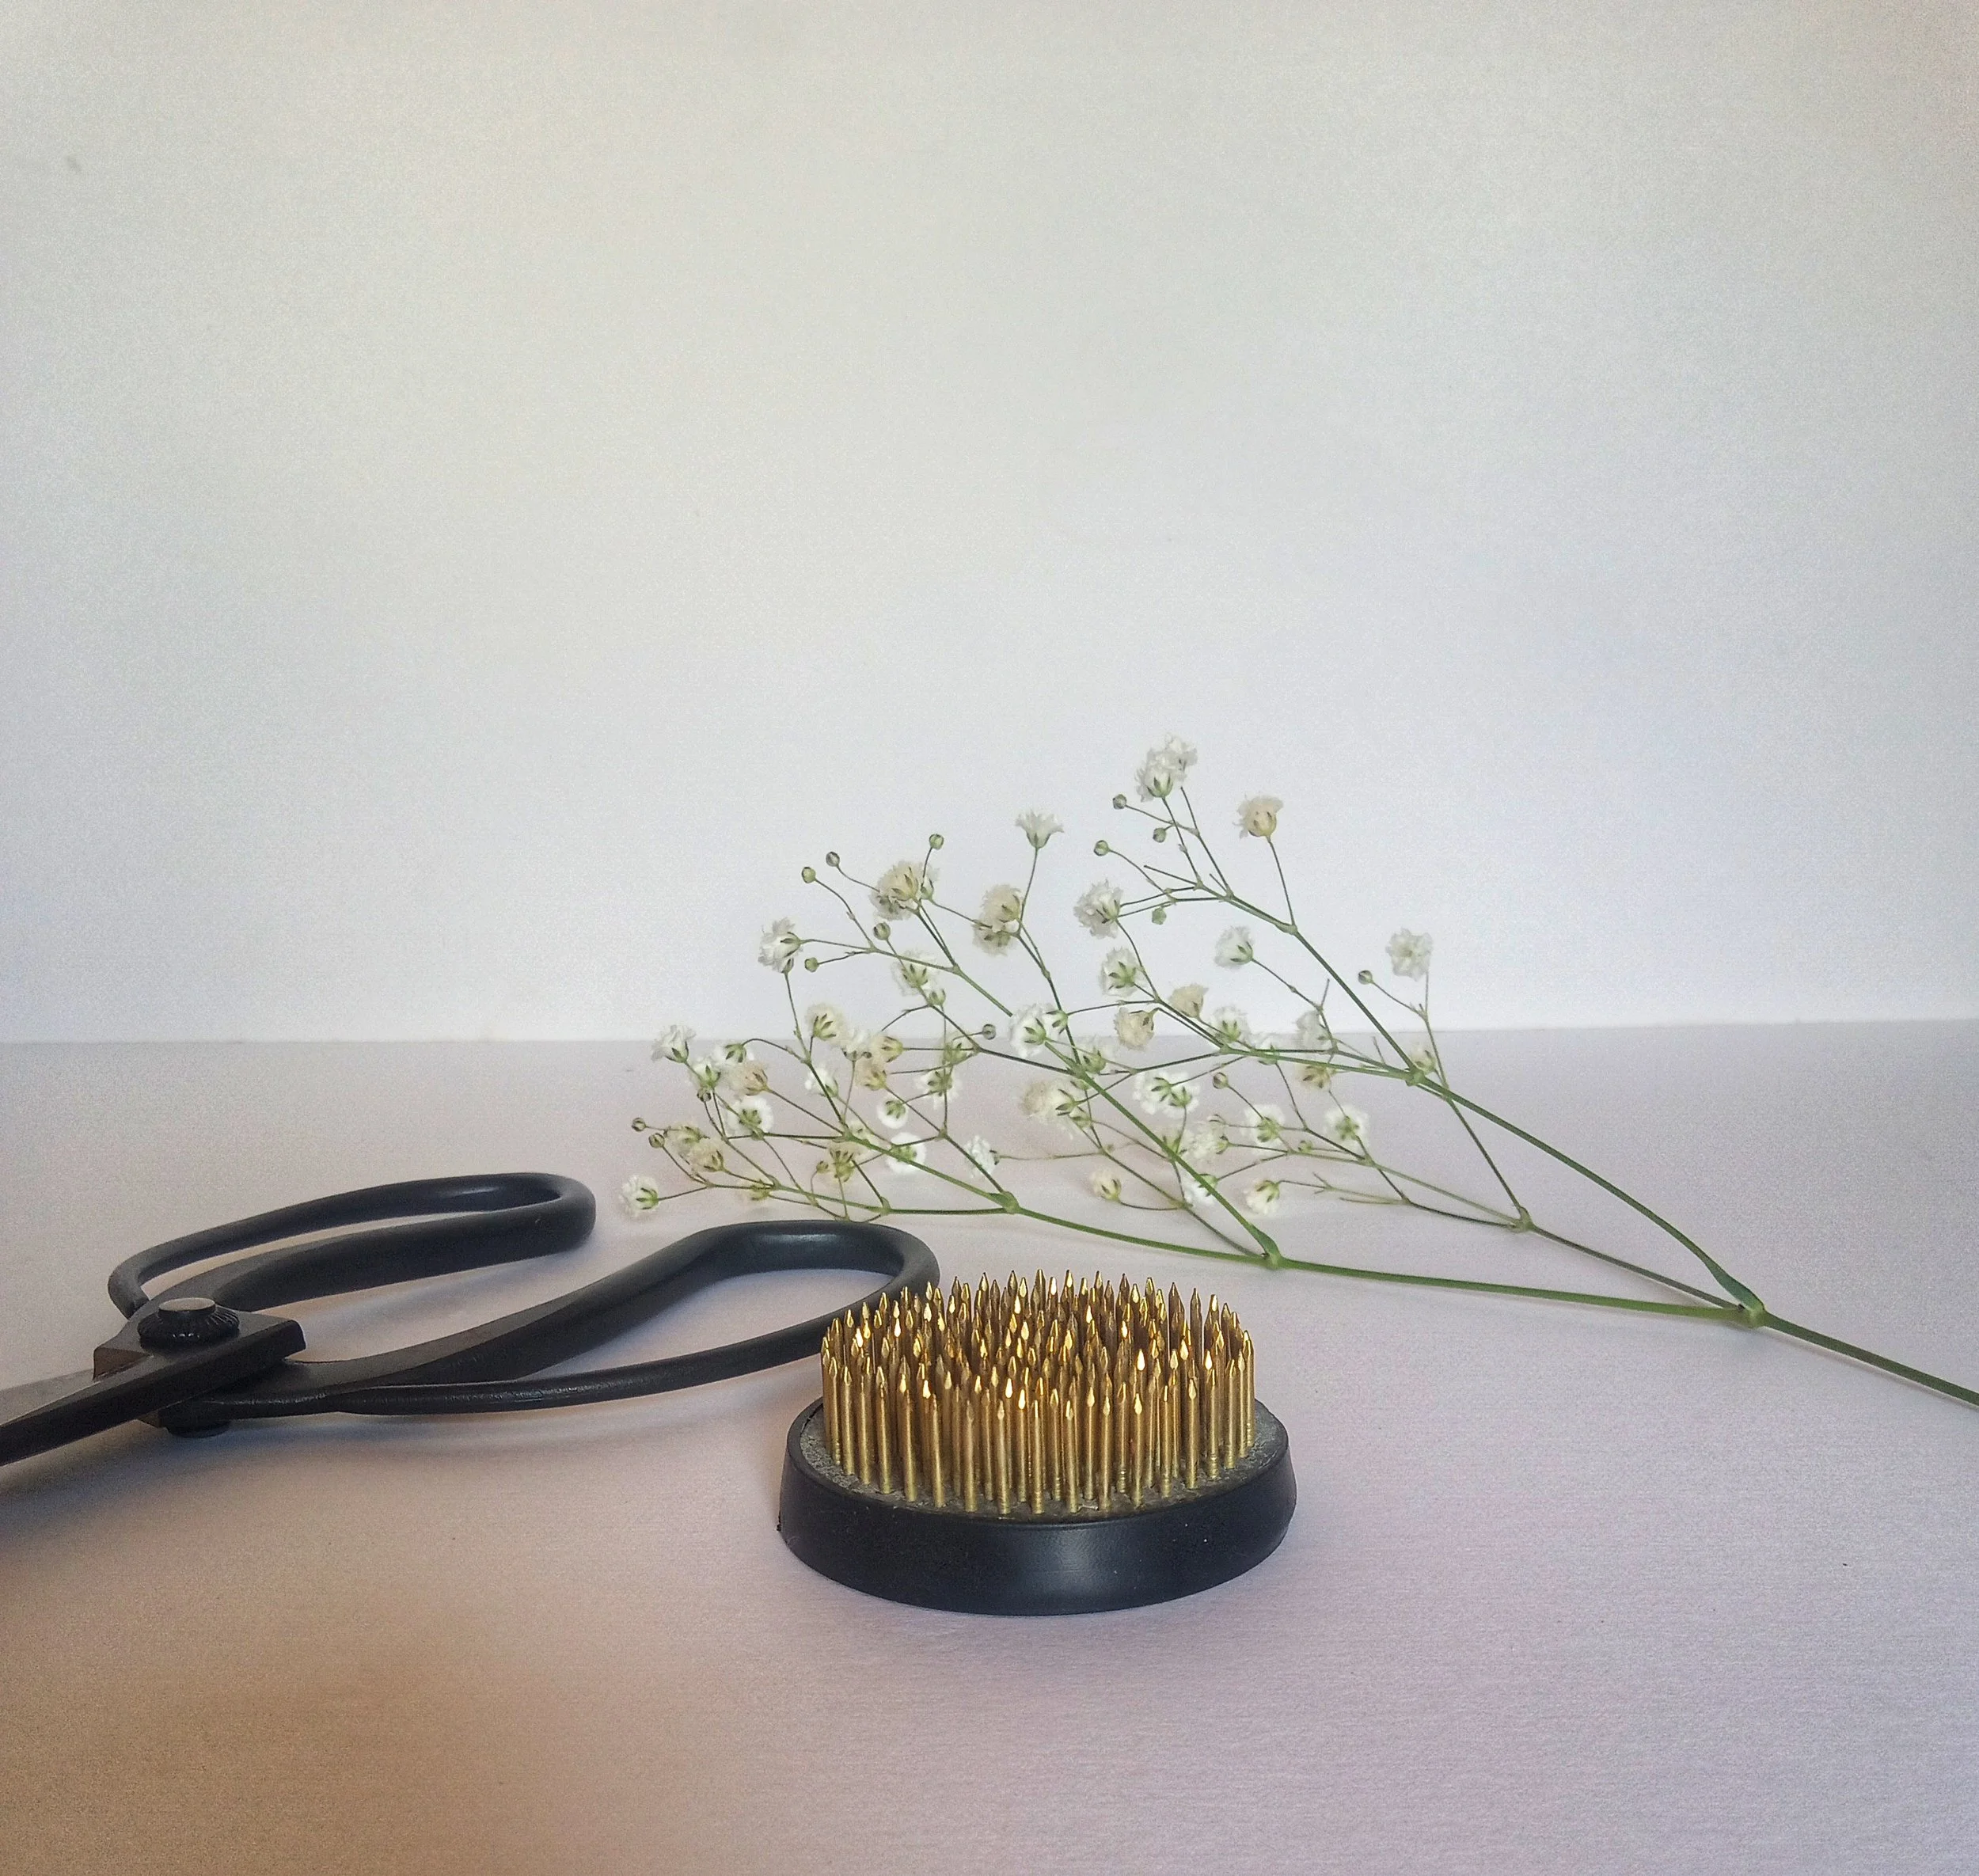
Kenzans
Kenzans were traditionally used in Ikebana, the Japanese art of flower arranging. The word Kenzan means ‘sword mountain’. Kenzans were also used in floral designs before the invention of floral foam. They come in different shapes and sizes and are a sustainable alternative to using floral foam.
A kenzan - also known as a flower frog or pin holder
Kenzans were traditionally used in Ikebana, the Japanese art of flower arranging. The word Kenzan means ‘sword mountain’. Kenzans were also used in floral designs before the invention of floral foam. They come in different shapes and sizes and are a sustainable alternative to using floral foam.
I use Kenzans a lot in my designs, sometimes without any other mechanics. For larger designs, I use Kenzans with chicken wire. Both can be reused time and time again.

Chicken wire and a kenzan
Before adding water to the vessel, attach some floral fix (also called floral tack/putty/clay) to the bottom of the kenzan – this will hold it firmly in position. Make sure that the vessel is completely dry or the floral fix will not stick. When attaching, press and twist the kenzan to secure it to the bottom of the vessel.
The floral fix can be fixed 1. in the middle of the kenzan or 2. around the rim (as you can see mine are well used!)
Although it is always best to cut flower stems on a 45-degree angle, to increase the surface area so that the flowers can absorb water more easily, when using kenzans I cut the stem straight across so that the stem goes in to the kenzan more easily. Take care when using kenzans as the pins are sharp.

Kenzan in a small bowl with a few stems of gypsophila
You can use kenzans to display a few blooms in a bowl (as used above when I had some leftover gypsophila from making a flower crown) or for larger arrangements. If only using a few stems, the kenzan may be visible. If this is the case, you can cover the kenzan with some moss. In larger arrangements it will not be seen due to the abundance of flowers.
When cleaning the Kenzan, make sure you remove any of the foliage left between the pins (you can use a kenzan ‘straightener’ for this). I twist the kenzan to remove it from the bowl and then remove the floral fix. You can reuse your kenzan time and time again, making it a cost effective and sustainable option for creating beautiful floral designs!

Buttonholes
I love making buttonholes and prefer the more natural look of a gathered buttonhole compared to a wired buttonhole (although wiring is necessary at times, particularly when using larger blooms).

Heuchera, geranium and ranunculus bottonholes tied with natural hand dyed silk ribbon
I love making buttonholes and prefer the more natural look of a gathered buttonhole compared to a wired buttonhole (although wiring is necessary at times, particularly when using larger blooms).
Buttonholes are made on the morning of the wedding and their stems are kept in water as long as possible. I always select hardy flowers and foliage such as geranium leaf, wax flower, roses, mint, heuchera, pittosporum and jasmine - they smell beautiful too and last well out of water.

Heuchera and ranunculus buttonholes
The buttonholes are held together with stemtex tape or twine (which is a biodegradable option). To finish off the buttonholes I use my own hand torn, natural dyed silk ribbon. The ribbon in the image above was naturally dyed using avocado skins!
Buttonholes are typically attached with a pearl pin to the left lapel of the jacket.

Queen Anne’s Lace
It’s that time of the year when the roadside verges and hedgerows are bursting with Queen Anne’s Lace. Also known as Cow Parsley, Wild Carrot, or by it’s Latin name, Daucus Carota (not to be confused with Hemlock which is poisonous). With its tall petite white flowers, Queen Anne’s Lace looks beautiful on its own in a vase or as as a filler flower.
Foraged Queen Anne’s Lace
It’s that time of the year when the roadside verges and hedgerows are bursting with Queen Anne’s Lace. Also known as Cow Parsley, Wild Carrot, or by it’s Latin name, Daucus Carota (not to be confused with Hemlock which is poisonous). With its tall petite white flowers, Queen Anne’s Lace looks beautiful on its own in a vase or as as a filler flower.
If you are foraging for Queen Anne’s Lace it is best to pick first thing in the morning. Remember to forage sensibly, following the foraging laws in your locality.
Cut the stems at an angle with a clean pair of secateurs and then sear the bottom of the stems for around 20 seconds in boiling water. Keep the flower heads away from the steam. Keep in a bucket or vase of water in a cool dark room overnight so that the flowers can have a good drink before arranging.

Sear the stems in boiling water
Select a vessel of your choice - I love this gold striped ceramic jug by Matilda Goad. Make sure your vessel is sparkling clean. Arrange the Queen Anne’s Lace by cutting the stems at different lengths. Always recut the stems when you remove them from the water. There is no need to use chicken wire or a flower frog (kenzan) in this arrangement as the jug has a narrow neck. When placing the stems into the jug they form a grid. This helps the stems to support each other. Make sure that there is no foliage below the water line or this will contaminate the water. Don’t be afraid to leave some negative space. This makes the arrangement look wild, airy and more natural.
Arrange any offcuts in pretty little bud vases or jam jars. You can dot these down the dining room table or enjoy a single bud vase on your bedside table.

Your arrangement will last longer if you change the water every few days and the flowers are kept away from radiators and direct sunlight.

British flowers by the season
Around 90% of the flowers purchased in the UK are imported. Although this means we may be able to access our favourite flowers all year round, you can imagine the impact this has on the environment.

Around 90% of the flowers purchased in the UK are imported. Although this means we may be able to access our favourite flowers all year round, you can imagine the impact this has on the environment.
At Floral Edit, where possible, I use British flowers and foliage. It is an important part of my business model to be as sustainable as possible. I was inspired by Claire Brown’s book, ‘The British Flower Book’, to use seasonal British flowers.
Seasonal British flowers look and smell amazing as they are not transported long distances. This means you can enjoy the beauty and scent of your flowers for longer.
Some of my favourite British flowers and foliage by the season
Spring:
Tulips, hellebores, paperwhites, snowdrops, catkins, pittosporum, virburum, hyacinths, pussy willow, artichoke leaves, anemone, skimmia, amaryllis, rosemary, daffodils, muscari, willow, eucalyptus, blossom, sage, bleeding heart, snake’s head fritillary, solomon’s seal, ranunculus, lilac, hawthorn, allium, spirea.
Summer:
Sweet pea, gypsophila, mint, lupin, cornflower, delphinium, dusty miller, ammi, wild carrot, ferns, foxglove, cornflower, peony, rose, spray rose, geranium, phlox, hydrangea, achillea, cosmos, dahlia, sunflowers, jasmine, rose, nigella, cosmos, alechemilla mollis, astilbe, scabiosa, icelandic poppy.
Autumn/Winter:
Amaranthus, dahlia, hydrangea, straw flower, rudbeckia, aster, echinacea, nasturtium, clematis, sedum, eucalyptus, pittosporum, alstroemeria.

Conditioning
Give the flowers a good drink (preferably overnight and in a cool dark room) before arranging your flowers.
Make sure that your vases/vessels are sparkling clean.
Cut the stem of the flower at an angle with a clean, sharp pair of secateurs. Cut the stem immediately before they go into the water.
Enjoy your blooms for longer.

Cut the stem at an angle with a sharp pair of secateurs
Give the flowers a good drink (preferably overnight and in a cool dark room) before arranging your flowers.
Make sure that your vases/vessels are sparkling clean.
Cut the stem of the flower at an angle with a clean, sharp pair of secateurs. Cut the stem immediately before they go into the water.
You can also sear your flowers - plunge 10% of the stem in boiling water for around 10-60 seconds, depending on how woody the stem is. Make sure the steam does not touch the petals.
Take off any foliage that is below the water line. If left below the water line, this will create bacteria and the flowers will not last as long.
Take off as many as the leaves as possible. This will enable the water to go straight to the flower.
For woody stems, cut vertically up the stem.
Every few days change the water in the vase or vessel.
Every time you take your flowers out of water make sure you recut the stems at an angle.
Keep your flowers away from radiators and out of direct sunlight.
Keep your flowers away from fruit.
Enjoy your blooms for longer!

Sustainable floristry
At Floral Edit, I feel strongly about using sustainable floristry techniques whenever possible. I never have, and never will, use floral foam in my designs because it is damaging to the environment.
At Floral Edit, I feel strongly about using sustainable floristry techniques whenever possible. I never have, and never will, use floral foam in my designs because it is damaging to the environment.
Sustainable mechanics are used to create beautiful and natural designs. For instance, chicken wire, twigs and flower frogs are used instead of floral foam. Chicken wire and flower frogs can be reused time and time again. Moss is used for wreaths instead of foam. Mechanics used to create the designs can often be reused or are compostable.
Flower frogs
I have a selection of vases, vessels and containers that are used to create wild and natural floral tablescapes. These vessels are reused.

A small selection of vases and vessels
Bouquets are wrapped in brown paper (no plastic foil) which can be recycled – even the tape used to secure the paper is compostable.
Where possible, flowers are sourced from British flower growers. Seasonal British flowers smell beautiful. Sometimes designs are a mixture of British flowers and wholesale flowers (depending on seasonal availability and the client’s flower selection).
My aim is to try, as much as possible, to reduce waste and use sustainable techniques. I am always learning new sustainable techniques and continue to adapt and develop my designs accordingly.